Playbooks

At a Glance
In 13 playbooks
Overview
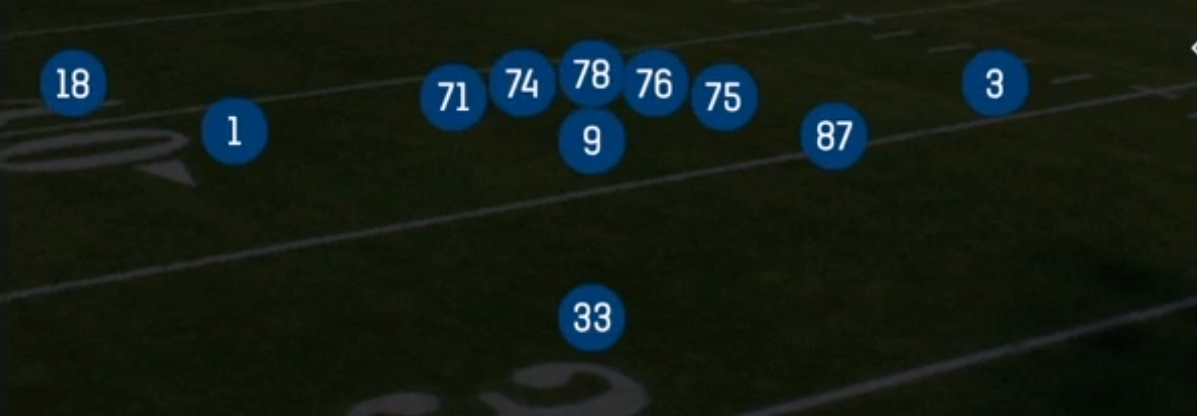
Singleback Doubles is a balanced 2x2 look out of 11 personnel. The tight end is attached inline on one side with a receiver split outside him, and two receivers sit to the other side in a slot and wide alignment. Singleback Ace and Tight Doubles compress the box with extra tight ends. Singleback Trey and Bunch overload one side. Doubles spreads the defense evenly, which forces the defense to declare its coverage rotation before the snap. Two receivers on each side make it hard to disguise Cover 2 versus Cover 3 versus Cover 4. The attached tight end still gives you a legitimate sixth blocker for the inside zone and gap run game.
The set carries the Gadget and SLWR tags, and its playbook is deep in a way most sets are not. Your running game covers Inside Zone, Tight Zone Wk, HB Mid Zone, HB Power O, HB Counter, 0 1 Trap, and a full draw family (HB Draw, HB Wide Draw, HB Pump Draw). Jet Sweep, Zone Fake Jet, and PA Jet Sweep add a horizontal jet motion element that stresses edge defenders and overhang players. Built-in RPO style alerts on HB Power O Alert Bubble and HB Stretch Alert Bubble let you punish defenses that load the box against your slot receivers.
Doubles is at its best when you isolate a slot receiver or the tight end against a linebacker or safety. Two-receiver sides give you classic high/low and vertical stretch combos like Smash, Dagger, X Dagger, Levels Divide, Curl Flats, and Double Slants. The play-action menu (PA Boot, PA Ctr Waggle, PA Y-Sail, PA Zone Shot, PA Corner Post) punishes run fits that trigger downhill. The result is a true base set that can run, pass, and play gadget ball without changing personnel, keeping your opponent's defensive substitutions honest.
Strengths
- Balanced 2x2 alignment forces the defense to show its safety rotation pre-snap, letting you check between zone beaters like Smash, Dagger, and Levels Divide and man beaters like Slants, Double Slants, and Z-Close Cross before the snap.
- Complete run menu from one look: Inside Zone, HB Mid Zone, HB Power O, HB Counter, 0 1 Trap, and the draw family all come from identical alignments, so opponents cannot key run or pass from formation.
- Jet Sweep, Zone Fake Jet, and PA Jet Sweep use jet motion to widen the edge and freeze overhang defenders. The fakes off that action create easy reads against users who chase the motion.
- Alert Bubble plays (HB Power O Alert Bubble, HB Stretch Alert Bubble) plus Bubble Screen give you quick answers to defenses that crowd the box or walk slot defenders inside, punishing heavy nano blitz setups.
- Deep play-action menu with boot and waggle concepts (PA Boot, PA Ctr Waggle, PA Y-Sail, PA Boot Comeback) moves the pocket away from pressure and creates high/low flood reads against Cover 3 and Cover 4 match.
Weaknesses
- Only one tight end and one back stay in to block, so six-man pressures and overload blitzes to the tight end side can beat protection on deeper developing concepts like Four Verticals and Deep Attack unless you slide protection or keep the back in.
- The 2x2 spacing leaves no natural bunch or stack release, so press man with a single high safety can jam receivers at the line and disrupt timing on Smash, Dagger, and Z Spot.
- A user-controlled middle linebacker or robber safety can sit in the hook zones and take away the tight end seam and dig windows that Doubles relies on, especially on TE Post, Slot Seam, and Flanker Dig.
- The run game can get predictable toward the tight end side, and savvy opponents will shade their defensive line and set the edge with a user on the strong side to spill zone runs back into pursuit.
- Gadget plays like PA Misdirect Shot and PA Draw Shot need long developing play-action fakes, which leaves you exposed to quick edge pressure and sacks if the defense does not bite on the run action.
Usage Tips
Read the safeties pre-snap: against two high safeties, audible to Inside Zone, HB Mid Zone, or HB Draw to attack the light box. Against single high, check to Slants, Double Slants, or Z-Close Cross to beat man coverage.
On early downs, establish HB Power O or Inside Zone first, then return to the same look with PA Boot, PA Y-Sail, or PA Corner Post once the defense starts triggering downhill on run keys.
Use jet motion on Jet Sweep and Zone Fake Jet to identify man versus zone. If a defender runs with the motion, it is man, so hot route the slot on a slant or drag. If the defense shifts without chasing, attack the vacated side with Smash or Curl Flats.
On 3rd and medium against Cover 3, Dagger, X Dagger, and Levels Divide are high percentage throws. Hot route the back to a block or a quick flat to protect against the nano blitz and give yourself a safe checkdown.
In the red zone, lean on Goalline Fade, Fade Smash, Corner Strike, and Slants for quick one-on-one throws, and mix in HB Counter or 0 1 Trap to keep users from cheating toward the pass.
Plays (71)
 0 1 TrapTrap, Run Play, Power Run
 Bubble ScreenScreen Pass, Bubble Screen, Pass Play +1
 Corner StrikeCorner, Pass Play, Block and Release +1
 Curl FlatsFlat, Curl, Pass Play +1
 DaggerDagger, Pass Play, Cover 2 Beater +7
 Deep AttackPass Play, Go, Post +7
 Double SlantsSlant, Pass Play, Flat
- Fade OutOut, Fade, Pass Play +1
- Fade SmashFade, Smash, Pass Play +5
 Flanker DigDig, Pass Play, Flat +3
 Flanker DragDrag, Pass Play, Block and Release +3
 Flanker DriveDrive, Pass Play, Cover 4 Beater +6
 ForkPass Play, Flood, Corner +6
 Four VerticalsFour Verts, Pass Play, Cover 2 Beater +5
 Goalline FadeFade, Pass Play, Block and Release +2
- HB CounterCounter, Run Play, Power Run
 HB CutbackRun Play, Inside Zone, Zone Run +1
 HB DiveDive, Run Play
 HB DrawDraw, Run Play
- HB Mid ZoneRun Play
- HB MisdirectionMisdirection, Run Play
 HB Power OPower, Run Play, Power Run
 HB Power O Alert BubblePower, Run Play, Power Run +2
 HB Pump DrawDraw, Run Play
 HB SlamDive, Run Play
 HB SlashRun Play, Power Run, Power +1
 HB Slip ScreenScreen Pass, Hb Screen, Pass Play +4
 HB StretchOutside Zone, Run Play, Zone Run
 HB Stretch Alert BubbleOutside Zone, Run Play, Zone Run +2
 HB Wide DrawDraw, Run Play
 Inside CrossCrosser, Pass Play, Block and Release +3
 Inside ZoneInside Zone, Run Play, Zone Run
- Jet SweepSweep, Jet Sweep, Motion +1
 Levels DivideLevels, Pass Play, Cover 2 Beater +4
 Mtn Z SpotSpot, Motion, Pass Play +5
 PA BootPlay Action, Pass Play, Block and Release +3
 PA Boot ComebackPlay Action, Comeback, Pass Play +4
- PA Corner PostPlay Action, Post, Corner Post +6
 PA Ctr WagglePlay Action, Pass Play, Block and Release +4
 PA Draw ShotDraw, Play Action, Pass Play +4
 PA HB LookPlay Action, Pass Play, Block and Release +4
- PA Jet SweepSweep, Jet Sweep, Play Action +8
- PA Misdirect ShotPlay Action, Pass Play, Deep Cross +2
 PA Power OPlay Action, Pass Play, Block and Release +5
 PA SD Y-CornerPlay Action, Corner, Pass Play +4
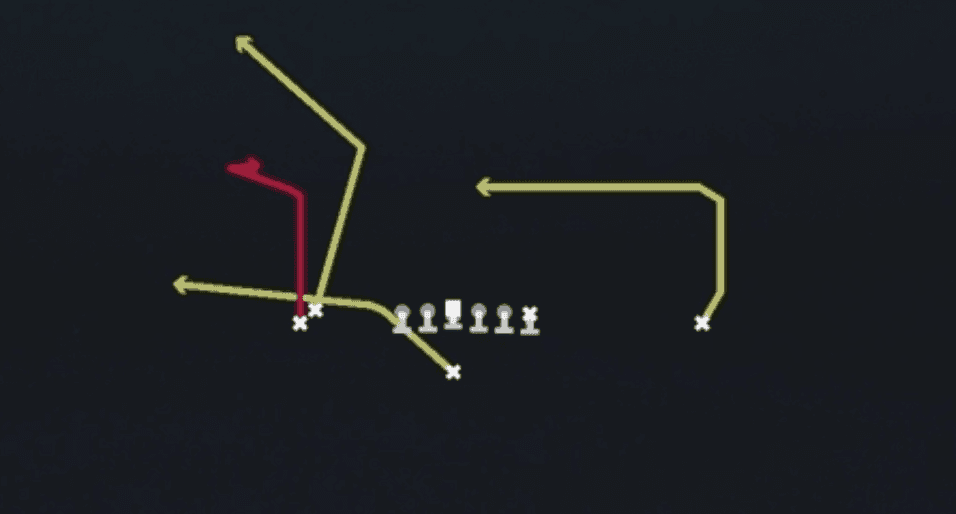 PA Slot StopPlay Action, Pass Play, Corner +3
 PA StretchPlay Action, Pass Play, Angle +5
- PA TE Screen GtPlay Action, Screen Pass, Te Screen +4
- PA Y-corner ForkPlay Action, Corner, Pass Play +3
 PA Y GlancePlay Action, Pass Play, Stop And Go +2
 PA Y-SailPlay Action, Sail, Pass Play +7
 PA Zone ShotPlay Action, Pass Play, Post +1
- Salem X KittyComeback, Hitch, Post +3
 SlantsSlant, Pass Play, Flat
 Slot SeamSeam, Pass Play, Comeback +4
 Sluggo SeamSeam, Sluggo, Pass Play +3
- SmashSmash, Pass Play, Cover 2 Beater +3
 StreaksStreak, Pass Play, Fade +1
 TE PostPost, Pass Play, Corner +4
 Tight Zone WkInside Zone, Run Play, Zone Run
- Tight Zone WK 2Inside Zone, Run Play, Zone Run
 Whip UndersWhip, Pass Play, Corner +4
 X DaggerDagger, Pass Play, Cover 2 Beater +7
 Y Shallow CrossShallow Cross, Crosser, Pass Play +5
 Z-Close CornerCorner, Pass Play, Block and Release +3
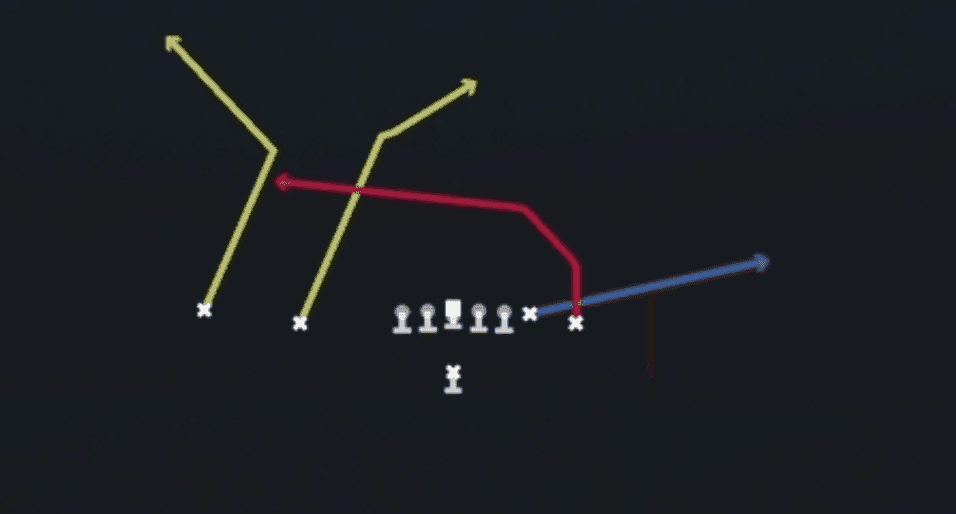 Z-Close CrossCrosser, Pass Play, Block and Release +3
 Z-Close CurlCurl, Pass Play, Flat +2
- Zone Fake JetMotion, Run Play
 Z Post Y OutOut, Post, Pass Play +3
 Z SpotSpot, Pass Play, Cover 3 Beater +4
 Z UnderPass Play, Go, Out +9