Playbooks

At a Glance
In 20 playbooks
Overview
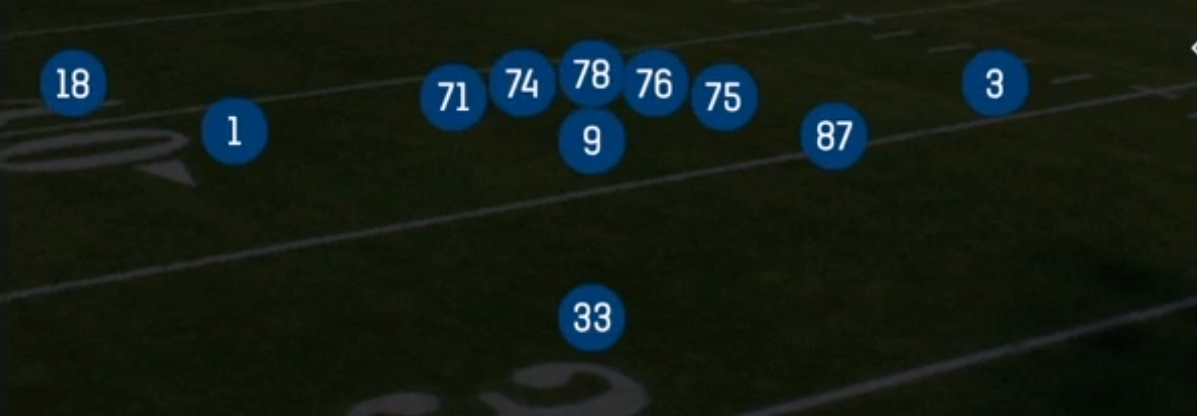
Doubles Y Off Close is a 2x2 Singleback set out of 11 personnel that pulls the Y tight end off the line of scrimmage and tucks him in tight to the edge as a wing or H-back. Instead of attaching the tight end on the line like standard Singleback Doubles, the off-ball alignment turns the Y into a movable chess piece. He can arc, kick out, lead through the hole, or slice back across the formation, while the two receiver pairs keep a balanced spread look on both sides. The tight slot alignment, tagged SLWR in this set, sets up jet motion and gadget looks that most Singleback sets cannot show.
This set is built around marrying the run game to play action. Inside Zone Split, HB Zone Wk, Counter Y, and HB Wham all use the off-ball Y as a blocker who can attack second-level defenders or the backside edge. PA Boot Slide, PA Slide, and PA Boot Corner Post then use the same backfield action to leak the Y into the flat after the defense bites on the run. Jet Sweep, PA Jet Sweep, and Zone Fake Jet put the slot in fast motion, stressing the edge and forcing linebackers to widen before the snap.
The matchup advantage comes from the Y alignment. Because he starts off the ball, defenses often assign a linebacker or safety to him in man, and on slide and boot concepts that defender has to chase him across the formation through traffic. Outside, the 2x2 split isolates the X receiver on concepts like Switch X Comeback and RPO Alert X Screen. That lets you pick on a weak boundary corner once the safeties start crashing on the run fakes.
Strengths
- Inside Zone Split and PA Slide share the same backfield action, so a single sealing block from the Y sets up a play-action leak to the flat that is devastating against aggressive run commits and users crashing the A gap.
- Jet motion on Jet Sweep, PA Jet Sweep, and Zone Fake Jet shows you man or zone before the snap: a defender running with the motion signals man, while shifting linebackers signal zone, so you can audible to the right beater.
- PA Boot Corner Post and PA Boot Slide flood one side with high, intermediate, and flat routes, which stretches Cover 3 and Cover 4 cloud flats vertically. The QB rollout also buys extra time against edge pressure.
- Switch, Dragon Spacing, and Stick give quick answers from the 2x2 shell. Switch releases create natural rubs against press man, and Dragon Spacing (slant/flat) and Stick attack Cover 2 and Cover 3 underneath defenders on quick three step timing.
- RPO Alert X Screen and Bench Corner Stop punish off coverage and soft corners on the boundary, giving you easy yards against defenses that play deep to stop the play-action shots.
Weaknesses
- Only one tight end and one back stay home to protect, so on longer developing concepts like PA Deep Out and PA Weak Flood, nano blitzes and overload pressure off the edge can get home before the deep routes break.
- The off-ball Y is your key run blocker, and a strong user linebacker who reads his arc or split action can shoot the gap he is vacating, blowing up Counter Y and Inside Zone Split in the backfield.
- Boot concepts roll to predictable sides, so opponents who user the flat defender or set their zone drops to Hard Flat and Cloud can take away the Y slide and force throws into the deep third.
- Jet motion telegraphs the gadget look, so smart defenders shift their linebackers toward the motion and spill the sweep outside, where a contain defender or user safety waits.
- Goal line and heavy fronts outnumber the 11 personnel blocking scheme, so HB Dive and HB Slam struggle against 6 or 7 man boxes in short yardage, and you can find it hard to punch it in without a second tight end.
Usage Tips
Establish Inside Zone Split and HB Zone Wk early on first down against light boxes, then call PA Slide or PA Boot Slide from the same look on second and short when you see the linebackers and safeties creeping downhill.
Motion the slot on Zone Fake Jet or PA Jet Sweep to read coverage before the snap. If a defender runs with the motion, hot route the X to a slant or check to Switch for a man beater. If the defense bumps as a group, hold for zone throws on Stick or Dragon Spacing.
Against Cover 3 on third and medium, run PA Boot Corner Post and read the corner route first, then check down to the Y in the flat. Consider hot routing the backside receiver to a drag to add a crossing option against a deep safety.
When the opponent sits in off coverage or two high shells, audible to RPO Alert X Screen or Bench Corner Stop to take free yardage on the boundary. Save PA Deep Out as a shot play after the defense starts rotating a safety down to stop the run.
Versus heavy blitz looks, slide protection toward the pressure and hot route the Y to block on PA Weak Flood, or check to Stick and Dragon Spacing for quick throws that beat the blitz before it arrives.
Plays (22)
 Bench Corner StopCorner, Bench, Pass Play +3
 Counter YCounter, Run Play, Power Run
 Dragon SpacingSpacing, Pass Play, Cover 3 Beater +5
 HB DiveDive, Run Play
 HB SlamDive, Run Play
 HB StretchOutside Zone, Run Play, Zone Run
 HB WhamWham, Run Play, Power Run
 HB Zone WkInside Zone, Run Play, Zone Run
 Inside Zone SplitInside Zone, Run Play, Zone Run
 Jet SweepSweep, Jet Sweep, Motion +1
 PA Boot Corner PostPlay Action, Corner, Post +7
 PA Boot ScreenPlay Action, Screen Pass, Pass Play +2
 PA Boot SlidePlay Action, Slide, Pass Play +5
 PA Deep OutPlay Action, Out, Pass Play +2
 PA Jet SweepSweep, Jet Sweep, Play Action +7
- PA SlideCorner, Deep Cross, Crosser +5
 PA Weak FloodPlay Action, Flood, Pass Play +6
 RPO Alert X ScreenScreen Pass, RPO, Pass Play +2
 StickStick, Stick Concept, Pass Play +3
 SwitchPass Play, Scissors, Post +8
 Switch X ComebackComeback, Pass Play, Block and Release +3
 Zone Fake JetMotion, Run Play