Playbooks

At a Glance
Overview
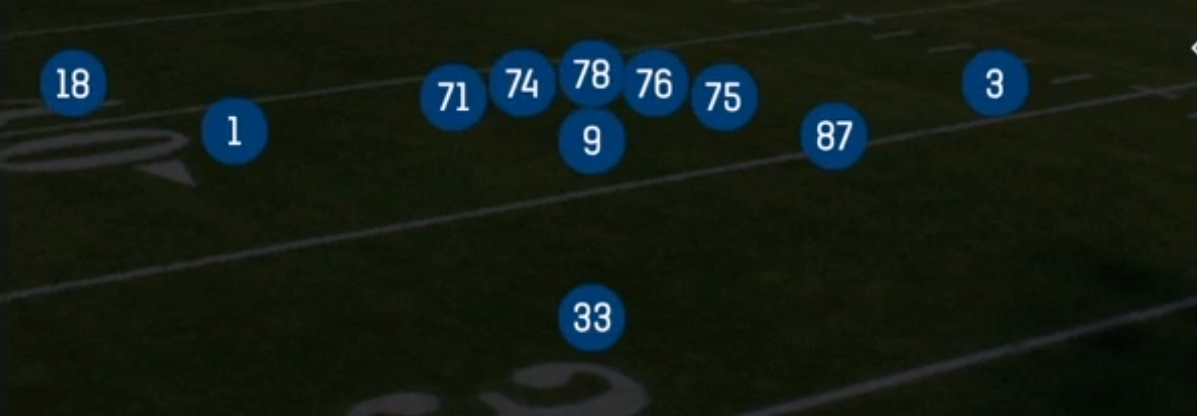
The Bunch TE set in Singleback groups the tight end with two wide receivers in a tight three-man cluster to one side of the formation, leaving a single receiver isolated on the backside and one running back directly behind the quarterback. Most Singleback sets spread the 11 personnel horizontally. This one compresses the strong side, which creates natural stacks and rubs, forces defenders to declare their coverage leverage before the snap, and gives the backside X receiver a clean one-on-one with the boundary corner. The tight end sitting in the bunch works as an extra blocker on the edge for the run game while staying a legitimate route threat on snag, stick, and crosser concepts.
The playbook for this set leans heavily into gadget and eye-candy concepts. Jet Sweep, Zone Fake Jet, PA Jet Sweep, WR Power Fake Jet, and HB Misdirection Lead all use motion and backfield action to pull linebackers and safeties out of their run fits. The Mtn variants (Mtn HB Screen, Mtn DBL Swing, Mtn PA Deep Over, Mtn PA Boot Over, Mtn PA Switch Replace) build pre-snap motion into the play call, which is a free coverage read on every snap. Shift Duo, Shift HB Sweep, and Shift PA Duo Crossers change the strength of the formation and can catch defenses in bad alignments.
In the passing game, the bunch creates legal traffic that punishes man coverage through Switch Snag, Cross Drag, and Stick, while Spacing and Verticals flood zone landmarks from a compressed look. Power Alert Bubble and Stretch Alert Bubble give you built-in RPO answers when the defense overloads the box against the bunch. The core matchup advantage is the tight end: linebackers who get stuck inside the bunch traffic, or safeties who spin down to match him, open up either the flat or the isolated backside receiver.
Strengths
- Switch Snag, Cross Drag, and Stick generate natural rubs out of the bunch, making this one of the most reliable man beaters in 11 personnel, especially against Cover 1 and Cover 0 where defenders trail through traffic
- The Mtn and Shift plays have motion built into the play art, so every snap gives you a pre-snap coverage read: a defender following the motion across tells you man, while a defensive shift or rotation tells you zone
- Power Alert Bubble and Stretch Alert Bubble give you true RPO answers, letting you throw the bubble screen when the defense overloads the bunch side box or hand off when they widen to cover the cluster
- The gadget package (Jet Sweep, Zone Fake Jet, WR Power Fake Jet, HB Misdirection Lead, PA Draw Shot) punishes aggressive users who crash on the first read and opens explosive play-action shots when linebackers bite
- The isolated backside receiver draws single coverage often, so hot routing him to a slant, fade, or streak against a pressed corner creates a quick one-on-one win when the defense rotates toward the bunch
Weaknesses
- Compressed alignments pull defenders toward the bunch, so a well-timed Cover 2 or Cover 4 match coverage can sit on snag and flat throws while the deep safeties cap vertical releases
- With only one back and a tight end often releasing into routes, pressure off the backside edge or a nano blitz from the weak side can hit the QB before the bunch routes clear, especially on PA Boot and PA Draw Shot drops
- Press-bail or pressing the point man of the bunch disrupts timing on Switch Snag and Cross Drag, and defenders showing banjo or zone match looks remove the rub advantage that makes the set dangerous against man
- A user-controlled linebacker or safety sitting in the middle hook zone can take away Cross Drag, Stick, and Mtn PA Deep Over in one position, forcing throws to the less efficient backside
- The gadget run game is motion-heavy and telegraphs direction, so opponents who spot the jet motion tendency can set their line shift or pinch toward it and blow up Jet Sweep and Shift HB Sweep for losses
Usage Tips
Open drives with a Mtn or Shift play to read the defense: if a corner or linebacker follows the motion, audible to Switch Snag or Cross Drag to exploit man, and if nobody travels, check to Spacing or Stick to attack zone windows
On 3rd and short to medium, Stick and Switch Snag are high-percentage calls; hot route the running back to a block or quick flat against heavy pressure looks to buy time for the bunch routes to separate
When the defense crowds the box and shows single high, use Power Alert Bubble or Stretch Alert Bubble and read the flat defender over the bunch: throw the bubble if he steps down, hand off if he widens
After establishing Inside Zone, Mtn Inside Zone, and Jet Sweep, call PA Boot, PA Boot Slide, or Mtn PA Boot Over on 1st and 10 to punish linebackers flowing downhill; roll out toward the flood side and hit the intermediate crosser or the slide route late
Save WR Power Fake Jet, HB Misdirection Lead, and PA Draw Shot for moments when your opponent is aggressively user-controlling to the motion or blitzing heavily, since gadget plays are most effective after you have shown the base look multiple times
Plays (30)
 Cross DragDrag, Crosser, Pass Play +3
 HB Misdirection LeadMisdirection, Run Play
 HB Pump DrawDraw, Run Play
 Inside ZoneInside Zone, Run Play, Zone Run
 Inside Zone SplitInside Zone, Run Play, Zone Run
 Jet SweepSweep, Jet Sweep, Motion +1
 Mtn DBL SwingSwing, Motion, Pass Play +3
 Mtn Fk SwingPlay Action, Swing, Motion +4
 Mtn HB ScreenScreen Pass, Hb Screen, Motion +6
- Mtn HB Zone WkRun Play
- Mtn Inside ZoneRun Play
- Mtn PA Boot OverCorner, Deep Cross, Crosser +5
- Mtn PA Deep OverDeep Over, Deep Cross, Crosser +6
- Mtn PA Switch ReplaceBlock and Release, In, Wheel +3
 PA BootPlay Action, Pass Play, Block and Release +4
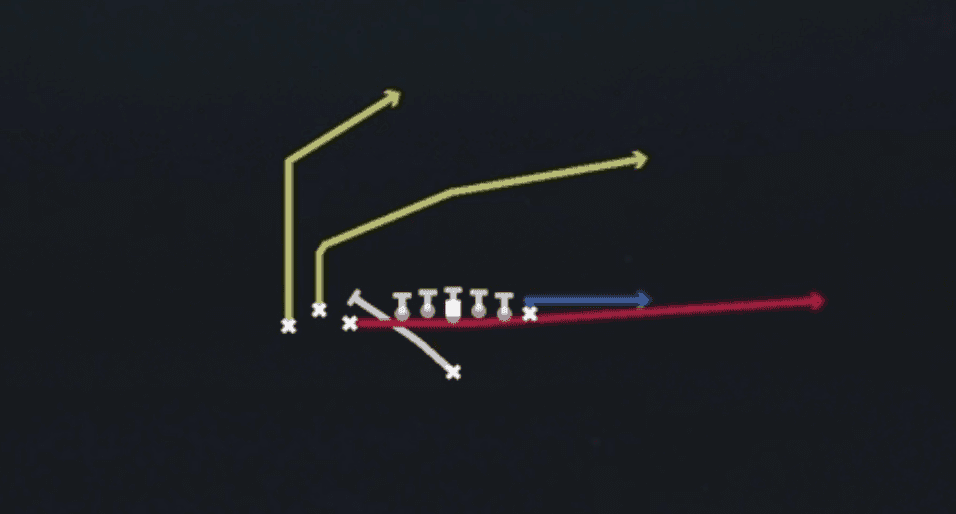 PA Boot SlidePlay Action, Slide, Pass Play +5
 PA Draw ShotDraw, Play Action, Pass Play +5
 PA Jet Deep OutPlay Action, Out, Motion +5
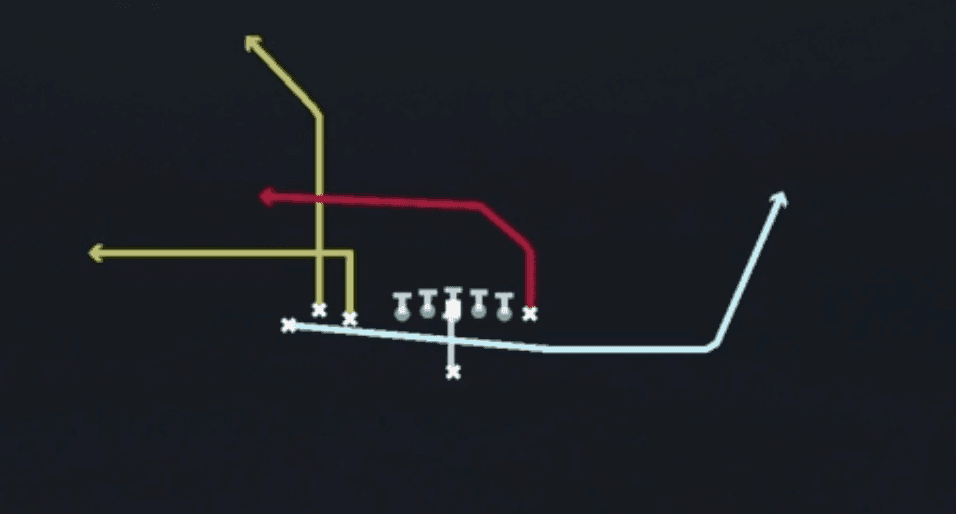 PA Jet SweepSweep, Jet Sweep, Play Action +7
 Power Alert BubbleRPO, Bubble Screen, Pass Play +2
- Shift DuoRun Play
- Shift HB SweepRun Play
- Shift PA Duo CrossersCrosser, Deep Cross, Post +3
 SpacingSpacing, Pass Play, Cover 3 Beater +4
 StickStick, Stick Concept, Pass Play +3
 Stretch Alert BubbleOutside Zone, Run Play, Zone Run +2
 Switch SnagSnag, Snag Concept, Pass Play +5
 VerticalsFour Verts, Pass Play, Cover 2 Beater +7
 WR Power Fake JetMotion, Run Play
 Zone Fake JetMotion, Run Play