Playbooks

Quick Reference
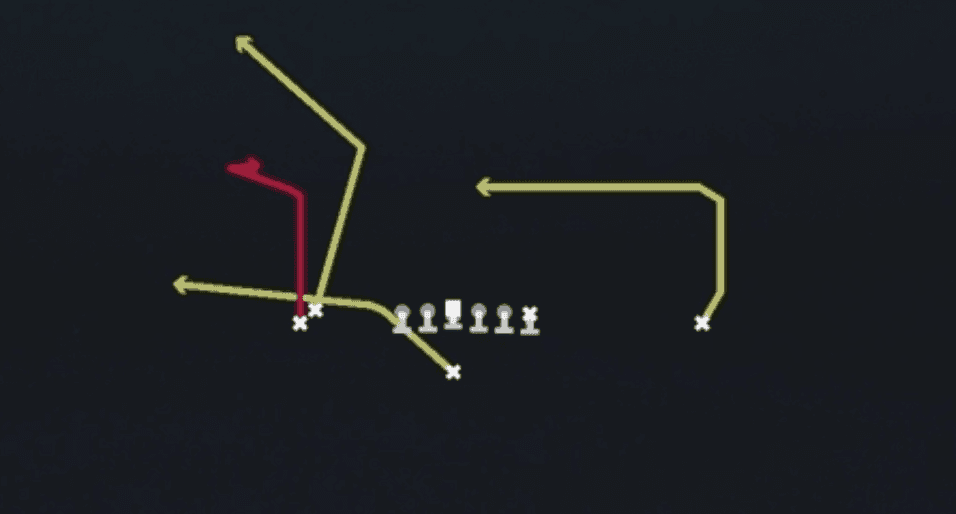
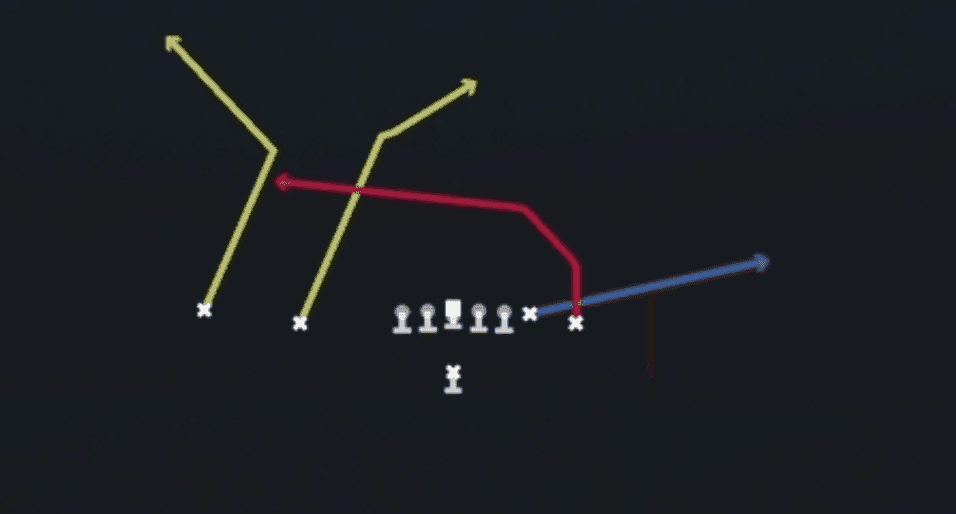
Receiver routes
Depth-chart slots are shown as they line up in the base package for this set.
| Player | Side | Route |
|---|---|---|
| HB1 | Middle | Block and Release Hook |
| WR3 | Left | Zig |
| WR1 | Left | In |
| WR2 | Right | Deep Post |
| TE1 | Right | Deep Out |
Read progression
- TE1 right, Deep Out
- WR2 right, Deep Post
- WR1 left, In
- HB1, Block and Release Hook or WR3 left, Zig
Breakdown
Z Post Y Out is a man beating concept out of Singleback Doubles that attacks the middle of the field with a deep post while clearing out underneath zones. The Z receiver runs a post from the backside, the Y (slot receiver in this look) breaks out to the flat, the outside receiver on the strongside runs a corner route, and the backside outside receiver runs a deep drag across the field. The HB releases on a check release into the flat off play action protection. Primary read starts with the Z post attacking the safety, then works to the corner route on the strongside if the safety jumps the post, with the underside out and drag serving as your checkdowns against zone drops.
Defensive Reads
Identify single high safety pre-snap since that leaves the post route with a favorable one on one angle against the deep defender. Watch linebacker depth at the snap, if they sink hard into the post window the drag route underneath becomes open as a checkdown. Key the flat defender on the out route side, if he sits and reads quarterback eyes the out will be contested in zone coverage. This concept struggles against two deep safety shells like Cover 2 or Cover 4 since the post has no room to work behind the safeties. Watch for user controlled defenders lurking in the middle of the field, a smart user will sit in the passing lane to jump the post route if the quarterback stares it down.
Usage Tips
Look for single high safety alignment pre-snap since the Z post is designed to split the safety and attack the seam behind linebackers.
If you see two deep safeties, work the corner route first since the post will be capped by the deep half defender.
Hot route the drag route into a deeper crossing pattern against man coverage to create natural rub traffic for the Z post.
Use this play on second and medium to third and long situations where defenses are more likely to sit in zone shells expecting a shorter throw.
Pair this with Four Verticals or Dagger in your play calling sequence so the defense cannot key on the post concept every time you break the huddle.
Other Plays in Doubles
 0 1 TrapTrap, Run Play, Power Run
 Bubble ScreenScreen Pass, Bubble Screen, Pass Play +1
 Corner StrikeCorner, Pass Play, Block and Release +1
 Curl FlatsFlat, Curl, Pass Play +1
 DaggerDagger, Pass Play, Cover 2 Beater +7
 Deep AttackPass Play, Go, Post +7
 Double SlantsSlant, Pass Play, Flat
- Fade OutOut, Fade, Pass Play +1
- Fade SmashFade, Smash, Pass Play +5
 Flanker DigDig, Pass Play, Flat +3
 Flanker DragDrag, Pass Play, Block and Release +3
 Flanker DriveDrive, Pass Play, Cover 4 Beater +6
 ForkPass Play, Flood, Corner +6
 Four VerticalsFour Verts, Pass Play, Cover 2 Beater +5
 Goalline FadeFade, Pass Play, Block and Release +2
- HB CounterCounter, Run Play, Power Run
 HB CutbackRun Play, Inside Zone, Zone Run +1
 HB DiveDive, Run Play
 HB DrawDraw, Run Play
- HB Mid ZoneRun Play
- HB MisdirectionMisdirection, Run Play
 HB Power OPower, Run Play, Power Run
 HB Power O Alert BubblePower, Run Play, Power Run +2
 HB Pump DrawDraw, Run Play
 HB SlamDive, Run Play
 HB SlashRun Play, Power Run, Power +1
 HB Slip ScreenScreen Pass, Hb Screen, Pass Play +4
 HB StretchOutside Zone, Run Play, Zone Run
 HB Stretch Alert BubbleOutside Zone, Run Play, Zone Run +2
 HB Wide DrawDraw, Run Play
 Inside CrossCrosser, Pass Play, Block and Release +3
 Inside ZoneInside Zone, Run Play, Zone Run
- Jet SweepSweep, Jet Sweep, Motion +1
 Levels DivideLevels, Pass Play, Cover 2 Beater +4
 Mtn Z SpotSpot, Motion, Pass Play +5
 PA BootPlay Action, Pass Play, Block and Release +3
 PA Boot ComebackPlay Action, Comeback, Pass Play +4
- PA Corner PostPlay Action, Post, Corner Post +6
 PA Ctr WagglePlay Action, Pass Play, Block and Release +4
 PA Draw ShotDraw, Play Action, Pass Play +4
 PA HB LookPlay Action, Pass Play, Block and Release +4
- PA Jet SweepSweep, Jet Sweep, Play Action +8
- PA Misdirect ShotPlay Action, Pass Play, Deep Cross +2
 PA Power OPlay Action, Pass Play, Block and Release +5
 PA SD Y-CornerPlay Action, Corner, Pass Play +4
 PA Slot StopPlay Action, Pass Play, Corner +3
 PA StretchPlay Action, Pass Play, Angle +5
- PA TE Screen GtPlay Action, Screen Pass, Te Screen +4
- PA Y-corner ForkPlay Action, Corner, Pass Play +3
 PA Y GlancePlay Action, Pass Play, Stop And Go +2
 PA Y-SailPlay Action, Sail, Pass Play +7
 PA Zone ShotPlay Action, Pass Play, Post +1
- Salem X KittyComeback, Hitch, Post +3
 SlantsSlant, Pass Play, Flat
 Slot SeamSeam, Pass Play, Comeback +4
 Sluggo SeamSeam, Sluggo, Pass Play +3
- SmashSmash, Pass Play, Cover 2 Beater +3
 StreaksStreak, Pass Play, Fade +1
 TE PostPost, Pass Play, Corner +4
 Tight Zone WkInside Zone, Run Play, Zone Run
- Tight Zone WK 2Inside Zone, Run Play, Zone Run
 Whip UndersWhip, Pass Play, Corner +4
 X DaggerDagger, Pass Play, Cover 2 Beater +7
 Y Shallow CrossShallow Cross, Crosser, Pass Play +5
 Z-Close CornerCorner, Pass Play, Block and Release +3
 Z-Close CrossCrosser, Pass Play, Block and Release +3
 Z-Close CurlCurl, Pass Play, Flat +2
- Zone Fake JetMotion, Run Play
 Z SpotSpot, Pass Play, Cover 3 Beater +4
 Z UnderPass Play, Go, Out +9