Playbooks

At a Glance
In 21 playbooks
Overview
Spread Y-Slot is a Shotgun 2x2 set out of 11 personnel that moves the tight end off the line and into a detached slot alignment. Instead of a traditional inline Y, the TE sits inside a boundary or field receiver, with two wideouts on the opposite side and a single back offset next to the QB. This differs from standard Shotgun Spread or Doubles looks because the defense now has to declare how it will handle a bigger body in space. Match the TE with a nickel corner and you gain a size and catch-radius advantage on seams and option routes. Leave a linebacker on him and your Y becomes a mismatch against speed on crossers and wheels.
The personnel alignment is built to isolate. With the TE detached, the backside X is often left alone against a single corner on concepts like X Dagger, Mtn X Post, and X Follow. The slot WR (SLWR tag) works the inside on Slot Stick, Slot Outs, and Mtn Slot Out. The 3DRB tag shows the back is a real part of the passing game, with HB Slip Screen, HB Swing, Smash HB Seam, Fake Jet HB Seam, and RZ Cross HB Rail getting the back into space against linebackers who are stretched by the spread alignment.
Conceptually the set covers almost everything a competitive offense needs: quick game (Y Stick, Quick Slants, Double Slant, Stick N Nod), full field zone beaters (Mesh, Smash, Levels Divide, Post Flood Salem, Mtn Flood), vertical stretches (Four Verticals, Jet Seams, Out Seams, Hitch Seam), and a deep RPO and option menu (RPO Peek Slant, RPO Zone Peek, RPO Read Screen, Read Option, Power Read, Mtn WR Power Read). The Gadget tag reflects the orbit and jet motion plays like Orbit PA Cross, Jet Touch Pass, Orbit Fake Screen Wheel, and Orbit Cross Screen, which use eye candy to pull defenders out of their zone drops before the ball is even snapped.
Strengths
- The detached Y creates an automatic mismatch read: if a linebacker aligns over the TE, Y Stick, Under Y-Option, and Y Seam win quickly, and if a nickel corner walks out, Y Cross and Mtn Y Cross let the TE box out smaller defenders on the break.
- Elite zone beater depth with Mesh, Mtn Mesh Dig, Smash, Levels Divide, and Post Flood Salem stressing Cover 3 and Cover 4 horizontally and vertically, and hot routing the RB to a wheel or the Y to a streak adds a Cover 2 hole shot on the same play art.
- Strong man beaters including Mesh, Double Slant, Quick Slants, Z Shallow Cross, and H Shallow Cross, where crossing traffic creates natural rubs that lose trailing man defenders, especially when you motion the slot tight to the formation.
- A real run and RPO game out of a pass look, with Inside Zone, Mid Zone, Same Side Zone, HB Draw, Power Read, Read Option, and RPO Peek Slant punishing light boxes when defenses go dime to handle the spread alignment.
- Gadget motion plays like Orbit PA Cross, Jet Touch Pass, Fake Jet HB Seam, and Orbit Fake Screen Wheel manipulate user defenders and zone eyes, pulling the flat and hook defenders toward the motion before the backside route attacks the vacated grass.
Weaknesses
- Only five blockers stay in on most concepts, so Cover 0 and nano blitz setups from Nickel or Dime overload the A gaps before long developing routes like Four Verticals, Deep Attack, or Corner Strike can clear.
- The detached TE is a poor pass protector from the slot, so edge pressure off the TE side forces you to either hot route the RB to block or burn a pre snap slide protect, which telegraphs your intention to good opponents.
- A user controlled linebacker or safety sitting in the middle hook can erase Mesh, Y Cross, and Y Shallow Cross, since so many of the best concepts funnel through the same underneath window.
- Run game is limited against base heavy defenses because you are light at the point of attack, and a defense that stays in 4-3 or 3-4 personnel with a slot linebacker on the TE can stop Inside Zone without losing much in coverage.
- Heavy tendency risk: the set leans on quick game and crossers, so opponents who bracket the Y and play Cover 2 Man or Cover 6 with robber help can take away your first two reads and force you into lower percentage backside throws.
Usage Tips
Read the defender over the Y pre snap: a linebacker means call Y Stick, Under Y-Option, or Kc Under Y-out and hit the TE early, while a corner or safety walked down means go to Y Seam, PA TE Wheel, or a streak hot route to use size over the top.
On 3rd and short to medium, Stick N Nod, Slot Stick, and Mtn H Stick give quick answers against both man and zone, and pairing them with a slide protect toward the blitz side buys enough time for the stick read.
When the opponent shows a light box of five or fewer, check into Inside Zone, Power Read, or RPO Peek Slant, and on the RPO read the linebacker who is responsible for the slant window instead of watching the end man on the line.
Against Cover 3 heavy players, Smash, Levels Divide, and Post Flood Salem are your staples, and adding a fake jet or orbit motion before the snap pulls the flat defender and opens the corner or deep out for easy chunk gains.
In the red zone, lean on RZ Cross HB Rail, Mesh, and Double Slant Swing where the compressed field makes crossing rubs and RB releases harder to cover, and use your 3DRB on the wheel or rail against linebackers who cannot carry him to the pylon.
Plays (93)
 45 Quick BaseDive, Run Play
 617Pass Play, Quick Pass, Out +9
 Bubble ScreensScreen Pass, Bubble Screen, Pass Play
 Corner StrikeCorner, Pass Play, Block and Release +1
 Cross DigDig, Pass Play, Crosser +4
 CurlsCurl, Pass Play, Block and Release
 Curl WheelCurl, Wheel, Pass Play +2
 Deep AttackPass Play, Go, Streak +9
 Digs H OptionOption Route, Pass Play, Dig +2
 Double SlantSlant, Pass Play, Flat
 Double Slant SwingSlant, Swing, Pass Play +1
- Fake Jet HB SeamSeam, Comeback, Curl +7
 Fk Bubble HB DrawDraw, Play Action, Pass Play
 Four VerticalsFour Verts, Pass Play, Cover 2 Beater +5
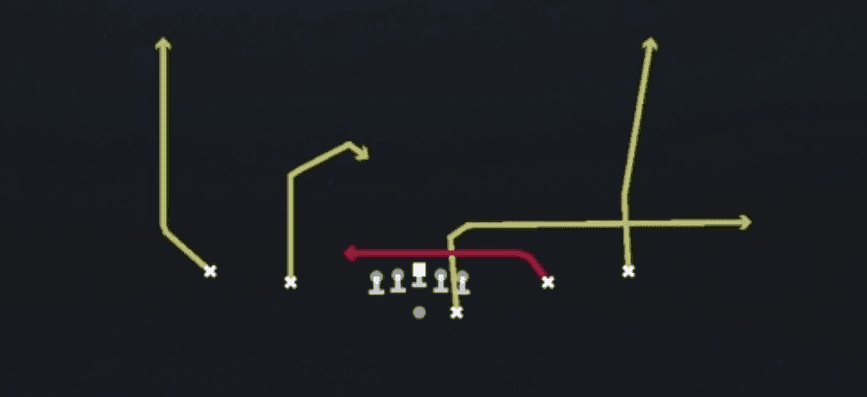 Go's Y-UnderGo, Pass Play
- Go Y-underGo, Pass Play, Drag +4
 HB DrawDraw, Run Play
 HB Slip ScreenScreen Pass, Hb Screen, Pass Play +2
- HB SwingSwing, Hitch, Slant +1
 Hitch SeamHitch, Seam, Pass Play +2
 H Shallow CrossShallow Cross, Pass Play, Crosser +5
 In N UpIn, Pass Play
- In N Up(1)Pass Play, Block and Release, Corner and Go +3
 Inside ZoneInside Zone, Run Play, Zone Run
- Jet Inside ZoneRun Play
 Jet SeamsMotion, Seam, Pass Play +3
- Jets Z ShallowShallow Cross, Pass Play, Block and Release +5
 Jet Touch PassMotion, Run Play
- Kc HB DrawDraw, Run Play
- Kc PostPost, Pass Play, Dig +3
- Kc Under Y-outOut, Pass Play, Option Route +3
 Levels DivideLevels, Pass Play, Cover 2 Beater +4
 MeshMesh, Pass Play, Man Beater +4
- Mid ZoneRun Play
 Mills Z ShallowShallow Cross, Mills, Pass Play +1
- Mtn Curl Flat CornerCurl, Corner, In +3
 Mtn Curls TexasTexas, Texas Concept, Motion +4
- Mtn DaggerDeep Cross, Crosser, Dig +4
- Mtn Double PostPost, Fade, Hitch +1
- Mtn Double ScreenScreen Pass, Bubble Screen, Swing +1
- Mtn FloodPost, Fade, Out +2
- Mtn H Shallow CrossShallow Cross, Crosser, Block and Release +5
- Mtn H StickStick, Fade, Hitch +3
 Mtn Mesh DigDig, Mesh, Motion +8
- Mtn PA WR Power ReadDeep Cross, Crosser, In +6
- Mtn Slot OutFade, Slant, In +3
- Mtn Slot ScreenScreen Pass, Hitch, Slant +1
- Mtn WR Power ReadRun Play
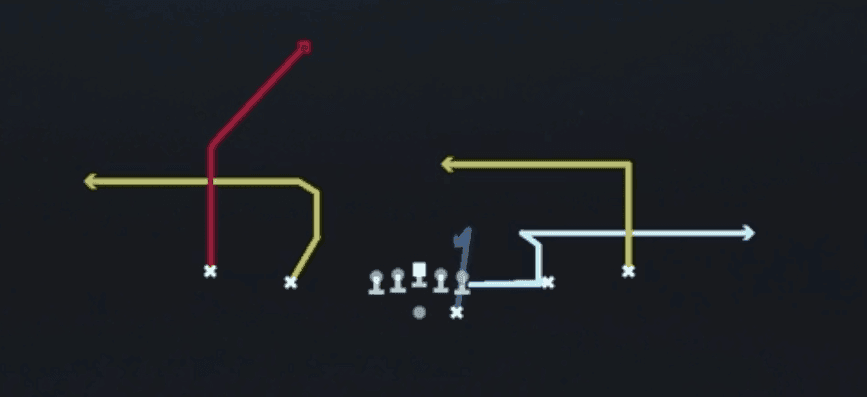 Mtn X PostPost, Motion, Pass Play +4
- Mtn Y CrossCrosser, Deep Cross, Post Sit +4
- Mtn Y CrossCrosser, Deep Cross, Post +4
- Mtn Z Shallow CrossShallow Cross, Crosser, Corner +5
- Orbit Cross ScreenScreen Pass, Crosser, Deep Cross +4
- Orbit Fake Screen WheelScreen Pass, Wheel, Post +5
- Orbit PA CrossCrosser, Deep Cross, Post +5
 Out SeamsOut, Pass Play, Seam +3
- PA All CurlCurl, Pass Play, Play Action +2
 PA ComebacksPlay Action, Pass Play, Comeback +2
 PA ReadPlay Action, Pass Play, Comeback +4
 PA TE WheelPlay Action, Wheel, Pass Play +2
 Post Flood SalemPost, Flood, Pass Play +1
 Post TrailPost, Pass Play, Trail +3
- Post X CurlCurl, Post, Hitch +2
- Power ReadRun Play
- Power Read TossRun Play
 Quick SlantsSlant, Pass Play, Flat
 Read OptionRead Option, Run Play
- Return Inside Zone SplitRun Play
- Return PA Post CurlsCurl, Post, Flat +3
- Return RPO Alert SlantSlant, Pass Play, Run Play
- RPO Alert Orbit SwingSwing, Pass Play, Run Play
 RPO Peek SlantRPO, Slant, Pass Play +1
 RPO Read ScreenScreen Pass, RPO, Pass Play +2
- RPO Zone PeekRPO, Pass Play, Run Play +2
- RZ Cross HB RailCrosser, Deep Cross, Fade +2
- Same Side ZoneRun Play
 Slot OutsOut, Pass Play, Angle +2
 Slot StickStick, Stick Concept, Pass Play +5
 SmashSmash, Pass Play, Cover 2 Beater +3
- Smash HB SeamSeam, Smash, Pass Play +4
 Stick N NodStick, Stick Concept, Pass Play
- Stick NodStick, Stick Concept, Pass Play +4
 Under Y-OptionOption Route, Pass Play
 WR Mid ScreenScreen Pass, Wr Screen, Pass Play +2
 X DaggerDagger, Pass Play, Cover 2 Beater +7
 X FollowPass Play, Quick Pass, Drag +9
 Y CrossY Cross, Pass Play, Crosser +5
 Y SeamSeam, Pass Play, Block and Release +3
 Y Shallow CrossShallow Cross, Pass Play, Crosser +5
 Y Shallow X PostPost, Shallow Cross, Pass Play +5
 Y StickStick, Stick Concept, Pass Play +5
 Z Shallow CrossShallow Cross, Pass Play, Crosser +5
- Z Spot DigDig, Fade, Flat +2









