Playbooks

Bunch Offset

SpecialistsGadgetSLWR

Overview

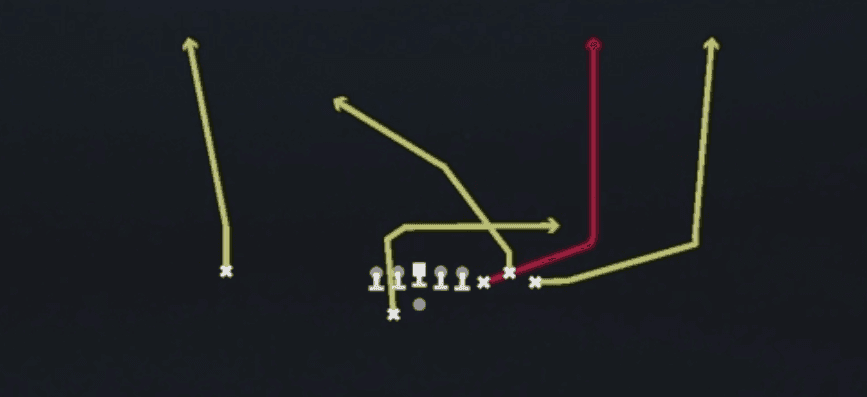
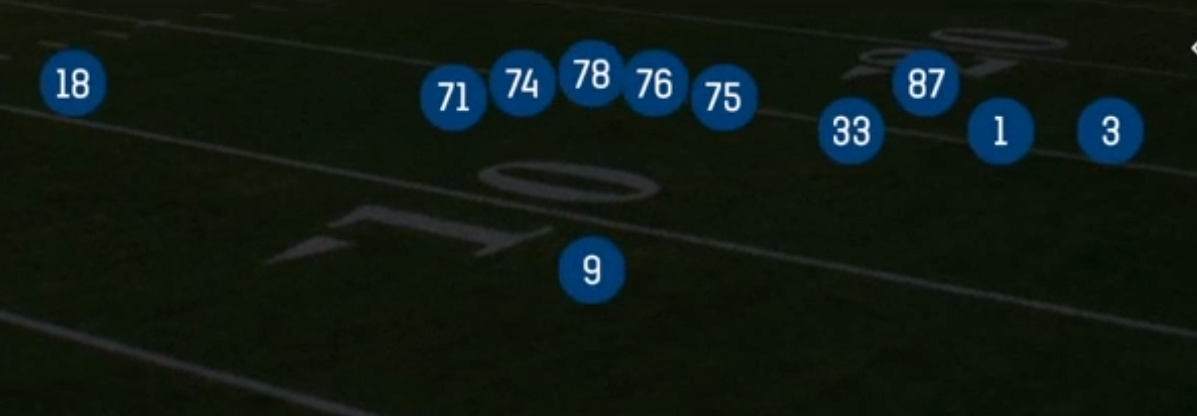
Bunch Offset takes the standard Shotgun 11 personnel look and stacks three receivers into a tight cluster to one side while the back offsets to the opposite hip of the quarterback. That offset alignment is the tell that separates this set from a conventional bunch: the back is already displaced away from the cluster, which means outside zone, counter Y, and read option all flow naturally to the weak side while the bunch occupies two or three defenders on the strong side. Instead of a balanced 2x2 spread look, you get a compressed triangle plus an isolated backside receiver, and that structural imbalance is what forces the defense to declare its coverage rotation before the snap.

The bunch cluster itself is the engine. Defenders cannot press cleanly against stacked releases in Madden, so the point man and the two wings all get free access off the line, which makes Bunch Drive, Spacing, Spacing Switch, and Bench Pivot devastating against man coverage. Route collisions and traffic inside the cluster generate natural rubs without you needing to hot route anything. Against zone, the same alignment floods short and intermediate landmarks in a hurry, and concepts like Z Spot, Curl Flat, Flood, and Y Trail put multiple bodies in the same flat or hook window and let the quarterback throw off leverage rather than off progression.

The Tight Cheat and PA Cheat family inside this set is where it separates from anything else in Shotgun. Those plays shift the back or a receiver into a cheat alignment before the snap, giving you Tight Cheat HB Screen, Tight Cheat TE Out, Tight Cheat TE Flood, PA Cheat Switch Dig, and PA Cheat Switch Comeback out of what looks like an identical formation. Pair that with a Gadget tag and a slot receiver friendly SLWR designation, and you can isolate a speed slot on the backside single receiver side against a linebacker or safety while the bunch pulls the coverage strength away from him.

Strengths

  • Stacked releases inside the bunch defeat press man automatically, making Bunch Drive, Spacing Switch, and Bench Pivot elite man beaters without a single hot route.
  • Z Spot, Curl Flat, and Flood flood a single zone landmark with two or three receivers, giving you an easy leverage throw against Cover 3 and Cover 4 flat defenders.
  • The offset back creates a built-in run and screen threat away from the coverage strength, so HB Cross Screen, Tight Cheat HB Screen, and Outside Zone hit into vacated space.
  • Dig Return, Smash Return, and Corner Out Dig attack the intermediate middle where a user defender cannot cover both the deep hook and the dig window, punishing single-high shells.
  • The isolated backside receiver on the SLWR side gets a true one on one look every snap, and a hot routed slant or fade there is an instant answer versus Cover 1 or Cover 0.

Weaknesses

  • The compressed alignment leaves half the field empty, so a strong side overload blitz or nano pressure from the bunch side arrives before the deeper concepts like Double Post or Verts HB Under develop.
  • Only one back and one tight end means your pass protection ceiling is low, and blitzing both inside linebackers forces you to either keep the back in or throw hot every time.
  • Cover 2 Invert and Cover 6 shells clog the flat and short middle where most of the bunch route combos live, choking Spacing and Z Spot before the receivers get separation.
  • A user-controlled defender sitting on the bunch triangle can undercut multiple routes at once because the receivers occupy such a small area of the field.
  • Heavy repetition of the Tight Cheat and PA Cheat plays creates a pre-snap tell, and experienced opponents will read the cheat motion and rotate coverage or trigger downhill on the screen.

Usage Tips

Read the alignment over the bunch first: if the defense puts three defenders in the cluster with an apex player, expect man and go straight to Bunch Drive or Spacing Switch. If they only stack two, it is zone and Curl Flat or Flood is the call.

On third and medium, use Bench Pivot or Choice Shallow Dig and user the backside isolated receiver as your bailout when the bunch gets bracketed.

Motion the bunch point man across before the snap to confirm coverage, then snap immediately so the defender trailing him is out of position on the return concepts like Dig Return and Smash Return.

Pair Inside Zone Split, Read Option, and Counter Y with PA Read and PA Dig from the same look so your run and play-action shells are indistinguishable to the defense.

Hot route the offset back to a flat or angle route against a defense that walks a linebacker into the box, since that defender is now the man responsible and cannot recover laterally.

Save the Tight Cheat package for high leverage downs, and mix Tight Cheat TE Out with Tight Cheat HB Screen so the cheat motion does not become a screen tell.

Plays (31)

Plays in Bunch Offset
PlayDiagramOpen
Bench PivotPivot, Pass Play, Bench
Bunch DriveDrive, Pass Play, Cover 4 Beater
Cheat Outside ZoneOutside Zone, Motion, Run Play +1
Choice Shallow DigDig, Shallow Cross, Option Route +1
Corner Out DigOut, Dig, Corner +1
Counter YCounter, Run Play, Power Run
Curl FlatFlat, Curl, Curl Flat +3
Dig ReturnDig, Motion, Pass Play
Double PostPost, Double Posts, Pass Play +2
FloodFlood, Pass Play, Cover 3 Beater
HB Cross ScreenScreen Pass, Hb Screen, Pass Play +1
HB DrawDraw, Run Play
Inside Zone SplitInside Zone, Run Play, Zone Run
Jet Pull ShallowShallow Cross, Motion, Pass Play
Outside ZoneOutside Zone, Run Play, Zone Run
PA Cheat Switch ComebackPlay Action, Comeback, Motion +1
PA Cheat Switch DigPlay Action, Dig, Motion +1
PA DigPlay Action, Dig, Pass Play
PA ReadPlay Action, Pass Play
Read OptionRead Option, Run Play
Smash ReturnSmash, Motion, Pass Play +1
SpacingSpacing, Pass Play, Cover 3 Beater +1
Spacing SwitchSpacing, Pass Play, Cover 3 Beater +1
Speed DigDig, Pass Play
Tight Cheat HB ScreenScreen Pass, Hb Screen, Motion +1
Tight Cheat TE FloodFlood, Motion, Pass Play +1
Tight Cheat TE OutOut, Motion, Pass Play
Verts HB UnderFour Verts, Pass Play, Cover 2 Beater +1
Y TrailTrail, Pass Play
Z SpotSpot, Pass Play, Cover 3 Beater
Z Spot N GoGo, Spot, Pass Play +1

Other Sets in Shotgun

4wr Pack Trips

18 Plays · 1 RB, 0 TE, 4 WR

4WR Trips Strong

18 Plays · 1 RB, 0 TE, 4 WR

5WR Flex Trey

16 Plays · 0 RB, 1 TE, 4 WR

5WR Tight

12 Plays · 0 RB, 0 TE, 5 WR

5WR Trio

24 Plays · 1 RB, 1 TE, 3 WR

5WR Trips

18 Plays · 0 RB, 0 TE, 5 WR

Ace

28 Plays · 1 RB, 2 TE, 2 WR

Ace Offset

15 Plays · 1 RB, 2 TE, 2 WR

Ace Slot

16 Plays · 1 RB, 2 TE, 2 WR

Ace Slot Offset

19 Plays · 1 RB, 2 TE, 2 WR

Box

18 Plays · 1 RB, 0 TE, 4 WR

Box HB Strong

6 Plays · 1 RB, 1 TE, 3 WR

Box Offset Wk

19 Plays · 1 RB, 1 TE, 3 WR

Box Y Off

6 Plays · 1 RB, 1 TE, 3 WR

Bunch

53 Plays · 1 RB, 1 TE, 3 WR

Bunch HB Str

12 Plays · 1 RB, 1 TE, 3 WR

Bunch Offset Close

11 Plays · 1 RB, 1 TE, 3 WR

Bunch Open

9 Plays · 1 RB, 0 TE, 4 WR

Bunch Open Offset

18 Plays · 1 RB, 1 TE, 3 WR

Bunch Open TE

13 Plays · 1 RB, 1 TE, 3 WR

Bunch Quads

9 Plays · 1 RB, 1 TE, 3 WR

Bunch Quads Close

6 Plays · 1 RB, 1 TE, 3 WR

Bunch Spread

24 Plays · 1 RB, 1 TE, 3 WR

Bunch Spread Nasty

35 Plays · 1 RB, 1 TE, 3 WR

Bunch Str Nasty

33 Plays · 1 RB, 1 TE, 3 WR

Bunch Str Offset

45 Plays · 1 RB, 1 TE, 3 WR

Bunch TE

51 Plays · 1 RB, 1 TE, 3 WR

Bunch TE Str

13 Plays · 1 RB, 1 TE, 3 WR

Bunch TE Wk

18 Plays · 1 RB, 1 TE, 3 WR

Bunch Trio Open

12 Plays · 1 RB, 1 TE, 3 WR

Bunch Wide

26 Plays · 1 RB, 1 TE, 3 WR

Bunch Wide Nasty

23 Plays · 1 RB, 1 TE, 3 WR

Bunch X Nasty

61 Plays · 1 RB, 1 TE, 3 WR

Bunch Y-Flex

32 Plays · 1 RB, 1 TE, 3 WR

Bunch Y-Trips

15 Plays · 1 RB, 1 TE, 3 WR

Cluster

14 Plays · 1 RB, 1 TE, 3 WR

Cluster HB Str

18 Plays · 1 RB, 1 TE, 3 WR

Dbls Flex Y Off Close

21 Plays · 1 RB, 1 TE, 3 WR

Deebo Package

6 Plays · Unknown

Deuce

18 Plays · 1 RB, 2 TE, 2 WR

Deuce Close

47 Plays · 1 RB, 2 TE, 2 WR

Doubles

65 Plays · 1 RB, 1 TE, 3 WR

Doubles Flex

27 Plays · 1 RB, 1 TE, 3 WR

Doubles Flex WK Pats

13 Plays · Unknown

Doubles Flex Wk Swap

12 Plays · 1 RB, 1 TE, 3 WR

Doubles Flex Y Off Close

21 Plays · 1 RB, 1 TE, 3 WR

Doubles HB Wk

46 Plays · 1 RB, 1 TE, 3 WR

Doubles Hip

13 Plays · 1 RB, 1 TE, 3 WR

Doubles Off Close

10 Plays · 1 RB, 1 TE, 3 WR

Doubles Off Close Wk

13 Plays · 1 RB, 1 TE, 3 WR

Doubles Offset

43 Plays · 1 RB, 1 TE, 3 WR

Doubles Offset Wk

42 Plays · 1 RB, 1 TE, 3 WR

Double Stack

13 Plays · 1 RB, 1 TE, 3 WR

Doubles Y-Flex

28 Plays · 1 RB, 1 TE, 3 WR

Doubles Y-Flex Offset

15 Plays · 1 RB, 1 TE, 3 WR

Doubles Y Off

42 Plays · 1 RB, 1 TE, 3 WR

Doubles Y Off Nasty

20 Plays · 1 RB, 1 TE, 3 WR

Doubles Y Off WK

2 Plays · 1 RB, 1 TE, 3 WR

Doubles Z Close

14 Plays · 1 RB, 1 TE, 3 WR

Doubles Z Close Wk

17 Plays · 1 RB, 1 TE, 3 WR

Double Wing

9 Plays · 2 RB, 3 TE, 0 WR

Duo Slot Open

10 Plays · 2 RB, 0 TE, 3 WR

Duo Twins Flex

9 Plays · 2 RB, 1 TE, 2 WR

Empty Ace

12 Plays · 1 RB, 2 TE, 2 WR

Empty Base

33 Plays · 1 RB, 1 TE, 3 WR

Empty Base Flex

35 Plays · 1 RB, 1 TE, 3 WR

Empty Base Trio

17 Plays · 1 RB, 1 TE, 3 WR

Empty Bunch

9 Plays · 1 RB, 1 TE, 3 WR

Empty Bunch Open

17 Plays · 1 RB, 1 TE, 3 WR

Empty Bunch Tight

12 Plays · 1 RB, 1 TE, 3 WR

Empty Bunch Wide

13 Plays · 1 RB, 1 TE, 3 WR

Empty Bunch Y Flex

9 Plays · 1 RB, 1 TE, 3 WR

Empty Chips

9 Plays · 1 RB, 1 TE, 3 WR

Empty Chips Nasty

10 Plays · 1 RB, 1 TE, 3 WR

Empty Chips Quads

9 Plays · 1 RB, 1 TE, 3 WR

Empty Chips Tight

11 Plays · 1 RB, 1 TE, 3 WR

Empty HB Wide

13 Plays · 1 RB, 1 TE, 3 WR

Empty Quads

9 Plays · 0 RB, 1 TE, 4 WR

Empty Sketch Stack

10 Plays · 1 RB, 1 TE, 3 WR

Empty Steeler

12 Plays · 1 RB, 1 TE, 3 WR

Empty Strong Slots

9 Plays · 1 RB, 1 TE, 3 WR

Empty Trey

21 Plays · 1 RB, 1 TE, 3 WR

Empty Trey Flex

12 Plays · Unknown

Empty Trey Stack

15 Plays · 1 RB, 1 TE, 3 WR

Empty Triple Stack

3 Plays · 1 RB, 1 TE, 3 WR

Empty Trips Speed

15 Plays · 1 RB, 1 TE, 3 WR

Empty Y Slot

15 Plays · 1 RB, 1 TE, 3 WR

Flanker Close

14 Plays · 1 RB, 0 TE, 4 WR

Flex Y Off

20 Plays · 1 RB, 1 TE, 3 WR

Flex Y Off Close

16 Plays · 1 RB, 1 TE, 3 WR

Flex Y Off Wk

27 Plays · 1 RB, 1 TE, 3 WR

Gadget Backfield

6 Plays · 3 RB, 1 TE, 1 WR

Gadget Package

6 Plays · 3 RB, 1 TE, 1 WR

Go Go Twins Flex

9 Plays · 2 RB, 1 TE, 2 WR

Heavy Panther

9 Plays · 2 RB, 3 TE, 0 WR

Monster

3 Plays · 1 RB, 1 TE, 3 WR

Normal Flex Snug

17 Plays · 1 RB, 1 TE, 3 WR

Normal Flex Wing

12 Plays · 1 RB, 1 TE, 3 WR

Normal Off Close Wk

21 Plays · 1 RB, 1 TE, 3 WR

Normal Y Off

50 Plays · 1 RB, 1 TE, 3 WR

Normal Y Off Close

49 Plays · 1 RB, 1 TE, 3 WR

Normal Y Off Wk

34 Plays · 1 RB, 1 TE, 3 WR

Open Flex

10 Plays · 1 RB, 1 TE, 3 WR

Slot Left

9 Plays · 1 RB, 1 TE, 3 WR

Slot Right

22 Plays · 1 RB, 1 TE, 3 WR

Slot WR Backfield

7 Plays · Unknown

Split Close

30 Plays · 2 RB, 0 TE, 3 WR

Split Close Pro

15 Plays · 2 RB, 1 TE, 2 WR

Split Cowboy

17 Plays · 1 RB, 1 TE, 3 WR

Split Flanker Close

9 Plays · 2 RB, 0 TE, 3 WR

Split Offset

34 Plays · 2 RB, 0 TE, 3 WR

Split Pro Offset Wk

6 Plays · 2 RB, 1 TE, 2 WR

Split Slot Offset

41 Plays · 2 RB, 0 TE, 3 WR

Split Slot Open

33 Plays · 2 RB, 0 TE, 3 WR

Split Twins

6 Plays · 2 RB, 1 TE, 2 WR

Split Twins Offset

13 Plays · 2 RB, 1 TE, 2 WR

Split Twins Stack

6 Plays · 2 RB, 1 TE, 2 WR

Split Wing Nasty

6 Plays · 2 RB, 2 TE, 1 WR

Split WR Backfield

9 Plays · 1 RB, 1 TE, 3 WR

Split Y-Flex

15 Plays · 2 RB, 1 TE, 2 WR

Split Y Off

19 Plays · 2 RB, 1 TE, 2 WR

Split Y Off Close

10 Plays · 1 RB, 1 TE, 3 WR

Spread

69 Plays · 1 RB, 0 TE, 4 WR

Spread 4wr

1 Play · 1 RB, 1 TE, 3 WR

Spread Dbl Flex

40 Plays · 1 RB, 1 TE, 3 WR

Spread Dbl Flex Wk

22 Plays · 1 RB, 1 TE, 3 WR

Spread Flex

15 Plays · 1 RB, 1 TE, 3 WR

Spread Slots Close

22 Plays · 1 RB, 0 TE, 4 WR

Spread Y-Flex

54 Plays · 1 RB, 1 TE, 3 WR

Spread Y-Flex Wk

40 Plays · 1 RB, 1 TE, 3 WR

Spread Y-Slot

61 Plays · 1 RB, 1 TE, 3 WR

Spread Y-Slot Wk

49 Plays · 1 RB, 1 TE, 3 WR

Stack HB WK

9 Plays · 1 RB, 1 TE, 3 WR

Stack Y-Flex

15 Plays · 1 RB, 1 TE, 3 WR

Stack Y Off

14 Plays · 1 RB, 1 TE, 3 WR

Tackle Over

9 Plays · 1 RB, 1 TE, 3 WR

Tackle Over Trips

10 Plays · 1 RB, 1 TE, 3 WR

Tight

31 Plays · 1 RB, 1 TE, 3 WR

Tight Base Flex

9 Plays · 2 RB, 1 TE, 2 WR

Tight Doubles

18 Plays · 1 RB, 1 TE, 3 WR

Tight Flex

25 Plays · 1 RB, 1 TE, 3 WR

Tight Flex Wk

18 Plays · 1 RB, 1 TE, 3 WR

Tight Offset TE

18 Plays · 1 RB, 1 TE, 3 WR

Tight Open

52 Plays · 1 RB, 1 TE, 3 WR

Tight Slot Flip

9 Plays · 1 RB, 1 TE, 3 WR

Tight Slot Open

10 Plays · 1 RB, 1 TE, 3 WR

Tight Slots

36 Plays · 1 RB, 1 TE, 3 WR

Tight Slots HB Wk

19 Plays · 1 RB, 1 TE, 3 WR

Tight Y Off

42 Plays · 1 RB, 1 TE, 3 WR

Tight Y Off Wk

47 Plays · 1 RB, 1 TE, 3 WR

Trey

12 Plays · 1 RB, 1 TE, 3 WR

Trey 4WR

21 Plays · 1 RB, 0 TE, 4 WR

Trey Offset

24 Plays · 1 RB, 1 TE, 3 WR

Trey Open

68 Plays · 1 RB, 1 TE, 3 WR

Trey Open HB Str

22 Plays · 1 RB, 1 TE, 3 WR

Trey Open Offset

37 Plays · 1 RB, 1 TE, 3 WR

Trey Y-Flex

38 Plays · 1 RB, 1 TE, 3 WR

Trey Y-Flex Str

21 Plays · 1 RB, 1 TE, 3 WR

Trey Y Iso

15 Plays · 1 RB, 1 TE, 3 WR

Trio

30 Plays · 1 RB, 1 TE, 3 WR

Trio HB Wk

30 Plays · 1 RB, 1 TE, 3 WR

Trio Offset

18 Plays · 1 RB, 1 TE, 3 WR

Trio Offset Wk

12 Plays · 1 RB, 1 TE, 3 WR

Trio Rt Open

1 Play · 1 RB, 1 TE, 3 WR

Trio Y-Flex

30 Plays · 1 RB, 1 TE, 3 WR

Trips

39 Plays · 1 RB, 0 TE, 4 WR

Trips HB Wk

53 Plays · 1 RB, 0 TE, 4 WR

Trips Slots Close

27 Plays · 1 RB, 0 TE, 4 WR

Trips TE

59 Plays · 1 RB, 1 TE, 3 WR

Trips TE Flex

23 Plays · 1 RB, 1 TE, 3 WR

Trips TE Offset

22 Plays · 1 RB, 1 TE, 3 WR

Trips TE Offset Wk

14 Plays · 1 RB, 1 TE, 3 WR

Trips X Nasty

22 Plays · 1 RB, 1 TE, 3 WR

Trips X Nasty Offset WK

12 Plays · 1 RB, 1 TE, 3 WR

Trips X Nasty Off Wk

12 Plays · 1 RB, 1 TE, 3 WR

Trips Y-Flex

21 Plays · 1 RB, 1 TE, 3 WR

Trips Y Slot Str

6 Plays · 1 RB, 1 TE, 3 WR

U Off Stack

13 Plays · 1 RB, 2 TE, 2 WR

U Off Trips

22 Plays · 1 RB, 2 TE, 2 WR

U Off Trips Flex

15 Plays · 1 RB, 2 TE, 2 WR

U Off Trips Wk

17 Plays · 1 RB, 2 TE, 2 WR

Wide 5wr

24 Plays · Unknown

Wide Slot Left

16 Plays · Unknown

Wide Slot Right WK

15 Plays · 1 RB, 1 TE, 3 WR

Wide Trips

15 Plays · 1 RB, 0 TE, 4 WR

Wide Y Trips WK

16 Plays · Unknown

Wing

15 Plays · 1 RB, 2 TE, 2 WR

Wing Flex Offset

22 Plays · 1 RB, 2 TE, 2 WR

Wing Flex Offset Wk

24 Plays · 1 RB, 2 TE, 2 WR

Wing HB Wk Close

9 Plays · 1 RB, 2 TE, 2 WR

Wing Pair

16 Plays · 1 RB, 3 TE, 1 WR

Wing Slot Offset

68 Plays · 1 RB, 2 TE, 2 WR

Wing Slot Wk

47 Plays · 1 RB, 2 TE, 2 WR

Wing Stack

21 Plays · 1 RB, 2 TE, 2 WR

Wing Stack Wk

13 Plays · 1 RB, 2 TE, 2 WR

Wing Tight

9 Plays · 1 RB, 3 TE, 1 WR

Wing Tight Flip

12 Plays · 1 RB, 3 TE, 1 WR

Wing Tight Nasty

6 Plays · 1 RB, 3 TE, 1 WR

Wing Tight Z

10 Plays · 1 RB, 3 TE, 1 WR

Wing Trio

15 Plays · 1 RB, 1 TE, 3 WR

Wing Trips Wk Nasty

15 Plays · 1 RB, 1 TE, 3 WR

Y Off Trio Close

25 Plays · 1 RB, 1 TE, 3 WR

Y Off Trio Wk

55 Plays · 1 RB, 1 TE, 3 WR

Y Off Trips

54 Plays · 1 RB, 1 TE, 3 WR

Y Off Trips Close

31 Plays · 1 RB, 1 TE, 3 WR

Y Off Trips Nasty

15 Plays · 1 RB, 1 TE, 3 WR

Y Off Trips Pats

32 Plays · Unknown

Y Off Trips Stack

3 Plays · Unknown

Y Off Trips Wk

60 Plays · 1 RB, 1 TE, 3 WR

Y Trio Offset Wk

23 Plays · 1 RB, 1 TE, 3 WR

Y Trips 1 Slot

1 Play · 1 RB, 1 TE, 3 WR

Y Trips Offset

25 Plays · 1 RB, 1 TE, 3 WR

Y Trips Offset Wk

15 Plays · 1 RB, 1 TE, 3 WR

Y Trips Wk

92 Plays · 1 RB, 1 TE, 3 WR