Playbooks

Receiver routes
Depth-chart slots are shown as they line up in the base package for this set.
| Player | Side | Route |
|---|---|---|
| HB1 | Right | Option Route |
| WR3 | Left | Seam Read |
| WR1 | Left | Speed Out |
| WR2 | Right | Out |
| TE1 | Right | Streak |
Read progression
- WR3 left, Seam Read
- WR2 right, Out
- WR1 left, Speed Out
- TE1 right, Streak
- HB1 right, Option RouteCheck-down
Breakdown
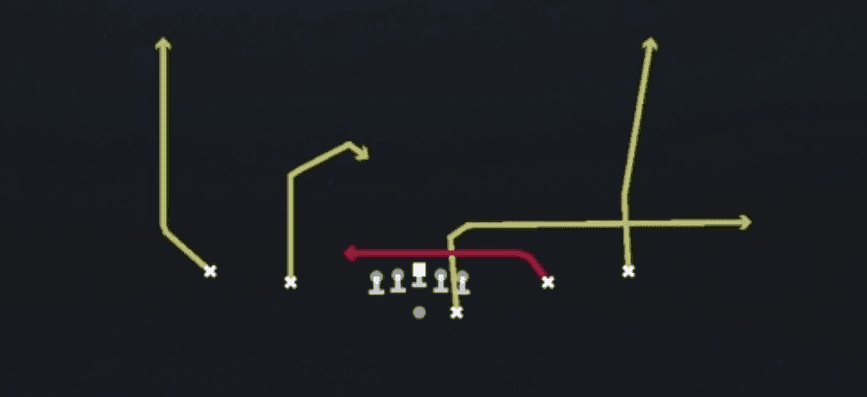
Out Seams aligns from Shotgun Spread Y-Slot with 11 personnel and sends both outside receivers on quick outs to attack the sideline, while the slot receiver runs a seam route up the numbers and the TE releases up the middle of the field on a bending seam of his own. The backfield stays empty of routes, so this is a pure five-out dropback concept built to stress both the flat and the deep middle at the same time. It is primarily a zone beater because the outs sit down in the void underneath cornerbacks playing off coverage while the two seams climb through linebacker zones, and the read progression starts with the seams for an explosive shot before working down to the outs against soft corners.
Defensive Reads
Identify the middle linebacker depth immediately after the snap, a shallow drop into the seam lane signals Tampa 2 or a robber concept and you should redirect to the outs instead of forcing the seam. Watch the corners at the snap, if they bail hard into deep zones the outs will be wide open in the void, but if they sit flat footed in man alignment expect them to trail the out and take it away. Key both safeties before the snap, two high shells open up the seam throws over the middle while a single high safety rotating late usually means Cover 3 or Cover 1 with a deep defender ready to close on the seam. Beware user controlled linebackers spying the middle of the field, a smart defender will sit in the seam window and undercut that route for a pick six if the quarterback stares it down too long. Look for blitz packages that send extra rushers off the edge, since the outs and seams both take time to develop, a nano blitz or overload pressure can force a bad throw before either read comes open.
Usage Tips
Check pre-snap for two high safeties, that shell tells you the seams have room to work before the safeties can close, so hit your first read up top immediately.
Against single high or man coverage, hot route the outs into quick hitches or slants since man corners will sit on top of the boundary route and take away the sideline throw.
Use this on second and medium or third and short since the outs give you a built-in checkdown if the seams are covered, letting you stay ahead of the chains without forcing a deep ball into traffic.
Pair this with Bubble Screens or Slot Outs earlier in a series to bait linebackers into jumping underneath routes, then come back to Out Seams to hit the seam behind them once they start flying to the flats.
If the defense starts sitting on the seam with a robber or Tampa 2 middle linebacker, switch to Digs H Option or Curls from this same set to attack the same horizontal stretch without feeding the middle defender.
Other Plays in Spread Y-Slot
 45 Quick BaseDive, Run Play
 617Pass Play, Quick Pass, Out +9
 Bubble ScreensScreen Pass, Bubble Screen, Pass Play
 Corner StrikeCorner, Pass Play, Block and Release +1
 Cross DigDig, Pass Play, Crosser +4
 CurlsCurl, Pass Play, Block and Release
 Curl WheelCurl, Wheel, Pass Play +2
 Deep AttackPass Play, Go, Streak +9
 Digs H OptionOption Route, Pass Play, Dig +2
 Double SlantSlant, Pass Play, Flat
 Double Slant SwingSlant, Swing, Pass Play +1
- Fake Jet HB SeamSeam, Comeback, Curl +7
 Fk Bubble HB DrawDraw, Play Action, Pass Play
 Four VerticalsFour Verts, Pass Play, Cover 2 Beater +5
 Go's Y-UnderGo, Pass Play
- Go Y-underGo, Pass Play, Drag +4
 HB DrawDraw, Run Play
 HB Slip ScreenScreen Pass, Hb Screen, Pass Play +2
- HB SwingSwing, Hitch, Slant +1
 Hitch SeamHitch, Seam, Pass Play +2
 H Shallow CrossShallow Cross, Pass Play, Crosser +5
 In N UpIn, Pass Play
- In N Up(1)Pass Play, Block and Release, Corner and Go +3
 Inside ZoneInside Zone, Run Play, Zone Run
- Jet Inside ZoneRun Play
 Jet SeamsMotion, Seam, Pass Play +3
- Jets Z ShallowShallow Cross, Pass Play, Block and Release +5
 Jet Touch PassMotion, Run Play
- Kc HB DrawDraw, Run Play
- Kc PostPost, Pass Play, Dig +3
- Kc Under Y-outOut, Pass Play, Option Route +3
 Levels DivideLevels, Pass Play, Cover 2 Beater +4
 MeshMesh, Pass Play, Man Beater +4
- Mid ZoneRun Play
 Mills Z ShallowShallow Cross, Mills, Pass Play +1
- Mtn Curl Flat CornerCurl, Corner, In +3
 Mtn Curls TexasTexas, Texas Concept, Motion +4
- Mtn DaggerDeep Cross, Crosser, Dig +4
- Mtn Double PostPost, Fade, Hitch +1
- Mtn Double ScreenScreen Pass, Bubble Screen, Swing +1
- Mtn FloodPost, Fade, Out +2
- Mtn H Shallow CrossShallow Cross, Crosser, Block and Release +5
- Mtn H StickStick, Fade, Hitch +3
 Mtn Mesh DigDig, Mesh, Motion +8
- Mtn PA WR Power ReadDeep Cross, Crosser, In +6
- Mtn Slot OutFade, Slant, In +3
- Mtn Slot ScreenScreen Pass, Hitch, Slant +1
- Mtn WR Power ReadRun Play
 Mtn X PostPost, Motion, Pass Play +4
- Mtn Y CrossCrosser, Deep Cross, Post +4
- Mtn Y CrossCrosser, Deep Cross, Post Sit +4
- Mtn Z Shallow CrossShallow Cross, Crosser, Corner +5
- Orbit Cross ScreenScreen Pass, Crosser, Deep Cross +4
- Orbit Fake Screen WheelScreen Pass, Wheel, Post +5
- Orbit PA CrossCrosser, Deep Cross, Post +5
- PA All CurlCurl, Pass Play, Play Action +2
 PA ComebacksPlay Action, Pass Play, Comeback +2
 PA ReadPlay Action, Pass Play, Comeback +4
 PA TE WheelPlay Action, Wheel, Pass Play +2
 Post Flood SalemPost, Flood, Pass Play +1
 Post TrailPost, Pass Play, Trail +3
- Post X CurlCurl, Post, Hitch +2
- Power ReadRun Play
- Power Read TossRun Play
 Quick SlantsSlant, Pass Play, Flat
 Read OptionRead Option, Run Play
- Return Inside Zone SplitRun Play
- Return PA Post CurlsCurl, Post, Flat +3
- Return RPO Alert SlantSlant, Pass Play, Run Play
- RPO Alert Orbit SwingSwing, Pass Play, Run Play
 RPO Peek SlantRPO, Slant, Pass Play +1
 RPO Read ScreenScreen Pass, RPO, Pass Play +2
- RPO Zone PeekRPO, Pass Play, Run Play +2
- RZ Cross HB RailCrosser, Deep Cross, Fade +2
- Same Side ZoneRun Play
 Slot OutsOut, Pass Play, Angle +2
 Slot StickStick, Stick Concept, Pass Play +5
 SmashSmash, Pass Play, Cover 2 Beater +3
- Smash HB SeamSeam, Smash, Pass Play +4
 Stick N NodStick, Stick Concept, Pass Play
- Stick NodStick, Stick Concept, Pass Play +4
 Under Y-OptionOption Route, Pass Play
 WR Mid ScreenScreen Pass, Wr Screen, Pass Play +2
 X DaggerDagger, Pass Play, Cover 2 Beater +7
 X FollowPass Play, Quick Pass, Drag +9
 Y CrossY Cross, Pass Play, Crosser +5
 Y SeamSeam, Pass Play, Block and Release +3
 Y Shallow CrossShallow Cross, Pass Play, Crosser +5
 Y Shallow X PostPost, Shallow Cross, Pass Play +5
 Y StickStick, Stick Concept, Pass Play +5
 Z Shallow CrossShallow Cross, Pass Play, Crosser +5
- Z Spot DigDig, Fade, Flat +2