Playbooks

At a Glance
Overview
Shotgun Normal Y Off Close is an 11 personnel set that puts the tight end a step off the line of scrimmage, tucked tight to the tackle in a wing-like position, while three wideouts spread the field and the running back aligns beside the quarterback. The off-ball, close alignment separates it from standard Shotgun sets with an attached or detached Y. The TE can arc-block the edge, kick out on Power Read and Read Counter Bash, or release cleanly into the flat and seam without a jam at the line. Defenses see a compact surface to one side and spread spacing everywhere else, which forces them to choose between an extra box defender and honest coverage on the perimeter.
The playbook is heavy on RPOs, motion tags, and gadget looks. The RPO Zone series (Alert Omaha, Snag, Peek Glance, Stick, Omaha Hitch) pairs Inside Zone with quick perimeter reads, so the offense can punish a defense that walks a linebacker or safety into the box. Mtn, Cheat, Reload, and Exit tags move the Y or slot pre-snap. Those motions reveal man or zone, create stacks and bunches on the fly, and shift the numbers advantage before the ball is snapped. Jet motion plays like Fk Jet Y Wheel, PA Jet Sweep, and Jet Touch Pass stress flow-reading linebackers horizontally and set up play-action shots.
The personnel creates clear matchup advantages. With the TE off the ball, a slower linebacker often draws him in man coverage, which is exactly what Fk Jet Y Wheel, Mtn Angle Y Wheel, and Cheat TE Angle attack. The three-receiver spacing isolates a speedy slot receiver on nickel corners with Double Slant, Cheat Slot Fade, and Mtn Slot Shallow Cross. A power or three-down back can live between the tackles on Inside Zone and Same Side Zone while still threatening defenses on HB Angle and HB Swing concepts.
Strengths
- The deep RPO menu (RPO Zone Alert Omaha, RPO Peek Stick, RPO Glance Post, RPO Alert Cheat Bubble) punishes defenses that load the box or nano blitz from the slot, because a quick read of the overhang defender puts the ball in space before pressure arrives.
- Man coverage is exploited by TE and RB isolation routes like Fk Jet Y Wheel, Mtn Angle Y Wheel, Cheat TE Angle, and Mtn HB Angle, where the wheel and angle break leave linebackers trailing, especially against Cover 1 and Cover 0.
- Zone beaters are built in: Flood H Post, Mtn Dash Flood, Y-Sail, and Reload PA Deep Sail flood three levels against Cover 3, while Mesh Spot, Reload Mesh Spot, and Y Stick find soft spots underneath Cover 2 and Cover 4.
- The run game is legitimate out of a spread look. Power Read, Read Counter Bash, Inside Zone, and Same Side Zone use the off-ball Y as a kick-out or arc blocker, which is ideal for a Power HB or 3DRB against light boxes.
- Motion tags (Mtn, Cheat, Reload, Exit, Jet) provide free pre-snap coverage reads, and jet action on PA Jet Sweep, Zone Fake Jet, and Jet Touch Pass freezes second-level defenders and opens play-action windows.
Weaknesses
- With only five linemen and the TE often releasing on RPOs and quick game, overload blitzes and Cover 0 pressure from the boundary can beat the protection before deeper concepts like Reload PA Deep Sail or Exit PA Smash develop.
- A user-controlled linebacker or robber sitting in the hook/curl area can blow up the RPO Glance, Peek, and Stick reads, jumping the quick throw after the QB pulls the ball.
- The compact TE side creates a formation tendency: skilled opponents shade coverage and slant their front toward the Y, taking away Power Read, Same Side Zone, and TE Angle concepts while daring you to throw away from him.
- Heavy motion leaves time on the play clock for the defense to adjust after the shift, so opponents who shade, show blitz, and rotate late can disguise their true shell after your motion read.
- Receiver screens and bubbles (RPO Alert Cheat Bubble, Empty Mtn Jailbreak Screen, Cheat TE Screen) die against press-heavy Cover 2 Man, where corners squat and blow up the perimeter blocking.
Usage Tips
On early downs against a single-high look with a safety or linebacker walking into the box, call the RPO Zone series and read the overhang defender. If he crashes on the Inside Zone mesh, pull and throw the quick route. If he widens, hand it off to the Power HB.
Use Mtn and Cheat motion tags as a pre-snap man/zone check. If a defender travels with the motion, audible to Fk Jet Y Wheel, Double Slant, or Cheat Slot Fade. If the defense rotates without chasing, check into Flood H Post, Mesh Spot, or Y-Sail.
On 3rd and short to medium, Y-Stick Dig, Y Stick, and Mtn Snag Curls give fast, high-percentage throws that beat both man and zone. Hot route the RB to a block or slant if you see a blitz look off the edge.
In the red zone, lean on Redzone Scissors, RZ Cross HB Choice, and PA Snag. The compressed field makes the Y off the ball a mismatch on angle and corner routes, especially against Cover 1 with a user robber.
After establishing Inside Zone and Power Read, run PA Jet Sweep, Mtn PA Boot, and Reload PA Cross to punish linebackers who flow downhill, and consider a pre-snap slide protection toward the blitz side to buy time for the deep window.
Plays (62)
 Cheat Flat X PostFlat, Post, Motion +3
 Cheat Inside ZoneInside Zone, Motion, Run Play +1
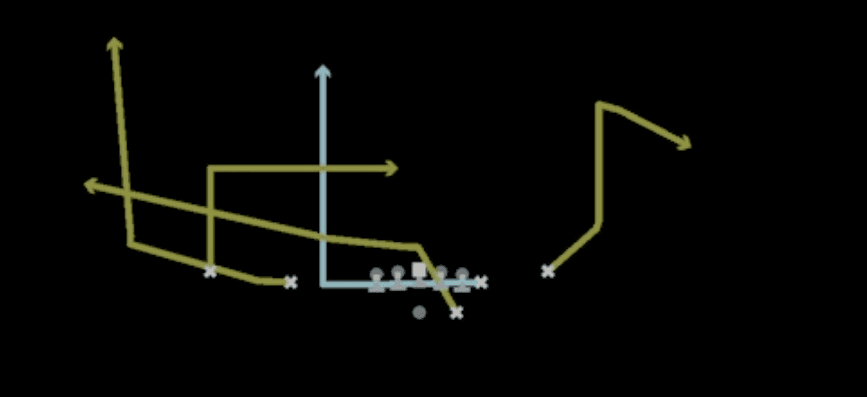 Cheat Slash Wheel InWheel, Motion, Pass Play +3
 Cheat Slot FadeFade, Motion, Pass Play +4
 Cheat TE AngleAngle, Motion, Pass Play +5
 Cheat TE ScreenScreen Pass, Te Screen, Motion +3
 Double SlantSlant, Pass Play, Post +2
 Empty Mtn HB SwingSwing, Motion, Pass Play +1
 Empty Mtn Jailbreak ScreenScreen Pass, Wr Screen, Motion +5
 Empty Mtn Spot ReplaceSpot, Motion, Pass Play +5
 EscapePass Play, Flood, Corner +10
- Exit HB Cross ScreenScreen Pass, Crosser, Corner +3
- Exit PA SmashCorner, Deep Cross, Crosser +6
- Exit RPO Zone HitchesHitch, Fade, Pass Play +1
- Fake Jet Y WheelPlay Action, Wheel, Motion +3
 Fk Jet Y WheelPlay Action, Wheel, Motion +1
- Flood H PostPost, Corner, Curl +2
 Inside ZoneInside Zone, Run Play, Zone Run
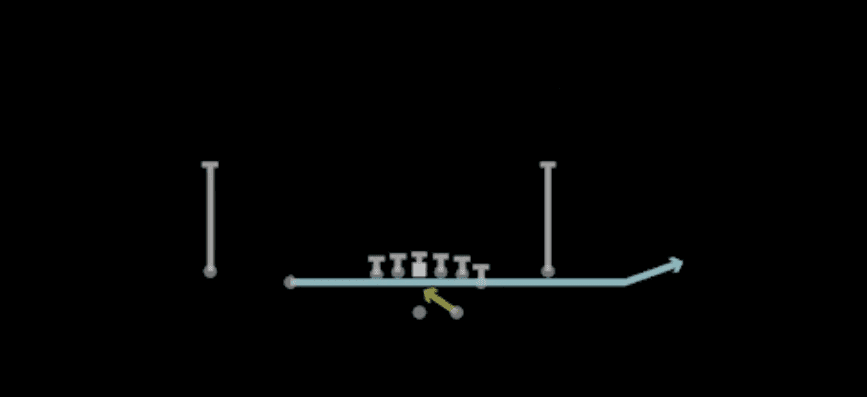 Jet Pass Fk ZoneMotion, Run Play
 Jet Touch PassMotion, Run Play
 Mesh SpotSpot, Mesh, Pass Play +7
 Mtn Angle Y WheelWheel, Angle, Motion +5
- Mtn Dash FloodCorner, Deep Cross, Crosser +3
 Mtn HB AngleAngle, Motion, Pass Play +4
 Mtn HB SwingSwing, Motion, Pass Play +1
- Mtn Inside ZoneRun Play
- Mtn PA BootBlock and Release, Corner, Deep Cross +5
- Mtn Slot Shallow CrossShallow Cross, Crosser, Curl +5
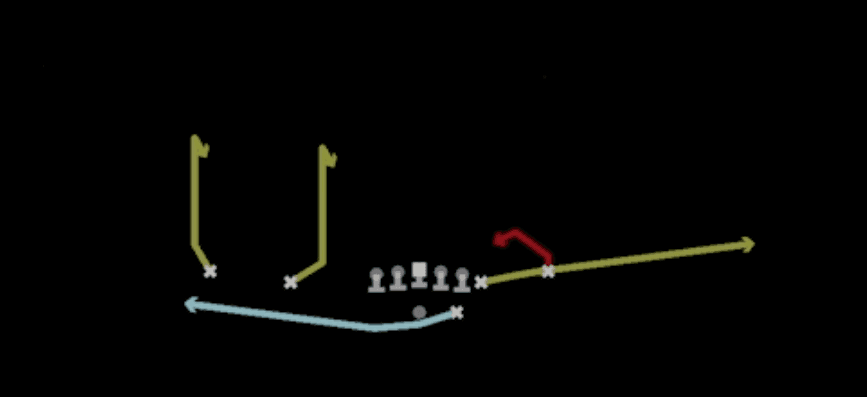 Mtn Snag CurlsSnag, Snag Concept, Motion +5
 Mtn Switch CornerCorner, Motion, Pass Play +4
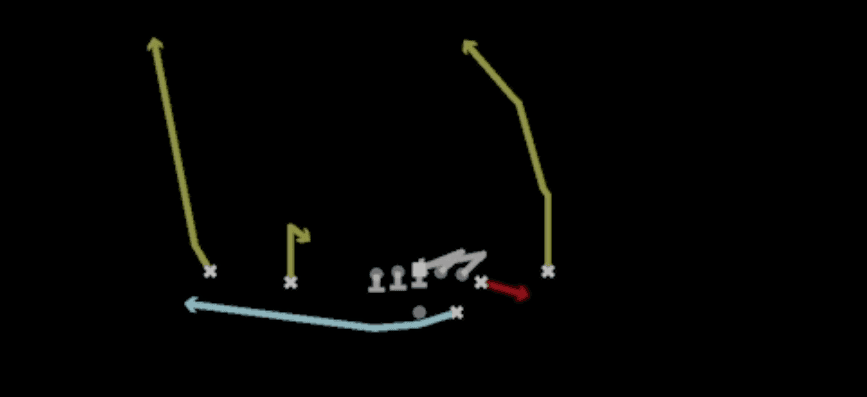 Mtn TE Middle ScreenScreen Pass, Te Screen, Motion +7
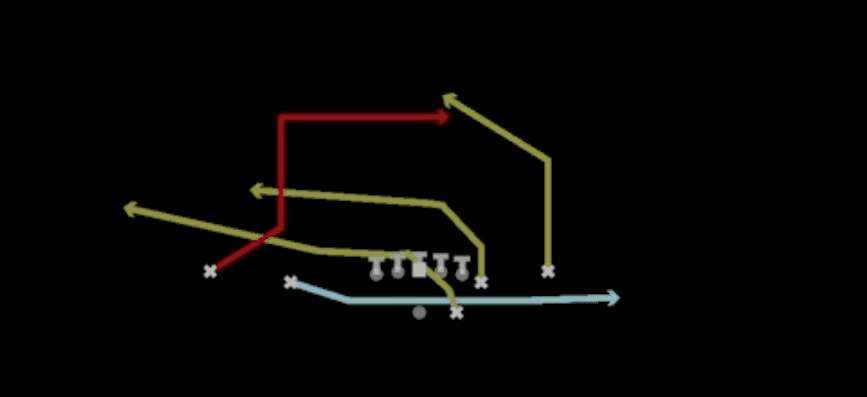 PA Jet SweepSweep, Jet Sweep, Play Action +7
 PA SnagPlay Action, Snag, Snag Concept +5
 Power ReadPower, Run Play, Power Run
 Read Counter BashCounter, Run Play, Power Run
 Read OptionRead Option, Run Play
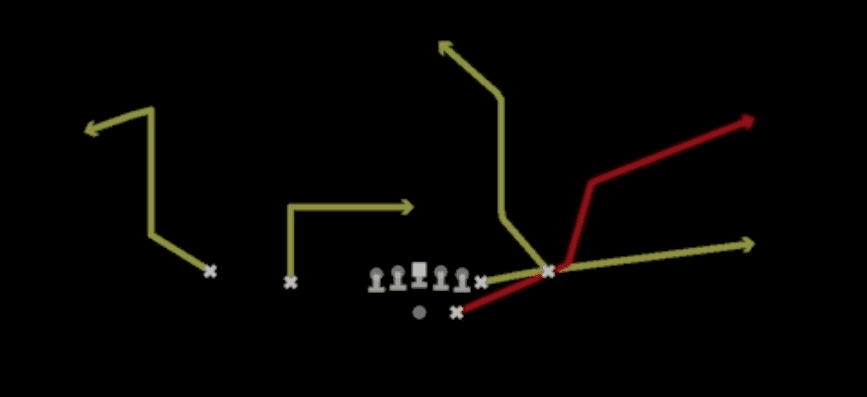 Redzone ScissorsScissors, Pass Play, Cover 2 Beater +6
 Reload HB SweepSweep, Motion, Run Play
 Reload Mesh SpotSpot, Mesh, Motion +8
 Reload PA CrossPlay Action, Motion, Pass Play +6
- Reload PA Deep SailCorner, Post, Flat +7
- Reload PA Shake BubblePlay Action, Motion, Pass Play +5
- Reload Quick HB TrailAngle, Corner, Deep Cross +4
- Reload RPO Zone SnagSnag, Bubble Screen, Flat +2
 RPO Alert Cheat BubbleRPO, Motion, Pass Play +3
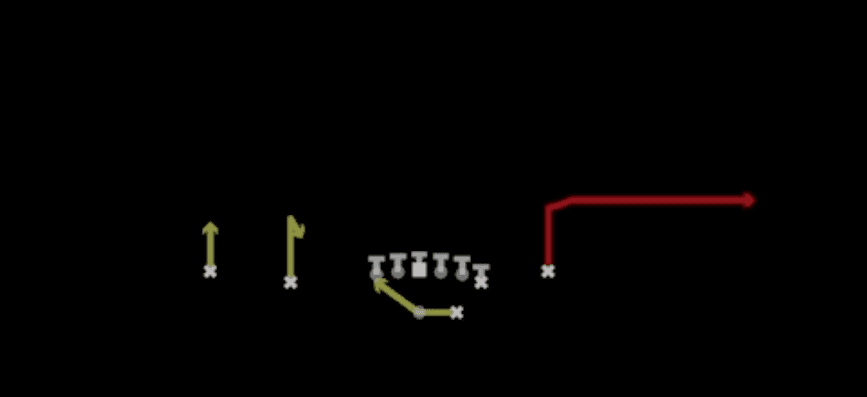 RPO Alert OutRPO, Out, Pass Play +1
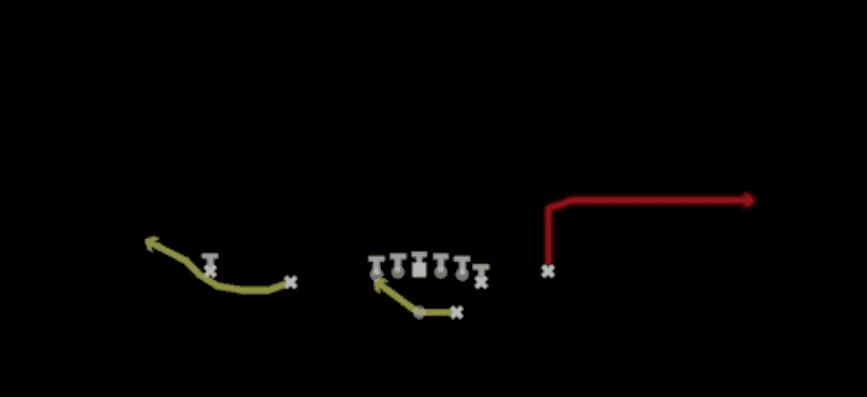 RPO Alert OutRPO, Out, Pass Play +1
 RPO Glance PostRPO, Post, Pass Play +1
 RPO Peek SpotRPO, Spot, Pass Play +2
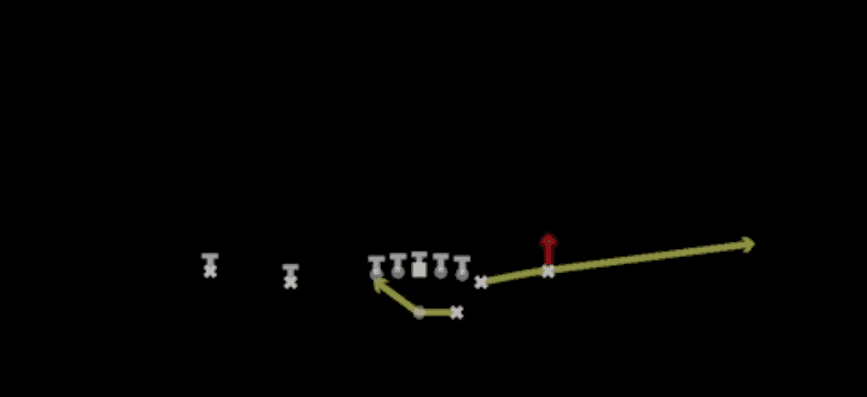 RPO Peek StickRPO, Stick, Stick Concept +2
- RPO Zone Alert OmahaRPO, Pass Play, Run Play +2
- RPO Zone Omaha HitchRPO, Hitch, Pass Play +3
- RPO Zone Peek GlanceRPO, Pass Play, Run Play +2
- RPO Zone SnagRPO, Snag, Snag Concept +6
- RPO Zone StickRPO, Stick, Stick Concept +3
- RZ Cross HB ChoiceCrosser, Option Route, Corner +3
- Same Side ZoneRun Play
 Wheel SwitchWheel, Pass Play, Post Corner +2
 Y-SailSail, Pass Play, Cover 2 Beater +6
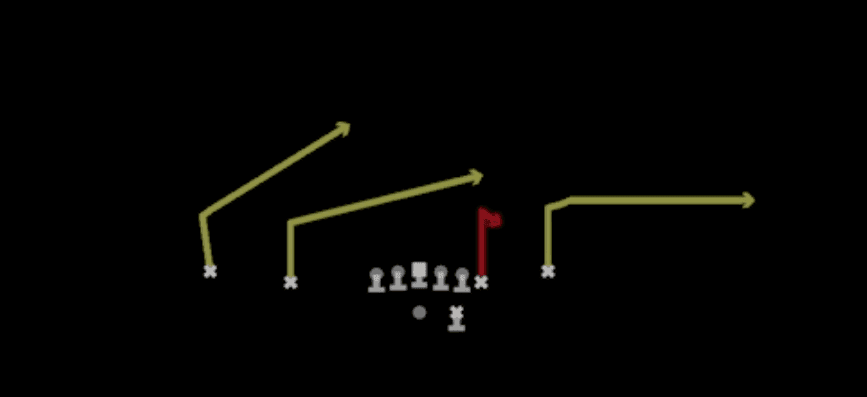 Y StickStick, Stick Concept, Pass Play +3
 Y-Stick DigDig, Stick, Stick Concept +5
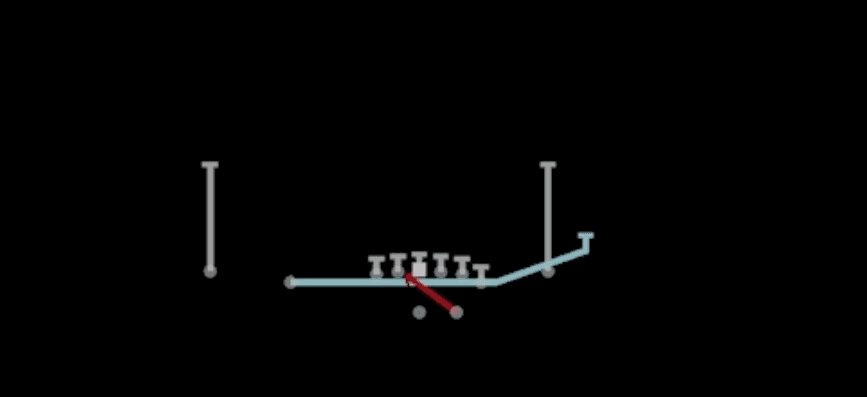 Zone Fake JetMotion, Run Play









