Playbooks

At a Glance
Overview
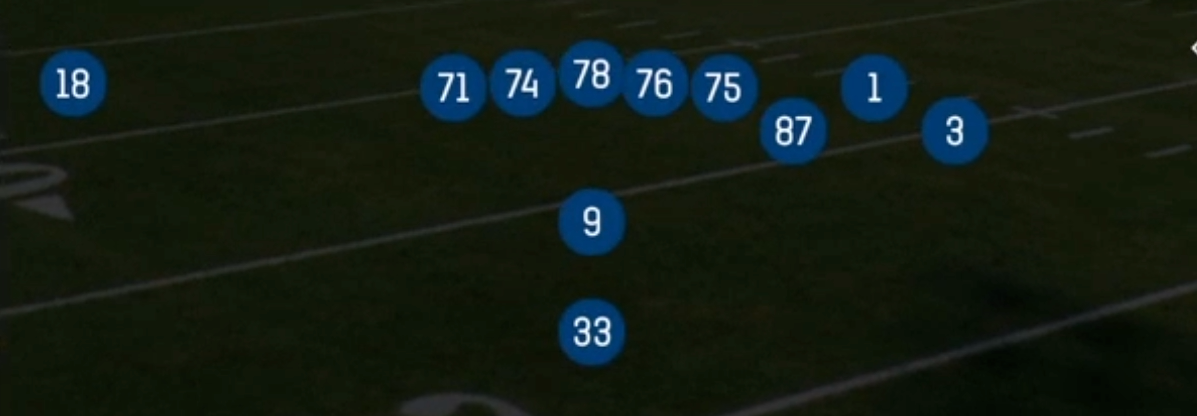
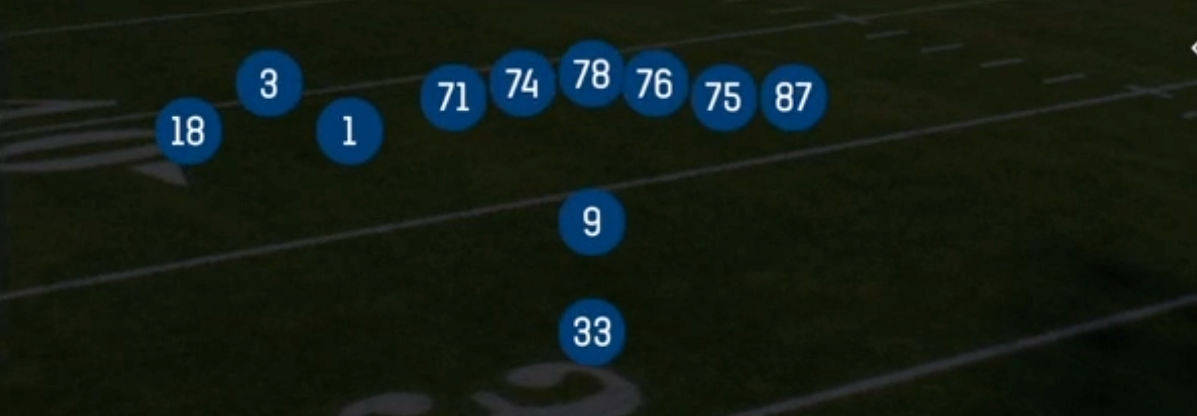
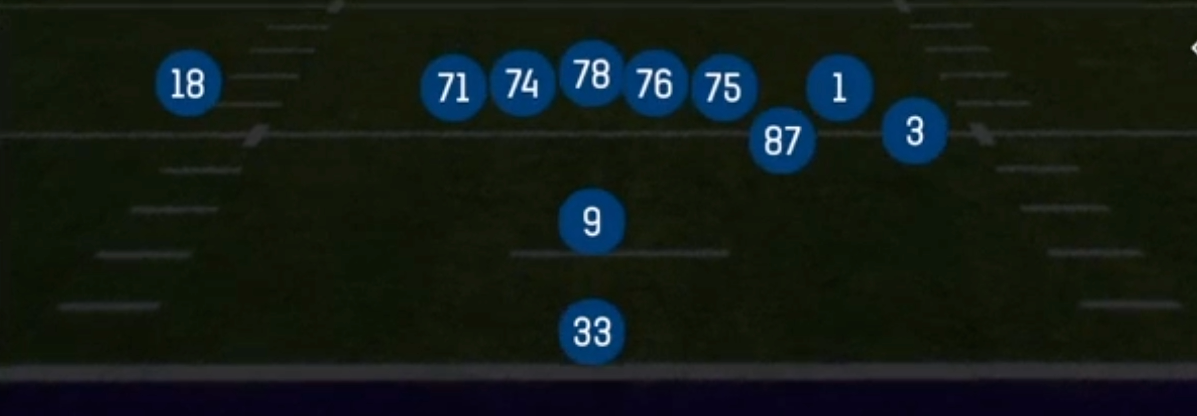
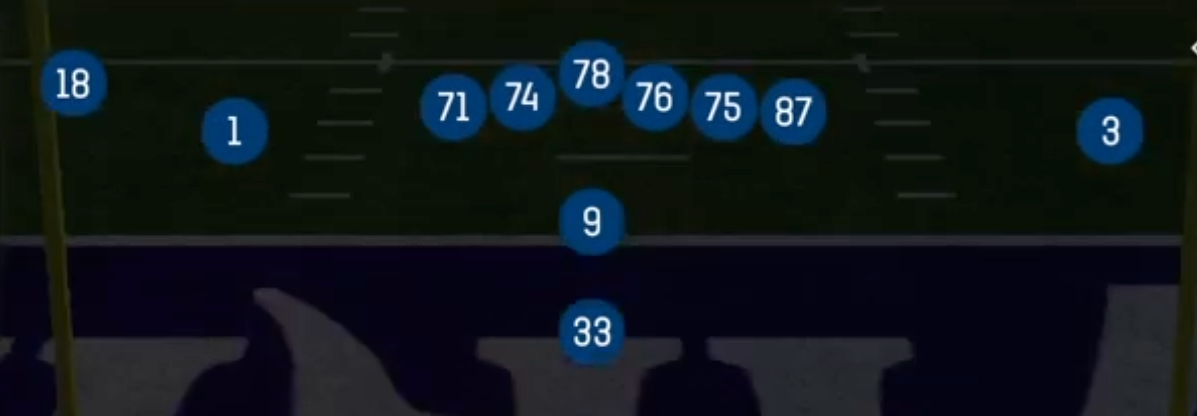
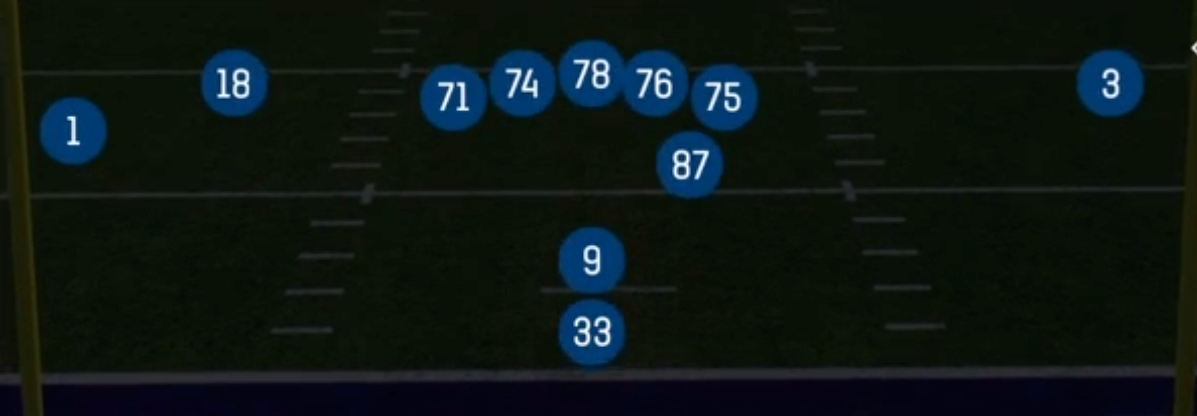
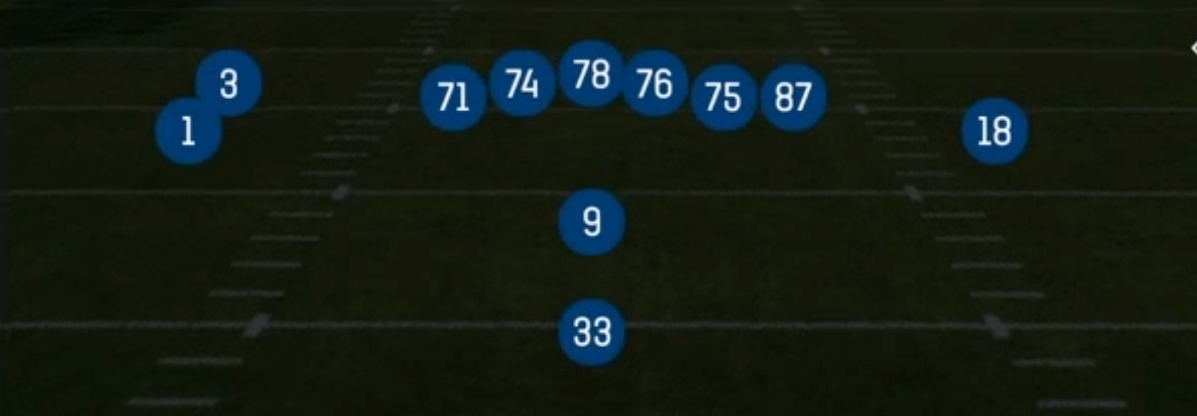
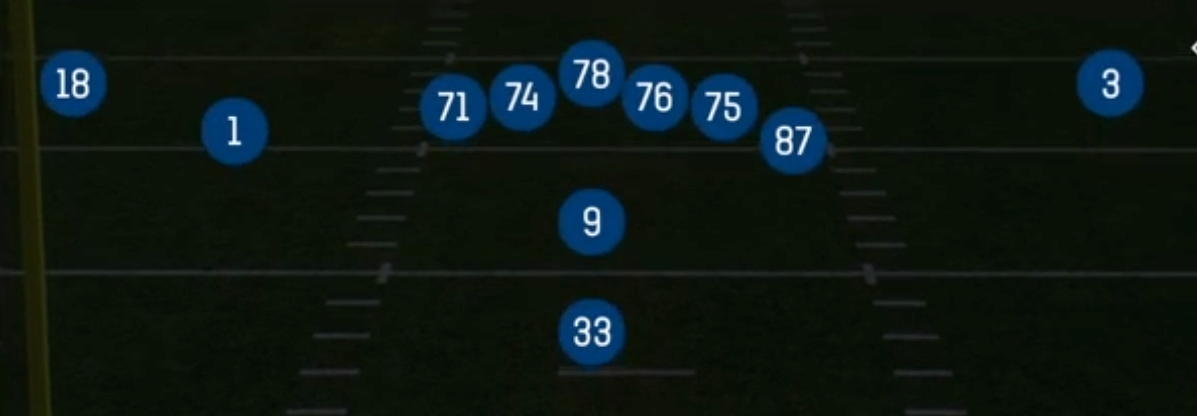
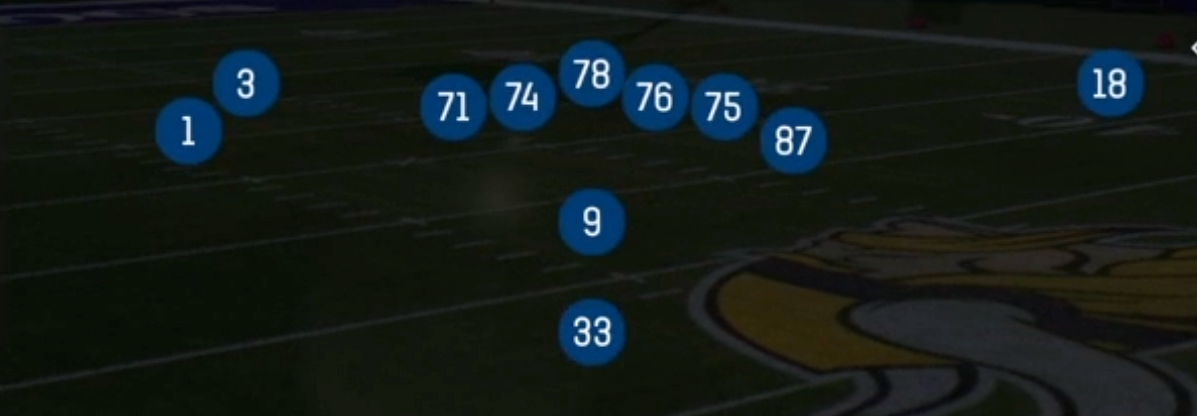
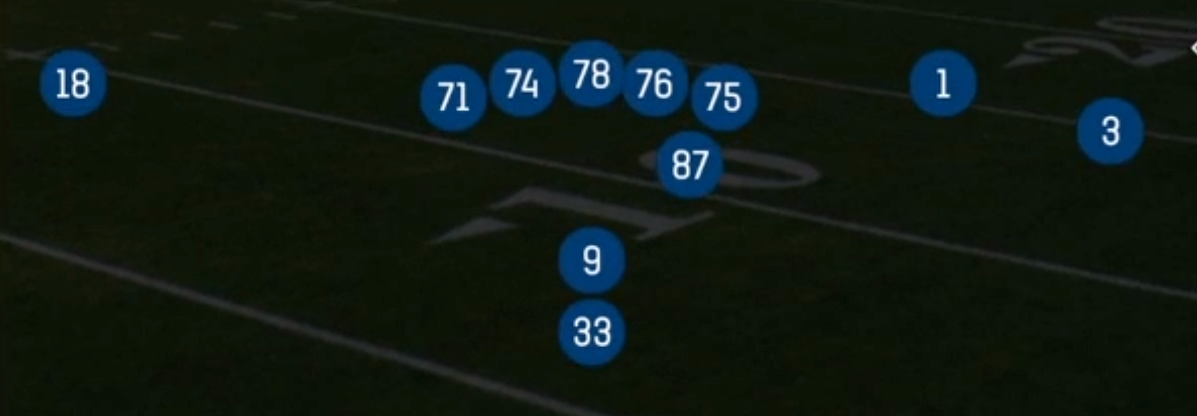
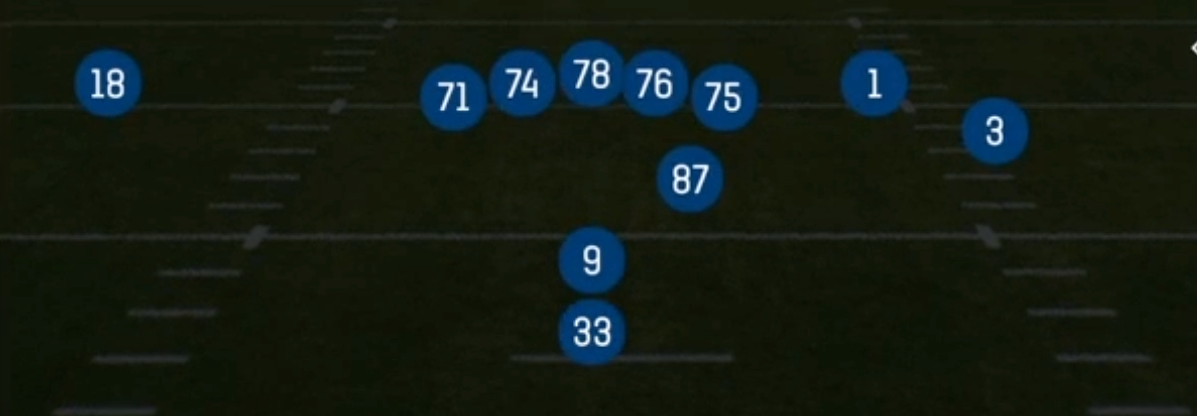
Y Off Trips in the Pistol puts three receivers to one side with the tight end set as the off-ball Y, usually in a wing or flexed alignment just behind the line inside the two slot and outside receivers. The X receiver is isolated on the backside and the halfback sits directly behind the QB. That depth gives you a balanced run threat to both sides, which a true Shotgun trips set cannot offer. Compared to the tighter Pistol sets, this look spreads the defense horizontally while keeping an 11 personnel blocker attached to the strength of the formation. Defenses have to choose between respecting the run and rotating coverage toward trips.
Because the Y is off the ball, he can motion, arc block, or release into seams and crossers without a jam at the line. That makes him the key to the playbook. Counter Y, Counter GT Alert Smoke, and PA Counter Y Screen use him as a puller or kick-out blocker. Mtn Seam Y Z-Choice, Vertical TE Cross, and Posts Y Wheel isolate him on linebackers and safeties in space. When a defense matches trips with a nickel or dime package to handle the slot receivers, the Y draws a smaller defender in the run game. When it stays in base, you get a linebacker covering the TE up the seam.
The set is loaded with RPOs (RPO Alert Bubble, RPO Alert Slant, RPO Glance Post), Alert Smoke tags, play-action boots, and a full wide zone and inside zone run tree. That lets you stress box counts and coverage rotation on every snap. The backside X gets true one-on-one looks when the defense rolls toward trips, and the Gadget and SLWR tags reflect how much this set relies on slot receivers and misdirection to create leverage.
Strengths
- Trips strength with an off-ball Y creates instant numbers problems on the frontside: Strong Flood, Dash Flood, and Rollout Flood stack three levels against Cover 3 and Cover 4 cloud rotations, and the Y releasing late often goes unaccounted for in the flat or intermediate out.
- The isolated backside X is a premium man beater: when the defense shifts or rotates coverage toward trips, the Alert tags on Counter GT Alert Smoke, HB Slam Alert Smoke, and Stretch Alert X Lookie give you a pre-snap free throw to the X against soft or single-high looks.
- Pistol depth plus the off-ball Y creates a legit two-way run game: Mtn Wide Zone, Inside Zone Split, Counter Y, and Return HB Power all hit downhill, and the Y can wham or arc block, so defenders cannot key the RB alignment to predict run direction.
- RPO Glance Post, RPO Alert Slant, and RPO Alert Bubble punish light boxes and overplaying linebackers: read the conflict defender post-snap and throw the slant or glance into vacated zones, or hand off when the second level widens to trips.
- The play-action boot package (PA Boot Slide, Mtn PA Boot RT, PA Boot RT, Mtn PA Boot Slide) sells off wide zone action and delivers the Y on a slide route across the formation, which kills aggressive Cover 1 users who crash the run fit.
Weaknesses
- Trips alignment tips pass-heavy intent, and smart opponents will check to Cover 3 Buzz or trips-check Cover 4 variants that bracket the slot and leave a robber sitting on the Y's crosser and seam paths.
- With the Y off the ball and only five linemen truly attached, edge pressure from the boundary side is dangerous: nickel and dime zero blitzes that overload away from trips can beat the RB's protection pickup before deep concepts like Four Verticals or PA Double Post develop.
- A user-controlled safety or middle linebacker who hangs in the hook zone can erase Mtn Seam Y Z-Choice, Vertical TE Cross, and PA Slot Cross, since most of the set's best concepts attack that same middle window.
- The backside X alert is predictable if you hit it too often; opponents will shade a corner or show press man with safety help over the top, turning your free throw into a pick six opportunity.
- The run game depends on the Y as a blocker, so if your TE has low run block ratings, counters and wide zone lose their edge, and a nano blitz through the vacated C gap on the trips side can blow up handoffs in the backfield.
Usage Tips
Count the box pre-snap: if the defense shows six or fewer defenders with a nickel matching trips, check to Inside Zone Split, HB Slam, or Counter Y; if you see seven or more, audible to RPO Alert Slant or RPO Glance Post and throw into the vacated second level.
On early downs against single-high, run Counter GT Alert Smoke or Stretch Alert X Lookie and read the backside corner before the snap; if he is playing off in press bail or cushion, throw the smoke or lookie to the X immediately.
On 3rd and medium against man, use Slants or Curls and hot route the Y to a drag or slant to create a natural rub off the trips stack; against zone, Strong Flood and Dash Flood give you a three-level read with the flat as a safe checkdown.
Set up the play-action game after two or three wide zone runs: call Mtn PA Boot RT or PA Boot Slide, and if the defense is in man, hot route the X to a streak to pull the backside safety wide and open the Y slide underneath.
In the red zone and in two-minute situations, lean on Fake Screen Wheel, PA Counter Y Screen, and HB Slip Screen to punish aggressive blitzers, and keep Four Verticals or Posts Y Wheel in your audibles to attack Cover 2 when the defense spins to protect the sideline.
Plays (45)
 Counter GT Alert SmokeCounter, Run Play, Power Run +2
- Counter YRun Play
 Counter YCounter, Run Play, Power Run
 CurlsCurl, Pass Play, Flat +1
- Dash FloodComeback, Curl, Deep Cross +3
 Fake Screen WheelPlay Action, Screen Pass, Wheel +3
 Four VerticalsFour Verts, Pass Play, Cover 2 Beater +7
 HB DiveDive, Run Play
 HB DrawDraw, Run Play
 HB SlamDive, Run Play
 HB Slam Alert SmokeDive, Run Play, Bubble Screen +1
 HB Slip ScreenScreen Pass, Hb Screen, Pass Play +5
- HB Split DiveRun Play
- HB StretchRun Play
- HB Wide Zone WkRun Play
- HB ZoneRun Play
 Inside Zone SplitInside Zone, Run Play, Zone Run
 Lead Swing Dbl SpotSwing, Spot, Pass Play +3
- Mtn HB Wide Zone WkRun Play
 Mtn PA Boot RTPlay Action, Motion, Pass Play +5
 Mtn PA Boot SlidePlay Action, Slide, Motion +6
 Mtn Seam Y Z-ChoiceSeam, Option Route, Motion +1
 Mtn Wide ZoneOutside Zone, Motion, Run Play +1
- PA Boot RTBlock and Release, Comeback, Deep Cross +4
 PA Boot SlidePlay Action, Slide, Pass Play +4
- PA Counter Y ScreenScreen Pass, Bubble Screen, Hook +4
 PA Double PostPlay Action, Post, Double Posts +5
 PA ScissorsPlay Action, Scissors, Pass Play +6
- PA Slot CrossCrosser, Curl, Post +4
- PA Slot SeamSeam, Hook, Streak +2
- PA Stretch ShotComeback, Post, Stop And Go +4
- Posts Y WheelPost, Wheel, Deep Cross +4
 Return HB PowerPower, Motion, Run Play +1
 Return PA Middle DividePlay Action, Motion, Pass Play +4
- Return PA Seam Y Z-choicePlay Action, Seam, Option Route +5
- Rollout FloodCorner, Deep Cross, Crosser +2
- RPO Alert BubbleBubble Screen, Option Route, Pass Play +1
- RPO Alert SlantSlant, Pass Play, Run Play
- RPO Glance PostPost, Pass Play, Run Play
 SlantsSlant, Pass Play
 Stretch Alert X LookieOutside Zone, Run Play, Zone Run +2
 Strong FloodFlood, Pass Play, Cover 3 Beater +5
 Vertical TE CrossCrosser, Pass Play, Angle +2
- Wide ZoneRun Play
 Y Lead Read OptionRead Option, Run Play