Playbooks

At a Glance
In 1 playbook
Overview
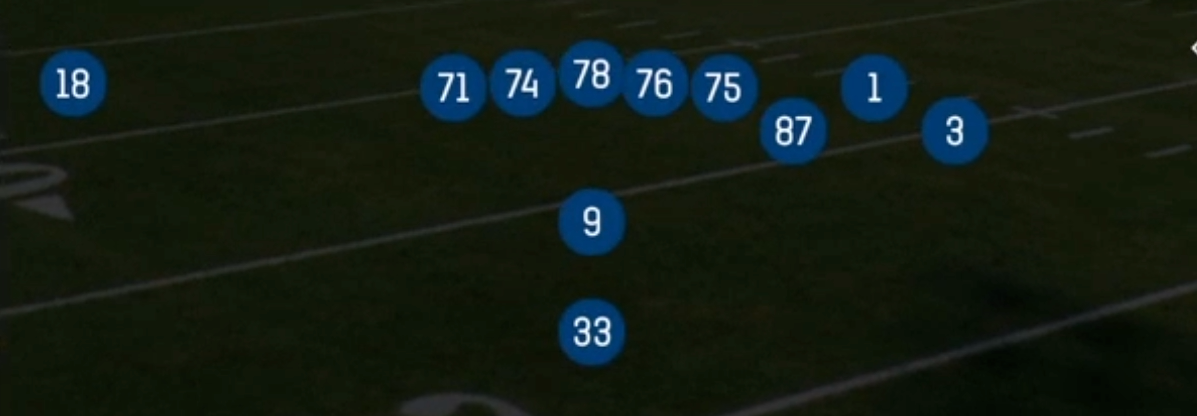
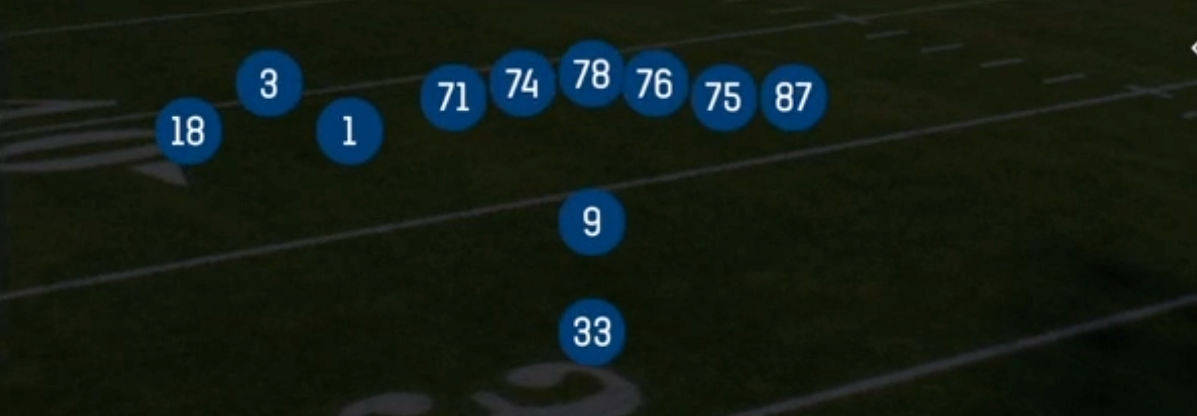
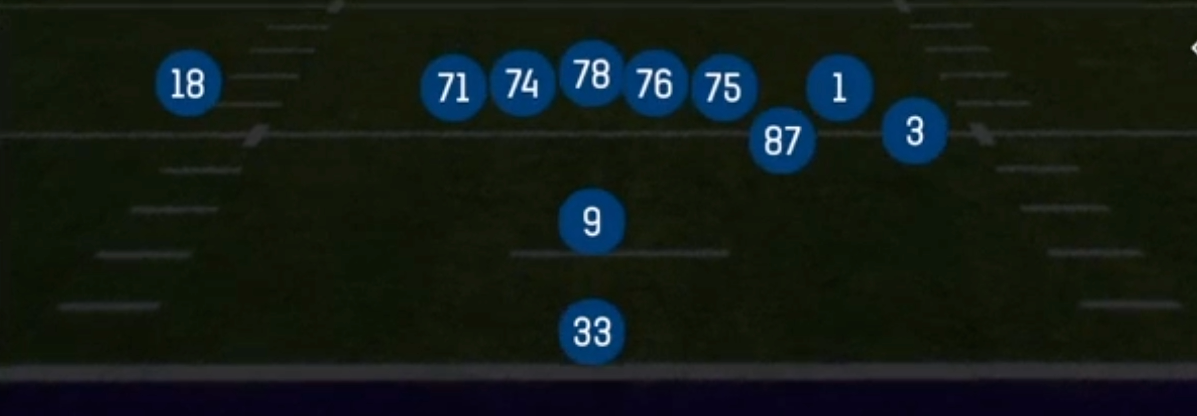
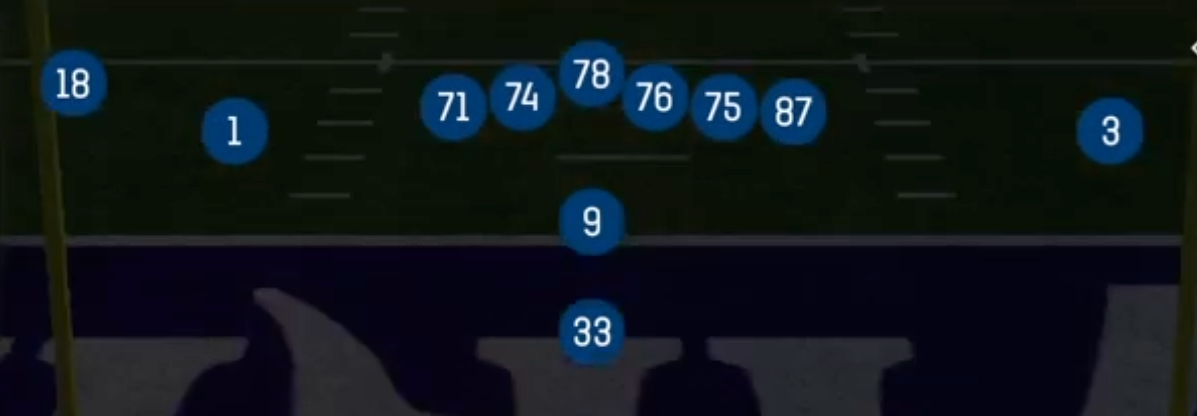
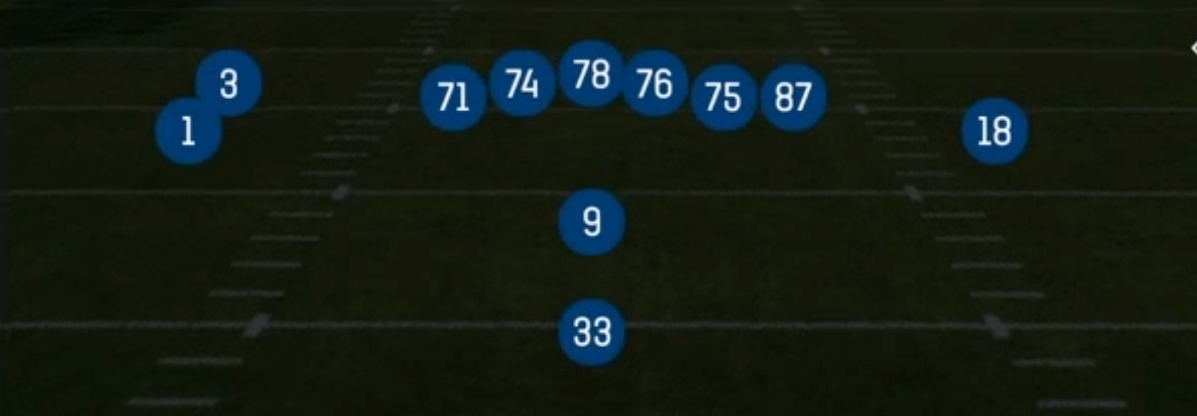
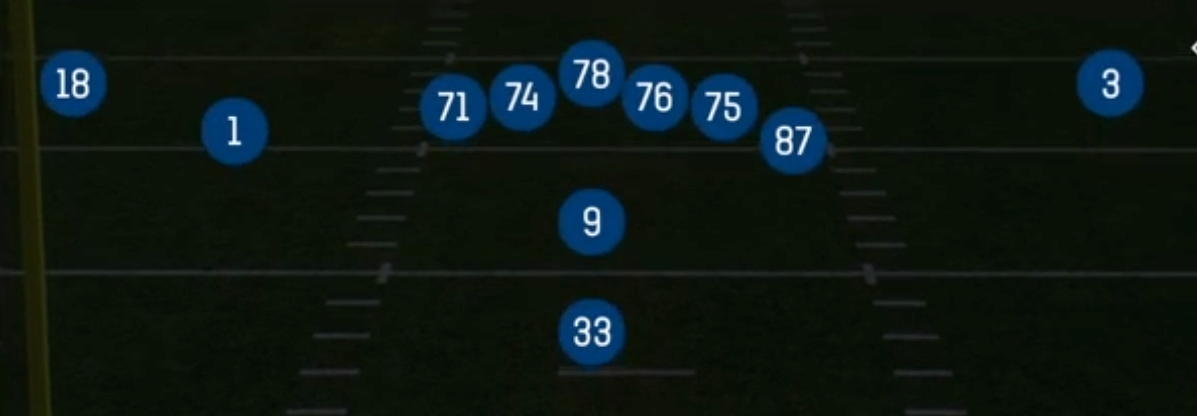
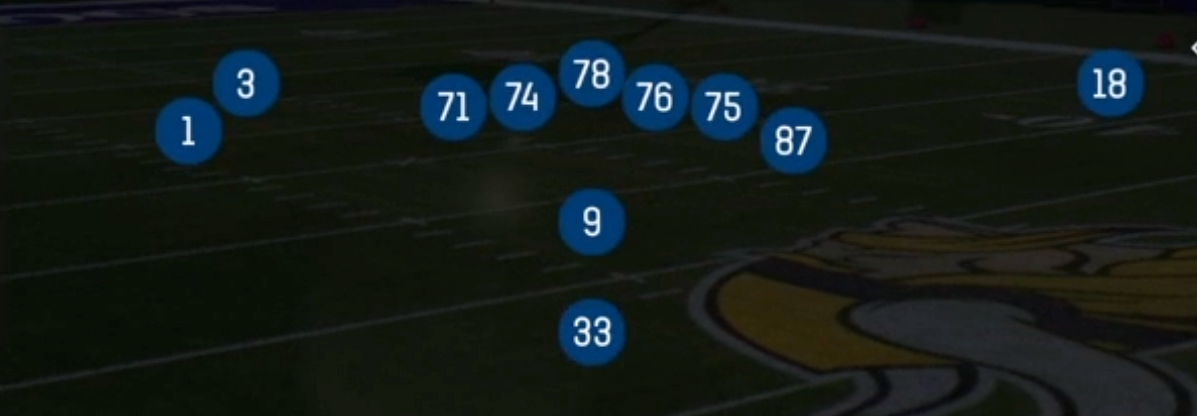
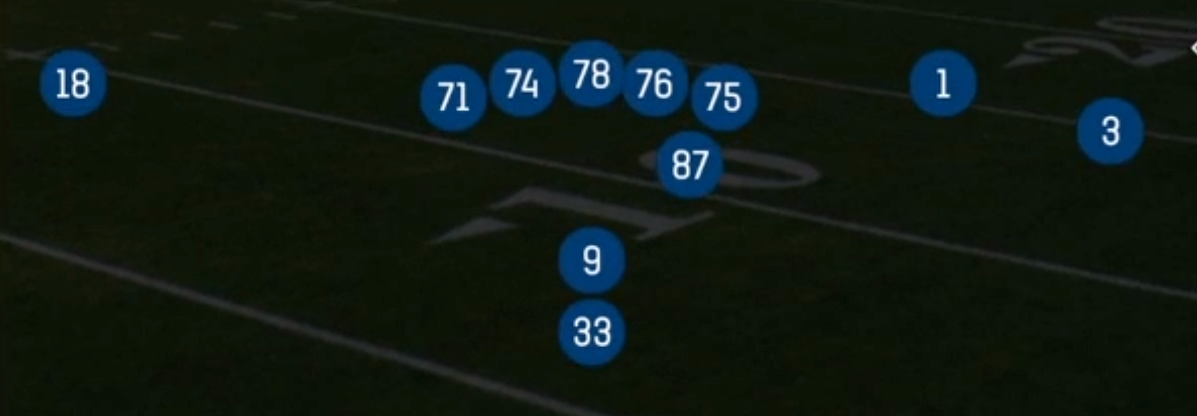
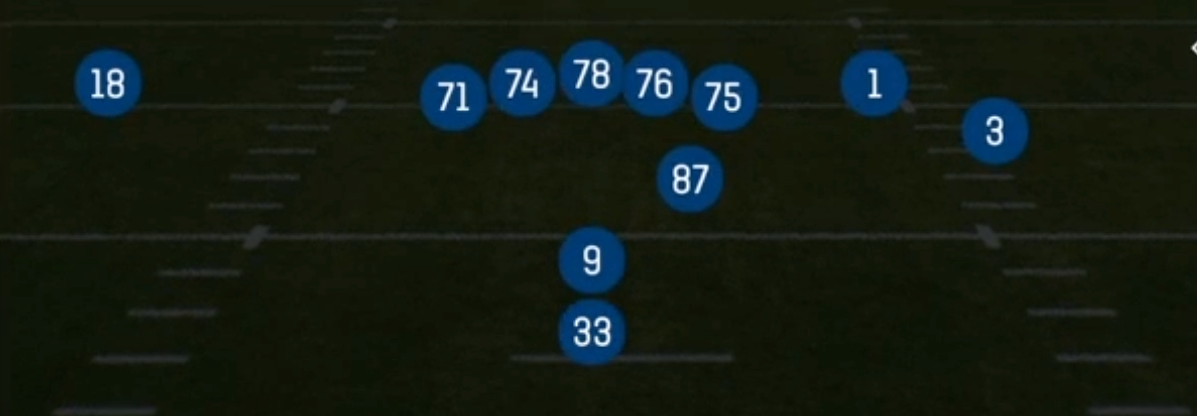
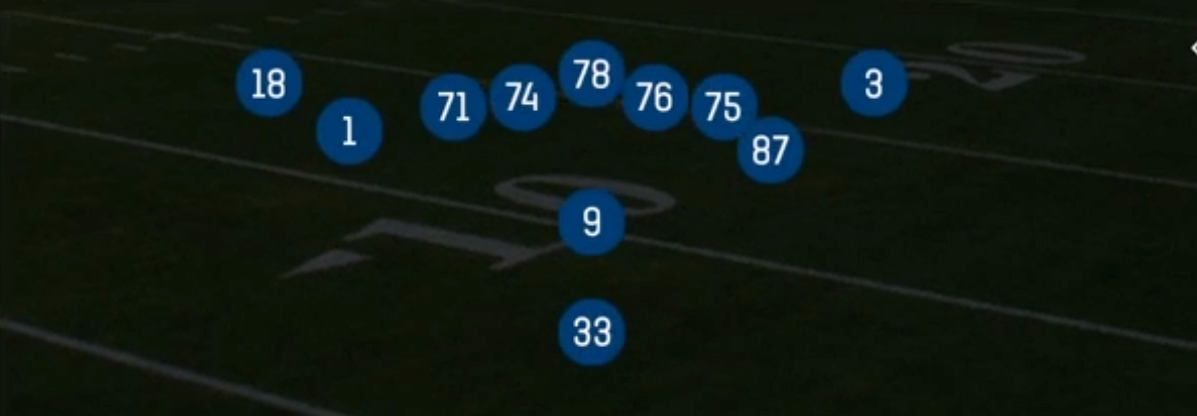
Doubles Flex Hip is a 2x2 look out of the Pistol built from 11 personnel. It splits two receivers to each side, but instead of pinning the tight end on the line or pushing him out to a true slot, it tucks him into a flexed hip alignment just off and outside the tackle. That detached spot is what separates this set from standard Pistol Doubles or Pistol Trips looks. The TE can arc block, kick out an edge defender, lead through the hole on option looks, or release cleanly into the seam without getting jammed at the line. The running back stays directly behind the quarterback, which keeps the downhill Pistol run game intact while the defense has to respect a spread 2x2 surface.
The hip alignment makes the TE the key piece of the set. He is close enough to the box to function as a sixth blocker on Inside Zone Split and Counter Y, and far enough away to threaten the middle of the field on Vertical TE Cross and PA Boot Slide. Defenses that match with base personnel leave a linebacker responsible for a flexed TE in space. Defenses that go nickel to handle the three receivers get lighter at the point of attack against the split zone and counter looks. That conflict is why the set carries the Gadget tag. Misdirection, split flow, and option reads all come from one alignment.
The play list covers every level of the field. Quick game (Slants, Curls), screens and draws (HB Slip Screen, HB Draw), gap and zone runs with the TE as a moving blocker (Inside Zone Split, Counter Y, F Lead Read Option), and shot plays off run action (PA Boot Slide, Vertical TE Cross) all share the same presnap picture. With that much variety, opponents cannot key personnel or alignment to predict the call, and you can isolate the backside X receiver one on one whenever the defense rolls coverage toward the TE side.
Strengths
- The flexed hip TE creates a true run/pass conflict: Inside Zone Split and Counter Y use him as a kick out or wham blocker, then PA Boot Slide and Vertical TE Cross use the identical first step to release him across the field behind flowing linebackers.
- The 2x2 spread forces defenses to declare their shell presnap, so you can check to Slants against Cover 1 and Cover 0 or to Curls against Cover 3 and Cover 4 without changing formation or personnel.
- F Lead Read Option gives you a numbers advantage against light nickel boxes because the TE leads for the QB keep while the mesh reads the unblocked edge, which punishes defenders who crash the dive.
- PA Boot Slide is an excellent man beater and flat flood: the TE slide route leaks underneath the boot while the backside receivers run clear outs, giving you a high, medium, low read on the rollout that beats both Cover 1 and Cover 3 cloud rotation.
- HB Slip Screen and HB Draw give you built in blitz answers from the same alignment, so aggressive pressure calls against your drop back looks get punished without needing a separate formation.
Weaknesses
- The quick game menu is thin, so opponents who press both sides and bring a Cover 0 look can force you into Slants every time or burn a timeout on a hot route audible.
- When the TE works across the formation on Counter Y or Inside Zone Split, he leaves an edge exposed to a pass protection mismatch, and a user blitzed backside end or overload zone blitz can hit the QB before the boot or play action fake finishes.
- A user controlled middle linebacker or robber safety sitting in the hook zone can shut down Vertical TE Cross and the TE slide route, taking away the primary read on the two best shot plays in the set.
- Nano blitz setups from the field side overload the three blocker surface, and since the RB is in the Pistol mesh he has less time to pick up the free rusher than he would from a shotgun offset alignment.
- Against disciplined edge contain with a spy or a user on the QB, F Lead Read Option loses its value, and the option looks become predictable once opponents key the TE motion and leadblock path.
Usage Tips
Use the box count presnap as your first read: with six or fewer defenders in the box, stay on Inside Zone Split or F Lead Read Option; with seven or more, check to PA Boot Slide or Slants to attack the thin secondary.
On first and 10, lean on Counter Y and Inside Zone Split early to condition linebackers to trigger on the TE pull, then call PA Boot Slide and Vertical TE Cross on second and short when the defense sells out against the run.
Against Cover 2 and Tampa 2 looks, hot route the outside receiver on Curls to a streak to hold the corner, which opens the curl window and the flat for the RB check release.
When you spot a blitz tell (slot defender creeping down or linebackers walking up into the A gaps), audible to HB Slip Screen or HB Draw instead of running a slow developing play action.
In the red zone, Slants and Vertical TE Cross work well off the compressed field; slide protection toward the boundary and put the backside X on a fade hot route against single high man coverage.
Plays (9)
 Counter YCounter, Run Play, Power Run
 CurlsCurl, Pass Play, Flat +3
 F Lead Read OptionRead Option, Run Play
 HB DrawDraw, Run Play
 HB Slip ScreenScreen Pass, Hb Screen, Pass Play +5
 Inside Zone SplitInside Zone, Run Play, Zone Run
 PA Boot SlidePlay Action, Slide, Pass Play +5
 SlantsSlant, Pass Play, Flat
 Vertical TE CrossCrosser, Pass Play, Out +3