Playbooks

At a Glance
Overview
Shotgun Tight Y Off is an 11 personnel set (1 RB, 1 TE) that places the tight end in a flexed wing alignment just off the line of scrimmage instead of attached to the tackle. That one-step difference changes the whole set. Because the Y is off the ball, he can motion across the formation, arc block on the perimeter, insert as a lead blocker on Duo and Inside Zone, or release into routes without getting jammed. Standard Shotgun Doubles and Trey sets keep the TE either attached or split wide. Tight Y Off keeps him as a hybrid piece, so defenders reading formation tendencies have a harder time telling run from pass before the snap.
The wide receivers stay spread to stretch the field horizontally, while the compressed Y side creates a natural run strength and a strong side for flood and corner concepts. That spacing lets you build numbers-based reads: RPO Alert Bubble and RPO Peek Slant make the overhang defender choose between the run fit and the perimeter throw. Jet and Mtn motions (Jet Touch Pass, Mtn Spinner HB Inside, Mtn WR Outside Zone) put a speed receiver on the move and pull linebackers out of their gaps. Cheat motions like Cheat Outside Zone and Cheat Slash Wheel Cross let you tighten splits to set up rubs and crack blocks.
The playbook covers almost everything. You get gap and zone runs (Duo, 0 1 Trap, Jet HB Trap, Inside Zone), a deep RPO menu, core man beaters (Mesh Spot, Mesh Whips, Deep Crossers, Choice Pivot Return), zone beaters (Flood Drive, Stick, Wheel Spot), screens (HB Slip Screen, PA Jailbreak Screen), and shot plays (Doubles Shot, PA Go Slot Cross). The off-ball Y is the key to the matchups. Against base he can be a mismatch on a linebacker (TE Corner, Fake Jet HB Seam). Against nickel or dime he gives you an extra blocker for the Power HB and 3DRB run game.
Strengths
- The off-ball Y makes run and pass look identical before the snap, so Duo, Inside Zone, and Jet HB Trap look like RPO Peek Slant and PA Slot Cross, which punishes defenders who guess by alignment.
- A deep RPO menu (RPO Alert Bubble, RPO Zone Alert Glance, RPO Zone Alert Omaha, RPO Peek Slant Bubble) puts the apex and overhang defenders in conflict against both Cover 3 and Cover 1, giving you easy yards without a single dropback read.
- Mesh Spot, Mesh Whips, Deep Crossers, and Choice Pivot Return are elite man beaters: crossers at two levels create natural rubs against Cover 0 and Cover 1, and the Y releasing from off the ball avoids press jams.
- Flood Drive, Stick, and Wheel Spot overload one side of Cover 3 and Cover 4 zones, and hot routing the outside WR to a streak clears the flat for the Y or HB.
- Jet, Mtn, and Cheat motions (Jet Touch Pass, Mtn Spinner HB Inside, Cheat Slash Wheel Cross) reveal man versus zone before the snap and shift run fits, which is ideal for SLWR and Gadget players on the edge.
Weaknesses
- With only one TE and five linemen, max protection options are limited, so heavy pressure against the Y side (edge plus nickel nano blitz) can get home before Mesh or Deep Crossers develop.
- A user-controlled linebacker dropping into the middle hook zone can take away the mesh point, the slant window on RPO Peek Slant, and the Stick sit route all at once, so you need a secondary read ready.
- The off-ball Y alignment tips a strong side, and smart opponents shade their run fit and use slant or pinch line shifts toward the wing to blow up Duo and Inside Zone before the lead block arrives.
- The deep shot game is thinner than in empty or 4-wide sets. Against Cover 2 Man or Cover 6 with safeties over the top, Doubles Shot and PA Go Slot Cross often end in checkdowns.
- Jet and Mtn motion plays need timing on the snap, and defenses using motion-adjust coverage or spinning to a Cover 3 Buzz can sit on Jet Touch Pass and the bubble throw.
Usage Tips
Before the snap, count the box: with six or fewer defenders and no low safety to the Y side, run Duo or Inside Zone. With seven or more, check to RPO Alert Bubble or RPO Zone Alert Glance and throw away from the numbers.
Use a Jet or Mtn motion on first down to diagnose coverage. If a defender follows across, you have man, so audible to Mesh Spot or Choice Pivot Return. If the defense rotates, work Flood Drive or Stick against zone.
On 3rd and short, lean on Mtn Y-Corner and TE Corner against Cover 3 and Cover 4, and hot route the HB to an angle or block depending on blitz look. Against Cover 0, check to Mesh Whips for a guaranteed rub.
In the red zone, Redzone Scissors and Cheat Slash Wheel Cross create stacked releases that beat both man and matchup zones. Keep Cheat Spot Y Quick as your go-to audible when the defense crowds the goal line.
Once the opponent starts crashing the mesh, pair your Power HB runs with PA Jailbreak Screen and HB Slip Screen to slow down aggressive users and edge blitzers.
Plays (43)
 0 1 TrapTrap, Run Play, Power Run
 Cheat Outside ZoneOutside Zone, Motion, Run Play +1
 Cheat RPO Zone Alert BubbleRPO, Motion, Pass Play +3
 Cheat Slash Wheel CrossWheel, Motion, Pass Play +4
 Cheat Spot Y QuickSpot, Motion, Pass Play +6
 Choice Pivot ReturnOption Route, Pivot, Motion +5
 Deep CrossersCrosser, Pass Play, Block and Release +3
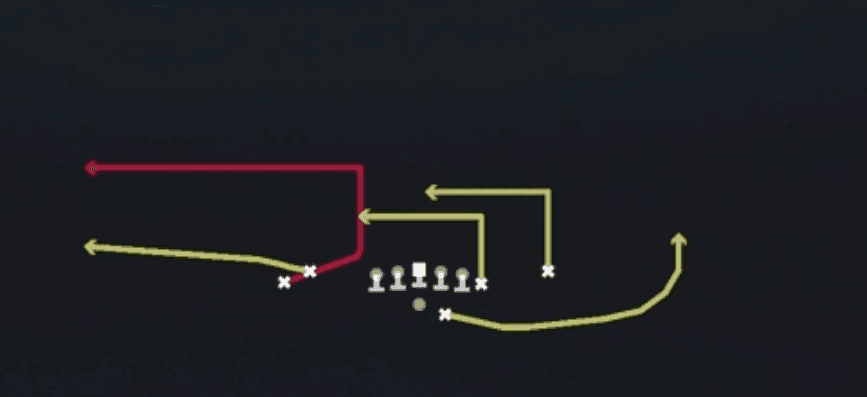 Double Ins Stack OutOut, Pass Play, In +2
 Doubles ShotPass Play, Post, Out +7
 DuoDuo, Run Play, Power Run
 Fake Jet HB SeamPlay Action, Seam, Motion +6
 Flood DriveFlood, Drive, Pass Play +8
 HB Slip ScreenScreen Pass, Hb Screen, Pass Play +2
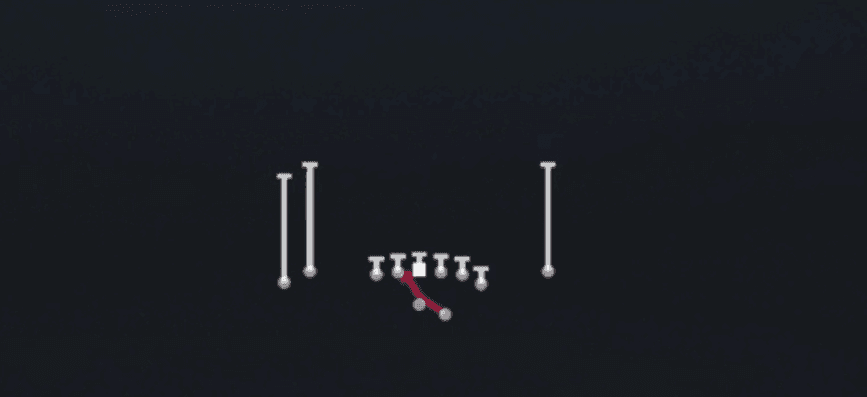 Inside ZoneInside Zone, Run Play, Zone Run
- Jet HB TrapRun Play
- Jet Pass Fk ZoneMotion, Run Play
 Jet Touch PassMotion, Run Play
 Mesh SpotSpot, Mesh, Pass Play +7
 Mesh WhipsMesh, Pass Play, Man Beater +5
 Mtn Mesh SpotSpot, Mesh, Motion +8
 Mtn PA SpinnerPlay Action, Motion, Pass Play +4
 Mtn Slot ChoiceOption Route, Motion, Pass Play +4
 Mtn Spinner HB InsideMotion, Dive, Run Play
 Mtn WR Outside ZoneOutside Zone, Motion, Run Play +1
 Mtn Y-CornerCorner, Motion, Pass Play +4
 PA Go Slot CrossPlay Action, Go, Pass Play +5
 PA Jailbreak ScreenPlay Action, Screen Pass, Wr Screen +3
 PA Slot CrossPlay Action, Pass Play, Crosser +4
 Read OptionRead Option, Run Play
 Redzone ScissorsScissors, Pass Play, Cover 2 Beater +5
 RPO Alert BubbleRPO, Pass Play, Run Play
 RPO Alert OutRPO, Out, Pass Play +1
 RPO Peek SlantRPO, Slant, Pass Play +1
 RPO Peek Slant BubbleRPO, Slant, Pass Play +1
- RPO Zone Alert BubbleRPO, Pass Play, Run Play +2
- RPO Zone Alert GlanceRPO, Pass Play, Run Play +2
- RPO Zone Alert OmahaRPO, Pass Play, Run Play +2
- RPO Zone PeekRPO, Pass Play, Run Play +2
 StickStick, Stick Concept, Pass Play +2
 Switch WR DragDrag, Pass Play, Corner +4
 TE CornerCorner, Pass Play, Angle +2
 Wheel SpotWheel, Spot, Pass Play +5
 Zone Fake JetMotion, Run Play









