Playbooks

At a Glance
In 57 playbooks
Overview
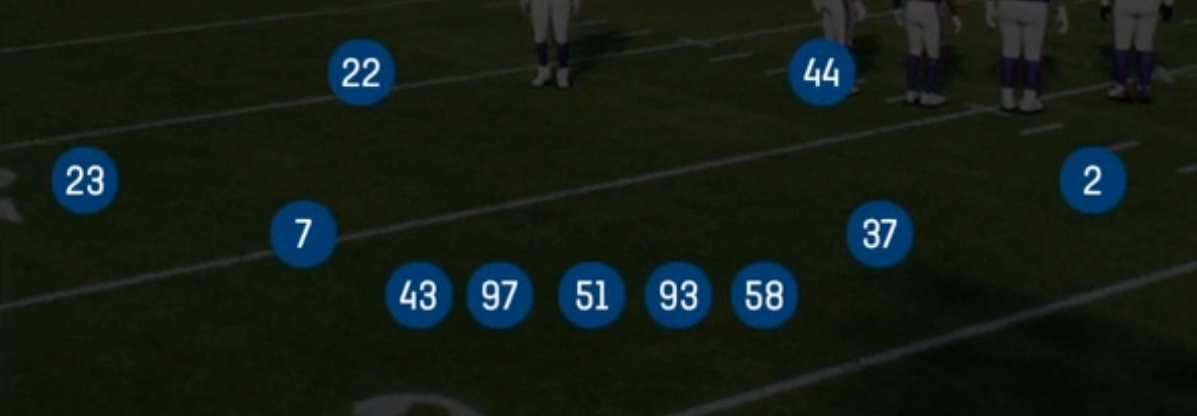
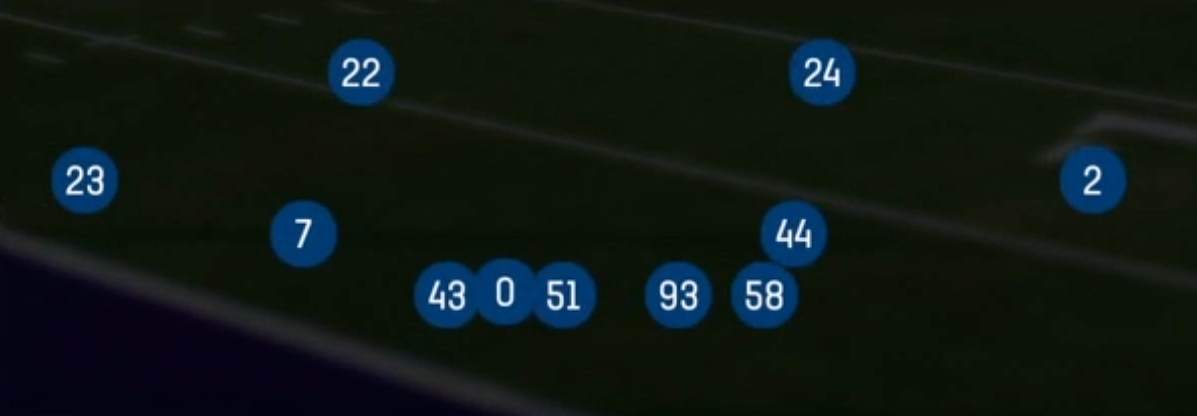
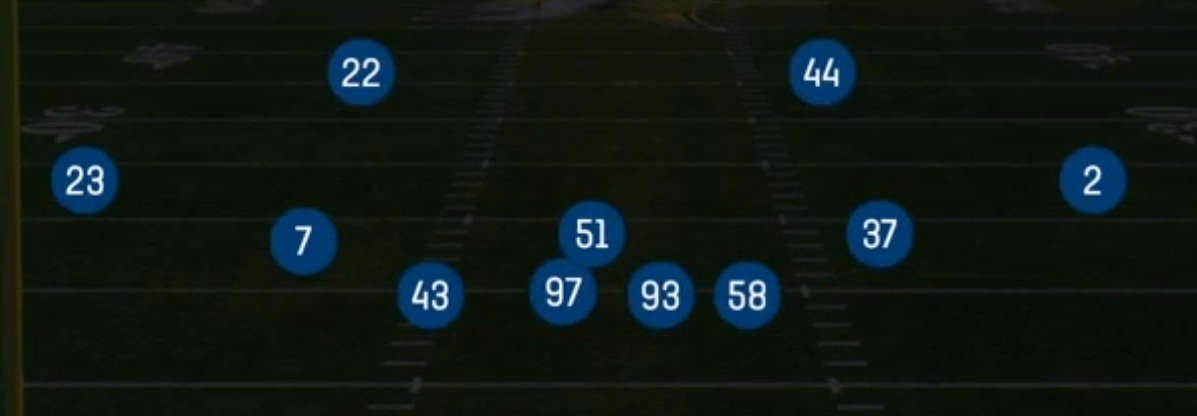
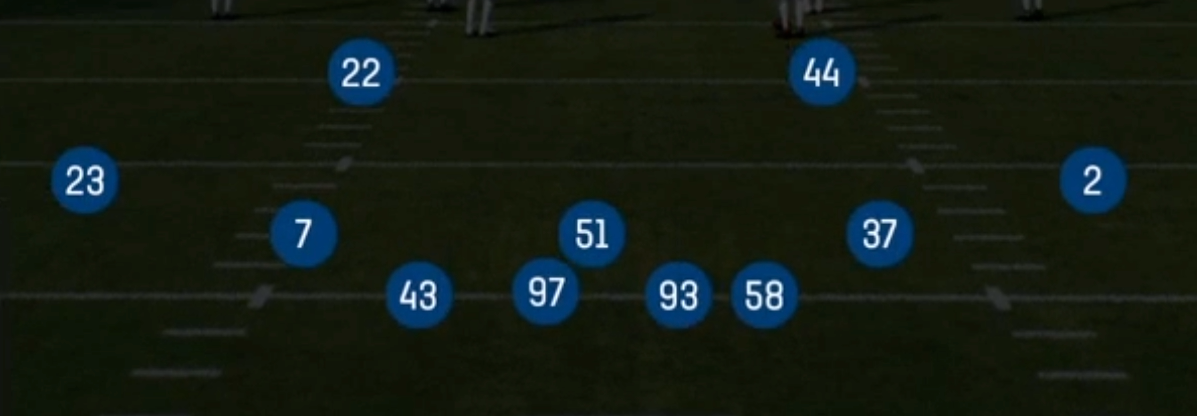
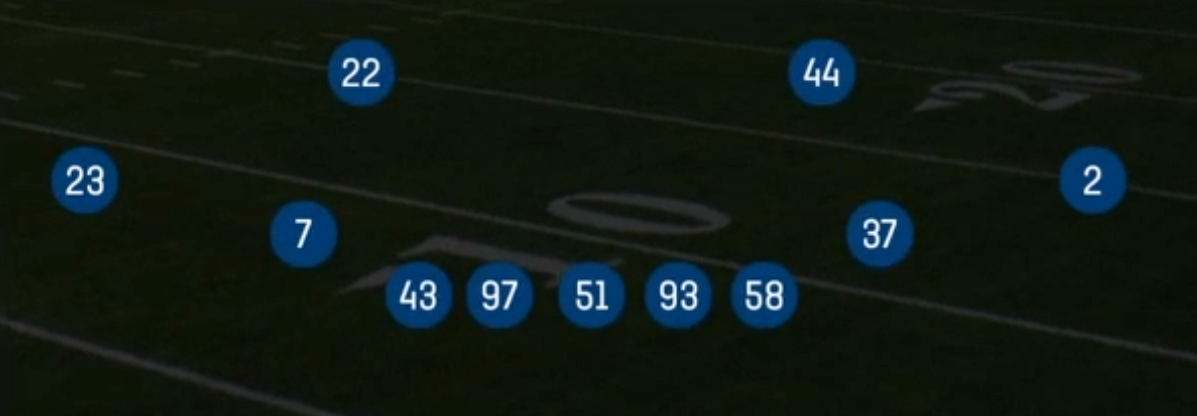
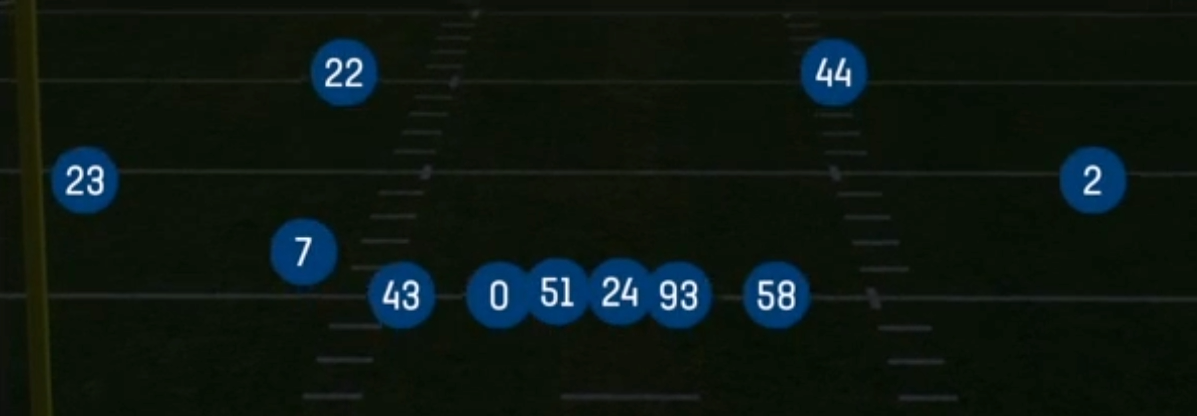
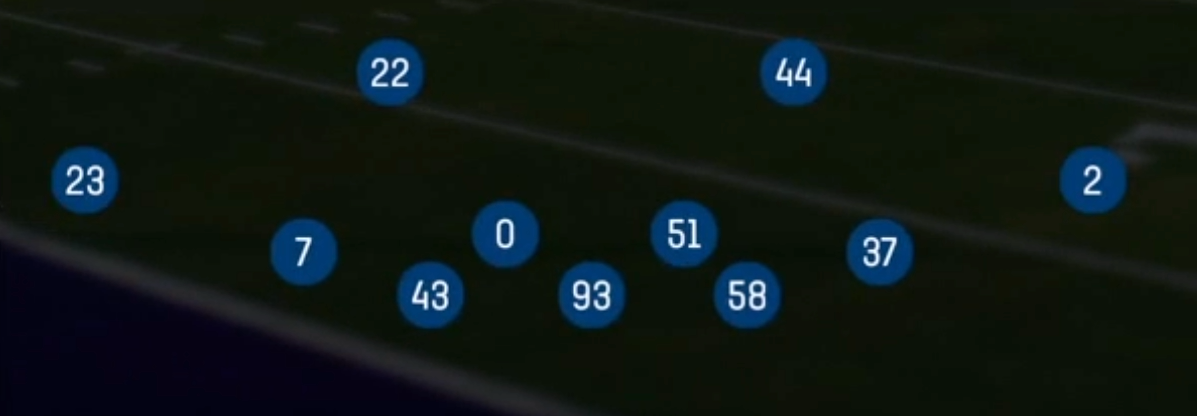
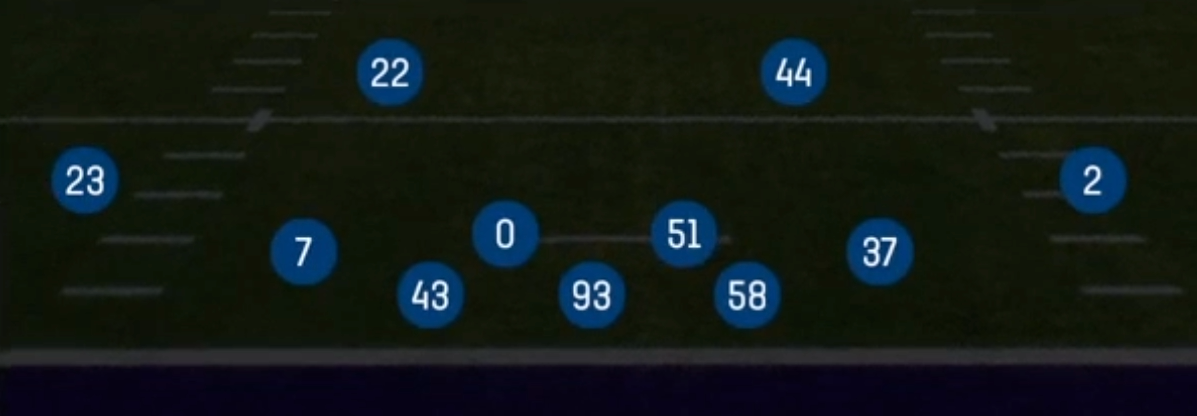
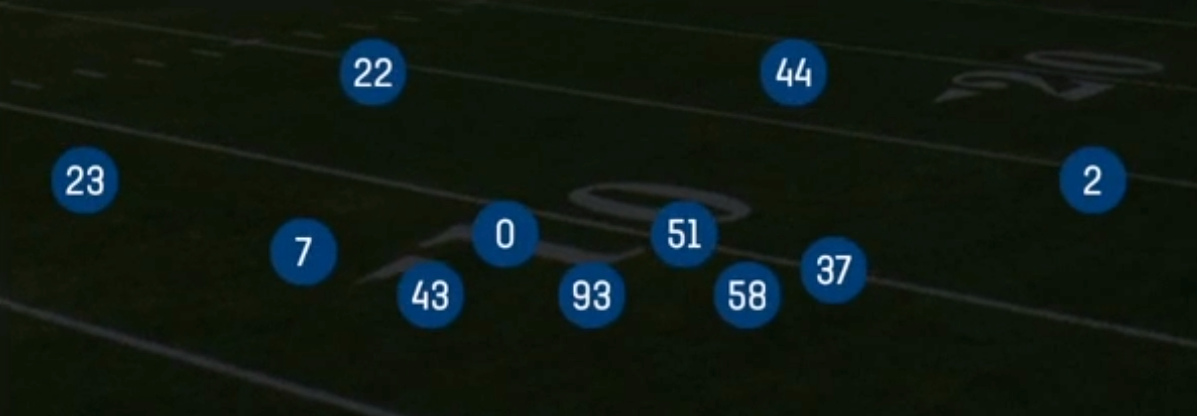
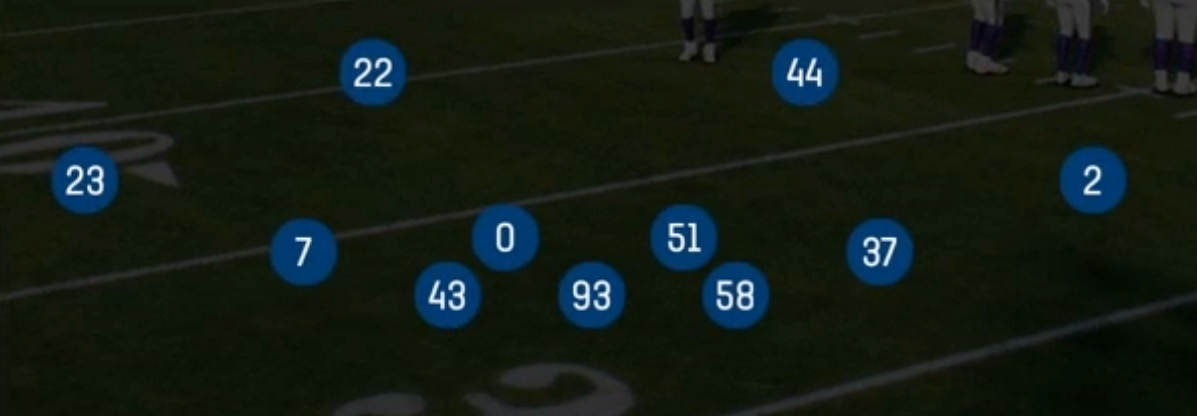
The 2-3-6 is a Dime alignment built on Big Dime 4-1-6 personnel. It keeps four true linemen on the field, but only the NT and RDT put a hand in the dirt. The RLE and RRE stand up in a two-point stance on the edges, and a lone SUBLB anchors the second level. Behind them sit six defensive backs, including a dedicated SLCB, so every eligible receiver in a spread set can be matched by a DB rather than a linebacker. Compared with a traditional four-down Dime or a 3-2-6 look, the stand-up edges are the key difference. The offense cannot tell pre-snap which of the four front players is rushing and which is dropping, and that ambiguity is the foundation of the set.
That disguise powers a deep menu of simulated pressures and creepers: Sim Pressure 3, Field Sim 3, Nickel Sim 2, and Buck Slant 3 can all show five or six rushers and bring four while dropping an edge into the flat or hook. From the same shell you can call true zeros like Edge Blitz 0 and FS Will Blitz 0, so offenses that read the look and assume a sim get punished. The playbook also layers in rotation and bracket calls (Roll 23 Cloud, Roll King, Roll Ring, Bracket 9 Switch, Double Bracket Switch, Cover 6 Show 2) that change the shell after the snap, which breaks pre-snap reads on Smash, Flood, Dagger, and Four Verticals.
The personnel package is built to erase matchup advantages that spread offenses normally create. Slot receivers and flexed tight ends draw a SLCB or safety instead of a linebacker, and the man calls (1 Double Wr1, 1 Double Wr2, 1 Double Slot, 1 Double TE) let you bracket whichever target the opponent leans on. The tradeoff is a light box with one true linebacker. The 2-3-6 is a passing-down weapon for 10 and 11 personnel, empty, and trips looks, not a base defense against heavy personnel.
Strengths
- Stand-up RLE and RRE disguise every pressure, so Sim Pressure 3, Field Sim 3, and Nickel Sim 2 look identical to Edge Blitz 0 and FS Will Blitz 0 pre-snap, baiting bad hot routes and bad protection slides.
- Six DBs let you run true man coverage (Cover 1 Hole, Cover 2 Man, Cover 1 Robber Show 2) with a SLCB or safety on every slot and flexed TE, removing the linebacker mismatch that most man beaters rely on.
- Targeted bracket calls (1 Double Wr1, 1 Double Slot, 1 Double TE, Double Bracket, Bracket Switch Willie) take away the opponent's primary read and force the ball to a lesser receiver.
- Post-snap rotations like Roll 23 Cloud, Roll Cover 3 Cloud, Roll King, Roll Ring, and Cover 6 Show 2 flip the shell after the snap, killing pre-snap reads on Smash, Dagger, and corner routes.
- Match and quarters coverages (Cover 3 Match, Cover 3 Buzz Match, Cover 4 Palms, Press Quarters, Cover 9 Sammie) handle Four Verticals, Flood, and mesh combos without leaving voids in the seams.
Weaknesses
- With only one true linebacker and a SUBLB, the box is light against 12, 21, and 22 personnel. Inside zone, counter, and power runs gash it, and smart opponents audible to a run the moment they see 2-3-6.
- Only two linemen have their hands down, so straight four-man rushes get slower get-offs than a four-down front, and max protect or seven-man protection can neutralize the rush entirely.
- When the stand-up edges drop in sims, rush lanes widen and mobile QBs can escape the pocket. Cover 1 QB Contain helps but costs you a coverage defender.
- Zero pressures like Edge Blitz 0 and FS Will Blitz 0 leave no safety help. Quick slants, hot routed drags, and RPO glances punish them before the free rusher arrives.
- Motion quickly exposes man versus zone, and bracket calls leave the non-bracketed receivers isolated, so opponents who read the double pre-snap can simply throw away from it.
Usage Tips
Call the 2-3-6 on 3rd and 6 or longer, in two-minute drills, and against 10 or 11 personnel with three or more receivers or empty sets. Sub out to Nickel or base if the offense brings in extra tight ends or a fullback.
Pair a sim with a matching coverage from the same look (Sim Pressure 3 with Cover 3 Match, Nickel Sim 2 with Cover 2 Invert) so your pressure and non-pressure calls share an identical pre-snap picture.
Identify the opponent's go-to target on your pre-snap read and call the matching bracket (1 Double Wr1, 1 Double Wr2, 1 Double Slot, or 1 Double TE), then user the robber or hole defender to jump the next read over the middle.
In Tampa 2 or Cover 2 Sink, user the SUBLB and drop him into the deep hole to take away digs and seams. In Cover 2 Invert or Cover 6, user the rotating safety to sit on the post.
If the opponent checks to a run against the look, respond with Pounder or Silver Shoot Pinch to add a run fitter, or pinch the NT and RDT with a defensive line shift before the snap.
Plays (57)
 1 Double SlotCover 1, Man Coverage
 1 Double TECover 1, Double Te, Man Coverage
 1 Double Wr1Cover 1, Double Wr1, Man Coverage
 1 Double Wr2Cover 1, Double Wr2, Man Coverage
- Bracket 9 Switch
 Bracket Switch WillieMan To Man, Man Coverage
- Buck Slant 3Cover 3, Line Slant, Zone Coverage
 Cover 1 HoleCover 1, Cover 1 Hole, Man Coverage
- Cover 1 LB BlitzCover 1, Blitz, LB Blitz +1
- Cover 1 QB ContainCover 1, Contain, Man Coverage
 Cover 1 Robber Show 2Cover 1, Cover 1 Robber, Man Coverage
- Cover 2 Hard FlatCover 2, Zone Coverage
 Cover 2 InvertCover 2, Inverted Coverage, Zone Coverage
 Cover 2 ManCover 2 Man, Man To Man, Man Coverage
- Cover 2 SinkCover 2, Zone Coverage
- Cover 3 BluffCover 3, Zone Coverage
 Cover 3 Buzz MableCover 3, Cover 3 Buzz, Zone Coverage
- Cover 3 Buzz MatchCover 3, Cover 3 Buzz, Cover 3 Match +1
- Cover 3 Buzz Show 2Cover 3, Cover 3 Buzz, Zone Coverage
- Cover 3 Hard FlatCover 3, Zone Coverage
 Cover 3 MatchCover 3, Cover 3 Match, Zone Coverage
 Cover 3 SkyCover 3, Cover 3 Sky, Zone Coverage
 Cover 4 PalmsCover 4, Cover 4 Palms, Zone Coverage
 Cover 4 QuartersCover 4, Quarters, Zone Coverage
- Cover 6
- Cover 6 InvertCover 6, Inverted Coverage, Zone Coverage
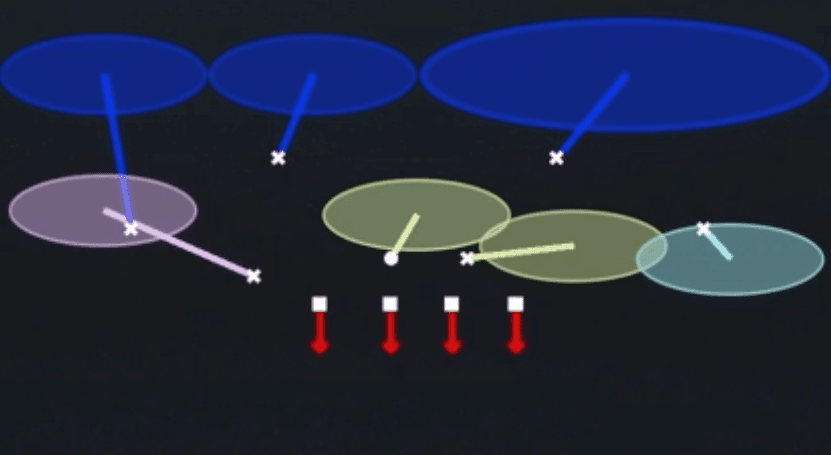 Cover 6 Show 2Cover 6, Zone Coverage
 Cover 6 WillieCover 6, Zone Coverage
- Cover 9 Sammie
 Cover 9 Show 2Cover 9, Zone Coverage
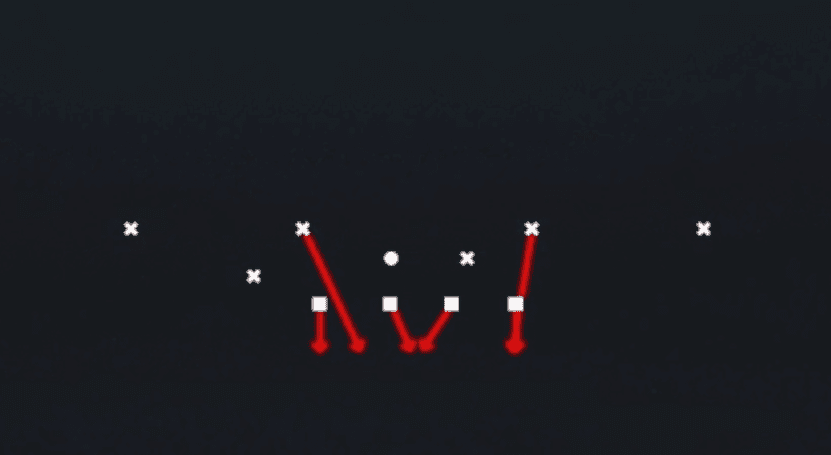 Dbl Safety BlitzBlitz, Safety Blitz
 Double BracketMan To Man, Man Coverage
 Double Bracket SwitchMan To Man, Man Coverage
 Edge Blitz 0Cover 0, Blitz, Edge Blitz +2
 Edge Blitz 3Cover 3, Blitz, Edge Blitz +1
 Field Sim 3Cover 3, Simulated Pressure, Zone Coverage +1
- FS Middle 3Cover 3, Zone Coverage
 FS Will Blitz 0Cover 0, Blitz, LB Blitz +3
- Man Double BuzzMan To Man, Man Coverage
 Nickel 2 TrapCover 2, Trap Coverage, Zone Coverage
 Nickel Sim 2Cover 2, DB Blitz, Simulated Pressure +2
 Overload 3 PressCover 3, Overload Blitz, Zone Coverage +1
 Over Storm BraveBlitz
- Pounder
- Press QuartersQuarters, Cover 4, Zone Coverage
- Prowl Slant 3 SeamCover 3, Line Slant, Zone Coverage
- Roll 23 Cloud
- Roll Cover 2 Invert
- Roll Cover 3 Cloud
- Roll King
- Roll Ring
- Silver Shoot PinchBlitz, Pinch
 Sim Pressure 3Cover 3, Simulated Pressure, Zone Coverage +1
- Slant Zone 2Cover 2, Zone, Line Slant +1
- SS Overload 3Cover 3, Overload Blitz, Zone Coverage +1
 Tampa 2Cover 2, Tampa 2, Zone Coverage
- Under Smoke 2Cover 2, Blitz, Safety Blitz +1