Playbooks

Quick Reference
Breakdown
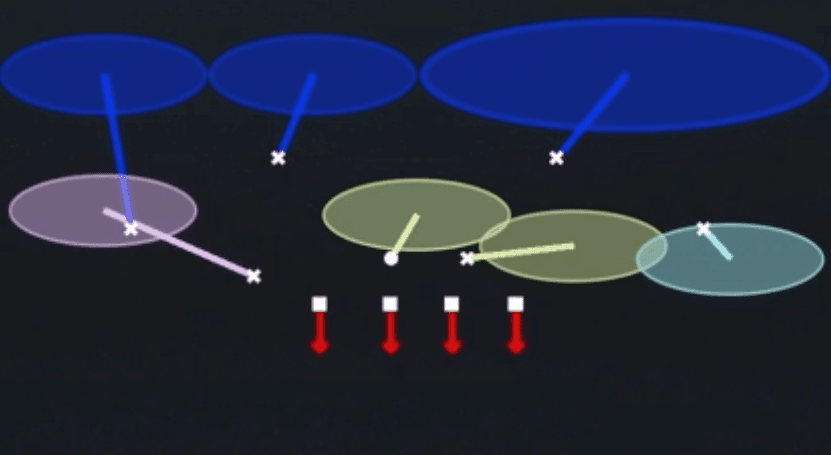
Cover 6 Willie is a zone coverage call out of the Dime 2-3-6 Big Dime personnel that splits the field with quarters coverage to one side and a sky/cloud rotation to the other, giving you a natural mix of two-deep and four-deep principles against trips and standard sets. On the diagram, the two deep thirds outside break vertically to wall off the numbers while the underneath zone defenders sink to the sticks, with the flat defender rolling down to squeeze the boundary and the robber sitting in the shallow hole to rob crossers and drag routes. This is a zone beater shell built to defend both run and pass, with no blitz shown, so the primary read progression for the offense facing it starts with the deep middle hole against the quarters side, then works down to the flat and shallow zones if the safety help rotates away.
Defensive Reads
Watch for offenses attacking the seam on the quarters side since that is the natural stress point between the deep half defender and the underneath zone hook player. Key the running back and tight end releases out of the backfield, since Cover 6 Willie's shallow robber and flat defenders can be pulled out of position by wheel routes and flat releases if you do not sink with the route. Pre-snap, check safety depth and corner alignment to confirm the quarters rotation side matches the formation strength, if the offense shifts or motions the strength away you need to rotate your coverage call to match. Post-snap, if you see the quarterback staring down the deep half side, drop your user defender into a lurk position over the intermediate crosser to bait a throw and jump the route. This coverage struggles against quick game to the flat and stick concepts run at the boundary before the flat defender fully rotates, so respect hot routes and sight adjustments that attack that window immediately after the snap.
Usage Tips
Use Cover 6 Willie on early downs and second and medium situations where you expect balanced play calling and want a safe shell that defends both run and pass without committing to man coverage.
Identify the strength of the formation pre-snap and shade the quarters side of the coverage toward the receiver heavy side so you get true four-under, four-deep integrity against trips or bunch sets.
User the robber defender in the shallow hole to rob drag and shallow cross concepts, since the CPU zone drop alone can be beaten by quick in-cuts if you do not manually stick a defender there.
Pair this call with Cover 6 Show 2 or Cover 6 Invert in your play-calling sequence to disguise the rotation post-snap, forcing the quarterback to hold the ball and giving your pass rush time to work.
Avoid using this against heavy run formations on early downs since the underneath defenders are zone dropping and not filling gaps aggressively, making it vulnerable to inside zone and power runs if you do not user a linebacker downhill.
Other Plays in 2-3-6
 1 Double SlotCover 1, Man Coverage
 1 Double TECover 1, Double Te, Man Coverage
 1 Double Wr1Cover 1, Double Wr1, Man Coverage
 1 Double Wr2Cover 1, Double Wr2, Man Coverage
- Bracket 9 Switch
 Bracket Switch WillieMan To Man, Man Coverage
- Buck Slant 3Cover 3, Line Slant, Zone Coverage
 Cover 1 HoleCover 1, Cover 1 Hole, Man Coverage
- Cover 1 LB BlitzCover 1, Blitz, LB Blitz +1
- Cover 1 QB ContainCover 1, Contain, Man Coverage
 Cover 1 Robber Show 2Cover 1, Cover 1 Robber, Man Coverage
- Cover 2 Hard FlatCover 2, Zone Coverage
 Cover 2 InvertCover 2, Inverted Coverage, Zone Coverage
 Cover 2 ManCover 2 Man, Man To Man, Man Coverage
- Cover 2 SinkCover 2, Zone Coverage
- Cover 3 BluffCover 3, Zone Coverage
 Cover 3 Buzz MableCover 3, Cover 3 Buzz, Zone Coverage
- Cover 3 Buzz MatchCover 3, Cover 3 Buzz, Cover 3 Match +1
- Cover 3 Buzz Show 2Cover 3, Cover 3 Buzz, Zone Coverage
- Cover 3 Hard FlatCover 3, Zone Coverage
 Cover 3 MatchCover 3, Cover 3 Match, Zone Coverage
 Cover 3 SkyCover 3, Cover 3 Sky, Zone Coverage
 Cover 4 PalmsCover 4, Cover 4 Palms, Zone Coverage
 Cover 4 QuartersCover 4, Quarters, Zone Coverage
- Cover 6
- Cover 6 InvertCover 6, Inverted Coverage, Zone Coverage
 Cover 6 Show 2Cover 6, Zone Coverage
- Cover 9 Sammie
 Cover 9 Show 2Cover 9, Zone Coverage
 Dbl Safety BlitzBlitz, Safety Blitz
 Double BracketMan To Man, Man Coverage
 Double Bracket SwitchMan To Man, Man Coverage
 Edge Blitz 0Cover 0, Blitz, Edge Blitz +2
 Edge Blitz 3Cover 3, Blitz, Edge Blitz +1
 Field Sim 3Cover 3, Simulated Pressure, Zone Coverage +1
- FS Middle 3Cover 3, Zone Coverage
 FS Will Blitz 0Cover 0, Blitz, LB Blitz +3
- Man Double BuzzMan To Man, Man Coverage
 Nickel 2 TrapCover 2, Trap Coverage, Zone Coverage
 Nickel Sim 2Cover 2, DB Blitz, Simulated Pressure +2
 Overload 3 PressCover 3, Overload Blitz, Zone Coverage +1
 Over Storm BraveBlitz
- Pounder
- Press QuartersQuarters, Cover 4, Zone Coverage
- Prowl Slant 3 SeamCover 3, Line Slant, Zone Coverage
- Roll 23 Cloud
- Roll Cover 2 Invert
- Roll Cover 3 Cloud
- Roll King
- Roll Ring
- Silver Shoot PinchBlitz, Pinch
 Sim Pressure 3Cover 3, Simulated Pressure, Zone Coverage +1
- Slant Zone 2Cover 2, Zone, Line Slant +1
- SS Overload 3Cover 3, Overload Blitz, Zone Coverage +1
 Tampa 2Cover 2, Tampa 2, Zone Coverage
- Under Smoke 2Cover 2, Blitz, Safety Blitz +1