Playbooks

Receiver routes
Depth-chart slots are shown as they line up in the base package for this set.
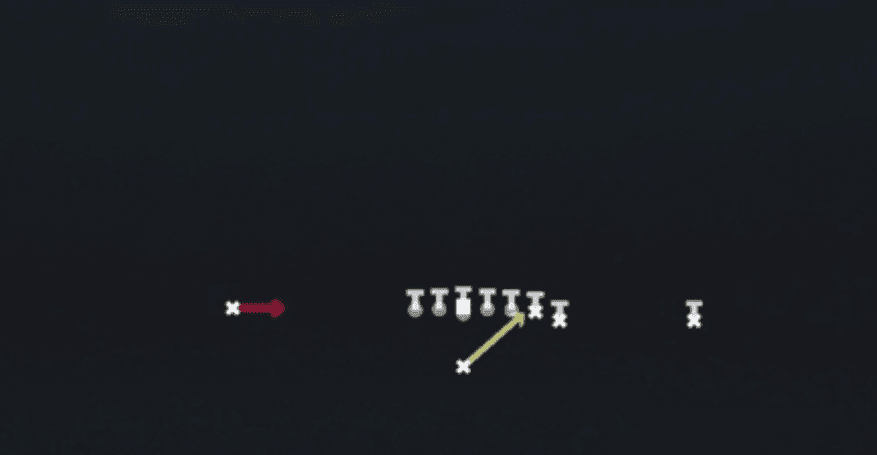
| Player | Side | Route |
|---|---|---|
| TE2 | Right | Run Block |
| WR1 | Left | Bubble Screen |
| WR2 | Right | Run Block |
| TE1 | Right | Run Block |
Read progression
- WR1 left, Bubble Screen
Breakdown
HB Stretch Alert Smoke is an outside zone run play out of Singleback Wing 12 personnel that comes with a pre-snap smoke screen alert built in. The diagram shows the offensive line flowing laterally with zone blocking steps while the HB takes the handoff and stretches wide, and if you check the alert, the outside receiver runs a quick smoke route with the slot man blocking downfield to spring him. This is fundamentally a run play with an RPO-style bailout option, so your primary read is the defensive edge and flow to the play side before deciding whether to stay with the zone run or check to the smoke against overaggressive corners.
Defensive Reads
If you are on defense, key the offensive line's lateral zone steps immediately at the snap, that flow tells you the run is going wide Watch the outside receiver's alignment before the snap, if he is stacked with a blocker in the slot behind him, prepare for the smoke alert and get your corner off any hard man press Play a corner with outside leverage and cushion to take away the smoke throw while still being able to fold inside to fill run support Linebackers should stay square and read the mesh point instead of flowing hard playside immediately, since a fast trigger on run can be exploited if the QB checks to the smoke A Sam or Will linebacker sitting flat footed at the snap to diagnose run versus screen is the best defensive counter, aggressive downhill linebackers get gashed by the cutback lanes on outside zone
Usage Tips
Check the defense pre-snap for corner depth on the alert side, if the corner is playing tight man or crashing hard on run support, throw the smoke immediately for a free five to seven yards
Use this play on early downs in run heavy sequences to keep linebackers honest, then mix in the alert smoke once you see corners biting on run fakes
Combine with HB Mid Zone and 26 Duo from the same set to build a consistent zone run package that disguises which play is coming
Against a defense sitting in zone coverage with the corner sinking, stick with the base outside zone run and trust your blocking to the play side edge
Use the smoke alert on third and short or third and medium as a low risk conversion tool since the throw is quick and negates most pass rush pressure
Other Plays in Wing
 26 DuoDuo, Run Play, Power Run
 26 Duo Alert X SmokeDuo, Run Play, Power Run +2
 Close PA CrossPlay Action, Crosser, Pass Play +4
 Close PA PostPlay Action, Post, Pass Play +2
 Close PA SailPlay Action, Sail, Pass Play +7
 Close Zone StrgRun Play, Inside Zone, Zone Run +2
 Counter UCounter, Run Play, Power Run
 Curl ComboCurl, Pass Play, Flat +1
 DriveDrive, Pass Play, Cover 4 Beater +6
 End Around LeadEnd Around, Trick Play, Run Play
 HB Blunt DiveDive, Run Play
- HB Counter WKCounter, Run Play, Power Run
 HB DelayRun Play
 HB DiveDive, Run Play
- HB Mid ZoneRun Play
 HB MisdirectionMisdirection, Run Play
- HB Power OPower, Run Play, Power Run
 HB Slant 18Run Play
- HB Slash Fk End ArdRun Play
 HB Slash Fk End ArndEnd Around, Trick Play, Run Play
 HB SmashRun Play
 HB Stretch Alert LookieOutside Zone, Run Play, Zone Run +2
 HB Toss CrackToss, Run Play
 HB Zone TossInside Zone, Toss, Run Play +1
- H Zone WKInside Zone, Run Play, Zone Run
 Mtn HB CounterCounter, Motion, Run Play +1
 Mtn HB DiveDive, Motion, Run Play
 Mtn HB SlamDive, Motion, Run Play
 Mtn H Zone WkInside Zone, Motion, Run Play +1
 Mtn PA BootPlay Action, Motion, Pass Play +5
- Mtn PA Copo SlidePlay Action, Slide, Corner Post +8
 Mtn PA CrossPlay Action, Crosser, Motion +5
 Mtn PA Fk SlidePlay Action, Slide, Motion +6
 Mtn PA PoCo SlidePlay Action, Slide, Post Corner +4
 PA Boot LtPlay Action, Pass Play, Comeback +4
 PA Comebacks Y DigPlay Action, Dig, Comeback +3
 PA End AroundEnd Around, Play Action, Trick Play +4
- PA MiddlePlay Action, Pass Play, Post +2
 PA Misdirection ShotPlay Action, Pass Play, Deep Cross +2
- PA Power OPlay Action, Pass Play, Corner +5
 PA TE FloodPlay Action, Flood, Pass Play +6
 PA Verts Y DigPlay Action, Dig, Four Verts +7
 PA Y-Drag WheelPlay Action, Wheel, Drag +5
 RZ Mtn PA CrossersPlay Action, Crosser, Motion +2
- Scene 44-4Run Play
- Sluggo SeamSeam, Sluggo, Pass Play +3
 SpacingSpacing, Pass Play, Cover 3 Beater +3
 Steeler CurlsCurl, Pass Play, Post +1
 TE AttackPass Play, Four Verts, Seam +5
 TE StickStick, Stick Concept, Pass Play +3
 TE Stick FadeFade, Stick, Stick Concept +4
 WR DriveDrive, Pass Play, Cover 4 Beater +6
 Zone Split Alert LookieInside Zone, Run Play, Zone Run +2
- Zone Split Alert SmokeInside Zone, Run Play, Zone Run +2
 Z SpotSpot, Pass Play, Cover 3 Beater +4