Playbooks

Quick Reference
Receiver routes
Depth-chart slots are shown as they line up in the base package for this set.
| Player | Side | Route |
|---|---|---|
| HB1 | Middle | Pass Block |
| TE2 | Right | Flat |
| WR1 | Left | Slant |
| WR2 | Right | Streak |
| TE1 | Right | Stick Option |
Read progression
- TE1 right, Stick Option
- WR1 left, Slant
- TE2 right, Flat
- WR2 right, Streak
Breakdown
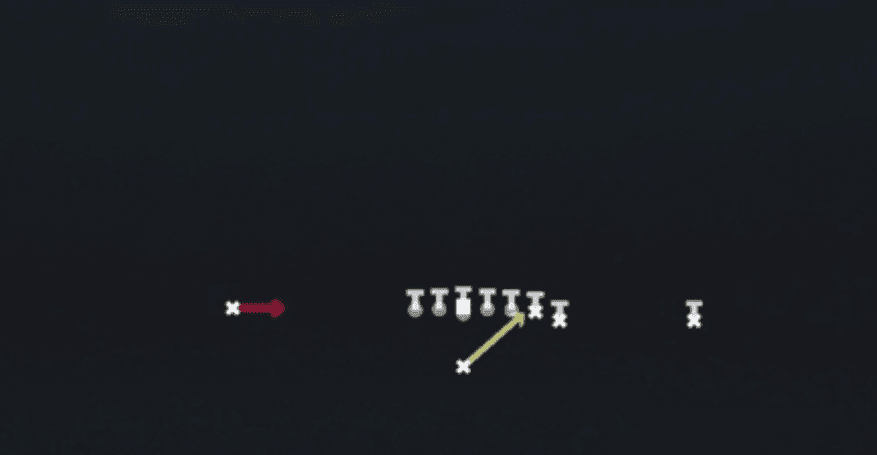
TE Stick out of Singleback Wing 12 personnel puts a wing TE in the backfield area on the strong side and shows a three level stick concept combined with a deep out breaking route. The wing TE runs a quick flat route, the inline TE at the line sits down on a stick route with the running back releasing vertically as a check down or seam option, while the backside receiver runs a deep dig or out breaking toward the sideline. This is a man beater against zone and blitz packages, with the primary read starting on the stick route to the flat, then working to the vertical crosser breaking away from the boundary if the underneath is taken away.
Defensive Reads
Watch the flat defender before the snap, if he is sitting shallow he can jump the stick route so be ready to hit the crosser instead. Key the middle linebacker depth, if he drops hard to the deep middle the underneath stick and flat combo will be wide open. Against man coverage, look for a lurking safety over the top who can undercut the vertical crossing route, this shuts down the deep option. Zone blitzes with a corner blitzing off the edge can be beaten quickly since the stick route releases into the vacated area almost instantly. If the defense shows two deep safeties with tight underneath linebacker spacing, expect the flat and stick to be taken away, forcing a check down to the backfield release.
Usage Tips
Presnap identify if the defense is showing zone or man by checking linebacker depth and slot cornerback leverage over the inline TE.
If you see man coverage with no safety help over the middle, hot route the vertical release out of the backfield into a seek or wheel to attack a linebacker in coverage.
Use this play on third and short to medium since the stick route and flat combo give you a quick, high percentage answer against zone blitzes.
Pair this with PA Y-Drag Wheel or PA TE Flood from the same formation to keep the defense guessing between the quick stick concept and a deeper shot play.
Against Cover 3 or Cover 4 shells, work the crossing route breaking to the sideline since it settles into the open zone window between the corner and safety.
Other Plays in Wing
 26 DuoDuo, Run Play, Power Run
 26 Duo Alert X SmokeDuo, Run Play, Power Run +2
 Close PA CrossPlay Action, Crosser, Pass Play +4
 Close PA PostPlay Action, Post, Pass Play +2
 Close PA SailPlay Action, Sail, Pass Play +7
 Close Zone StrgRun Play, Inside Zone, Zone Run +2
 Counter UCounter, Run Play, Power Run
 Curl ComboCurl, Pass Play, Flat +1
 DriveDrive, Pass Play, Cover 4 Beater +6
 End Around LeadEnd Around, Trick Play, Run Play
 HB Blunt DiveDive, Run Play
- HB Counter WKCounter, Run Play, Power Run
 HB DelayRun Play
 HB DiveDive, Run Play
- HB Mid ZoneRun Play
 HB MisdirectionMisdirection, Run Play
- HB Power OPower, Run Play, Power Run
 HB Slant 18Run Play
- HB Slash Fk End ArdRun Play
 HB Slash Fk End ArndEnd Around, Trick Play, Run Play
 HB SmashRun Play
 HB Stretch Alert LookieOutside Zone, Run Play, Zone Run +2
 HB Stretch Alert SmokeOutside Zone, Run Play, Zone Run +2
 HB Toss CrackToss, Run Play
 HB Zone TossInside Zone, Toss, Run Play +1
- H Zone WKInside Zone, Run Play, Zone Run
 Mtn HB CounterCounter, Motion, Run Play +1
 Mtn HB DiveDive, Motion, Run Play
 Mtn HB SlamDive, Motion, Run Play
 Mtn H Zone WkInside Zone, Motion, Run Play +1
 Mtn PA BootPlay Action, Motion, Pass Play +5
- Mtn PA Copo SlidePlay Action, Slide, Corner Post +8
 Mtn PA CrossPlay Action, Crosser, Motion +5
 Mtn PA Fk SlidePlay Action, Slide, Motion +6
 Mtn PA PoCo SlidePlay Action, Slide, Post Corner +4
 PA Boot LtPlay Action, Pass Play, Comeback +4
 PA Comebacks Y DigPlay Action, Dig, Comeback +3
 PA End AroundEnd Around, Play Action, Trick Play +4
- PA MiddlePlay Action, Pass Play, Post +2
 PA Misdirection ShotPlay Action, Pass Play, Deep Cross +2
- PA Power OPlay Action, Pass Play, Corner +5
 PA TE FloodPlay Action, Flood, Pass Play +6
 PA Verts Y DigPlay Action, Dig, Four Verts +7
 PA Y-Drag WheelPlay Action, Wheel, Drag +5
 RZ Mtn PA CrossersPlay Action, Crosser, Motion +2
- Scene 44-4Run Play
- Sluggo SeamSeam, Sluggo, Pass Play +3
 SpacingSpacing, Pass Play, Cover 3 Beater +3
 Steeler CurlsCurl, Pass Play, Post +1
 TE AttackPass Play, Four Verts, Seam +5
 TE Stick FadeFade, Stick, Stick Concept +4
 WR DriveDrive, Pass Play, Cover 4 Beater +6
 Zone Split Alert LookieInside Zone, Run Play, Zone Run +2
- Zone Split Alert SmokeInside Zone, Run Play, Zone Run +2
 Z SpotSpot, Pass Play, Cover 3 Beater +4