Playbooks

At a Glance
Overview
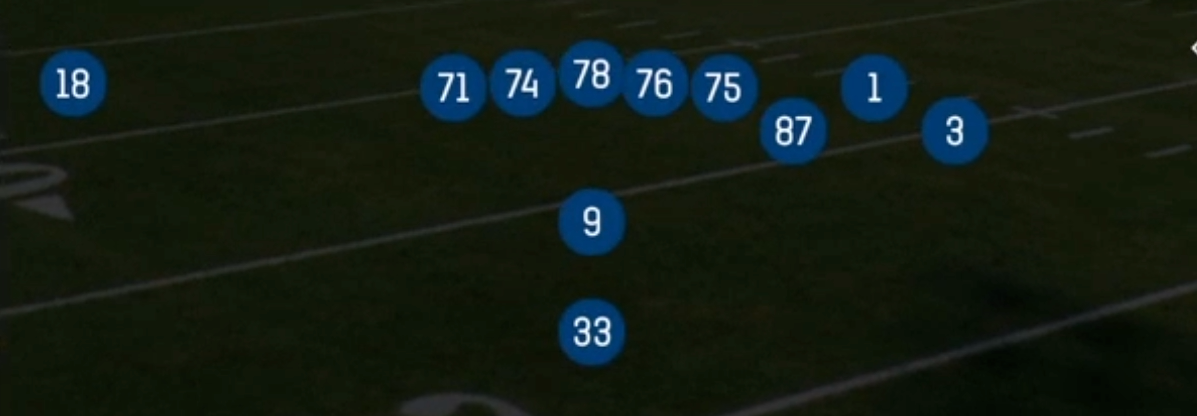
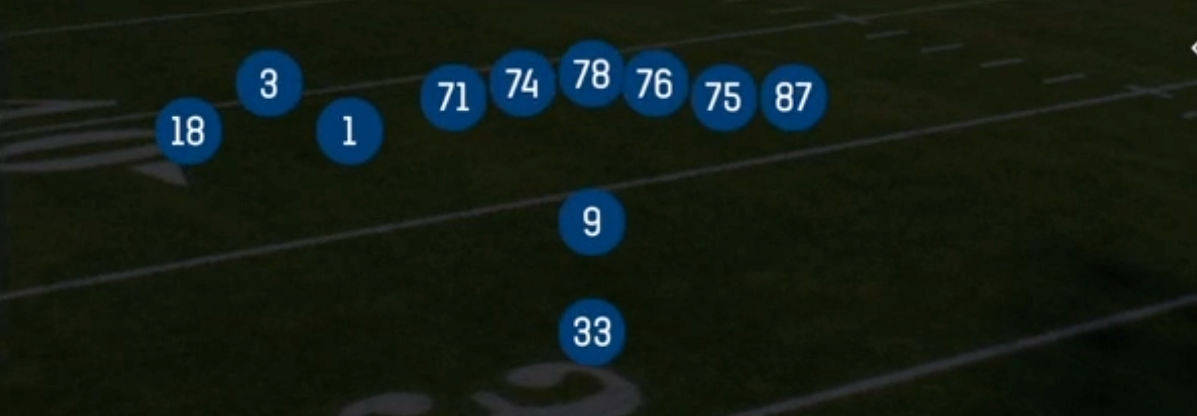
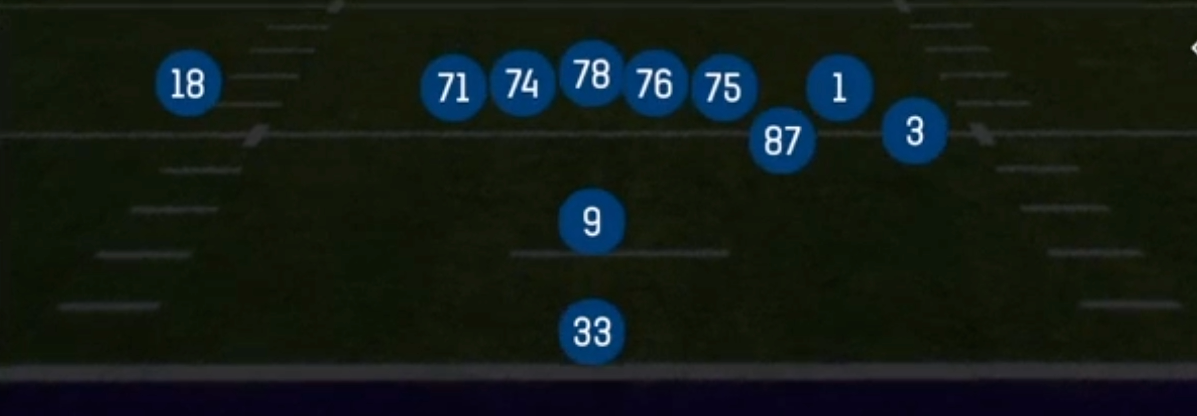
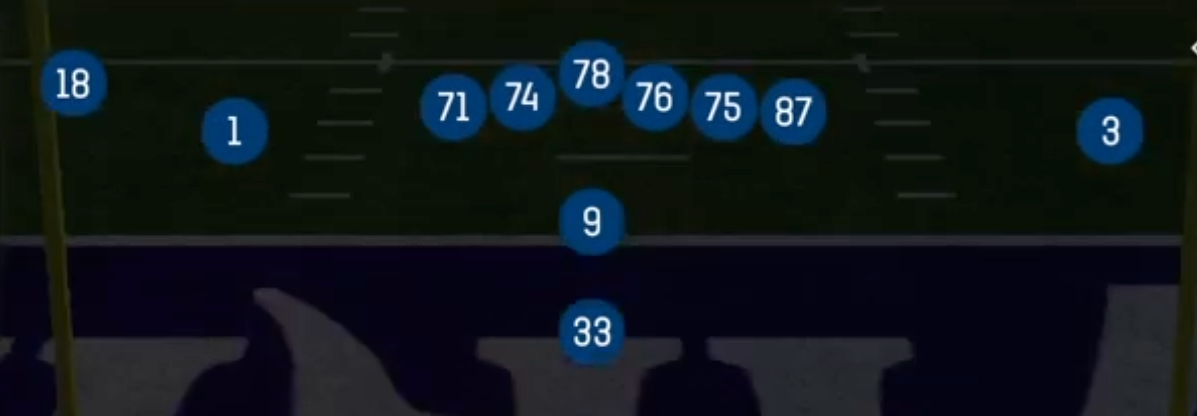
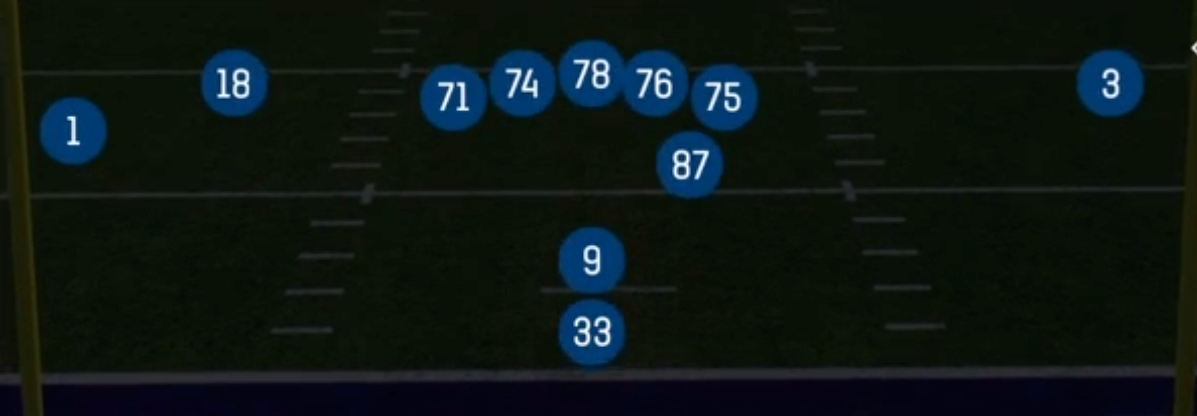
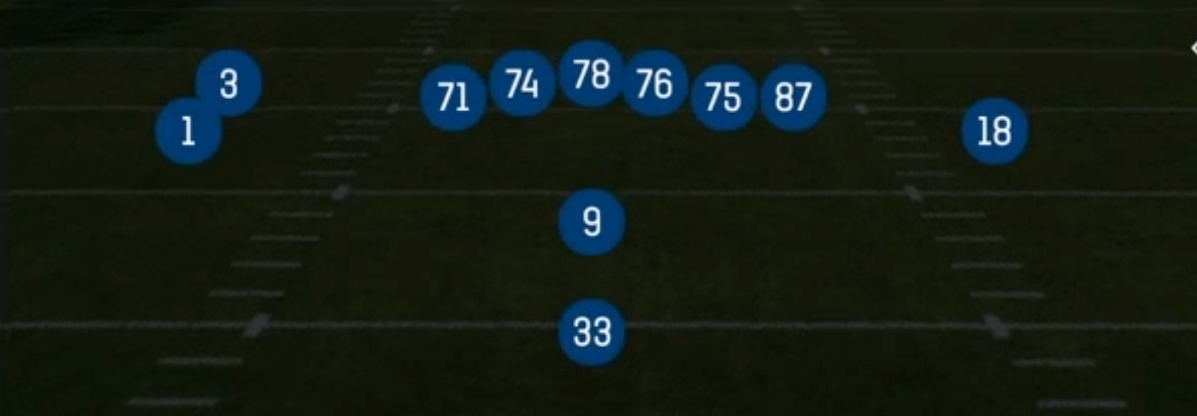
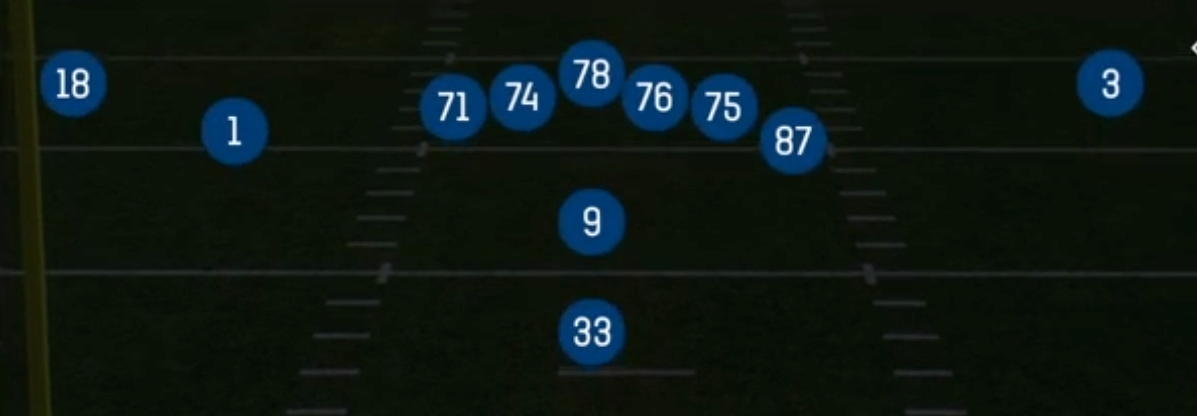
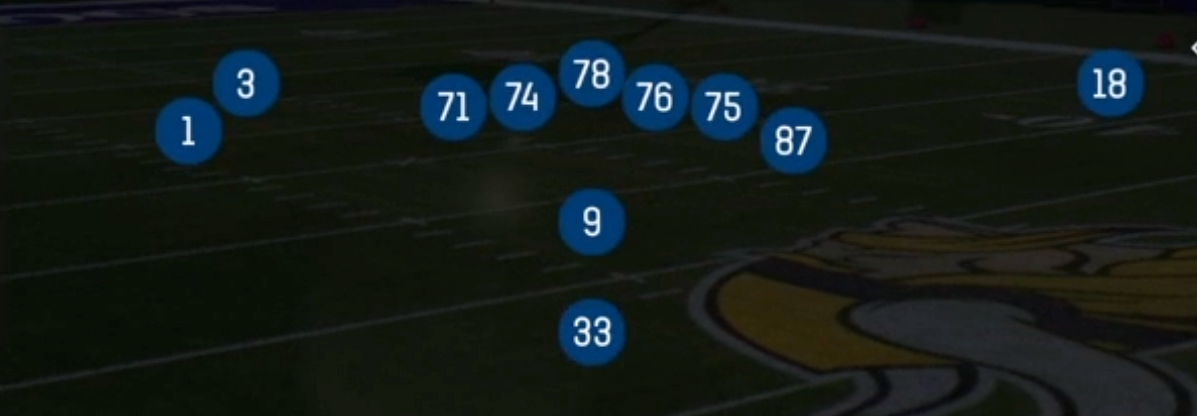
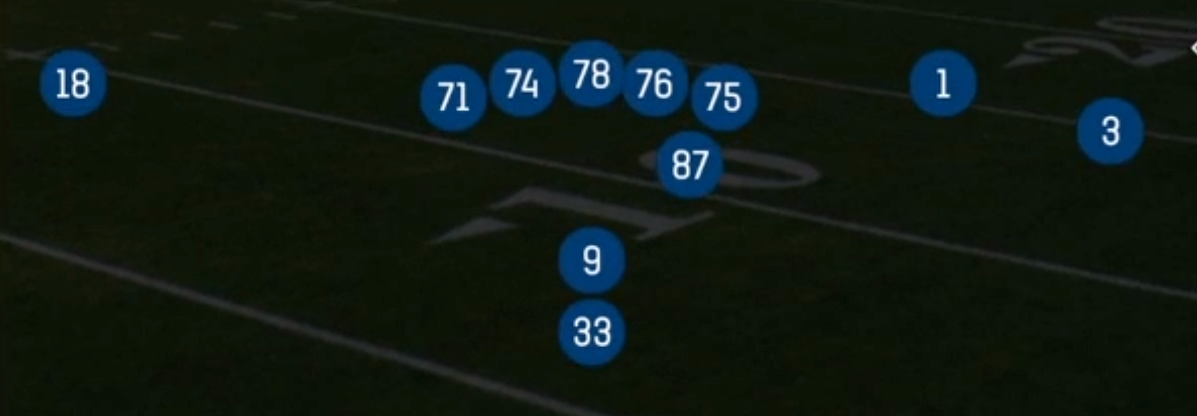
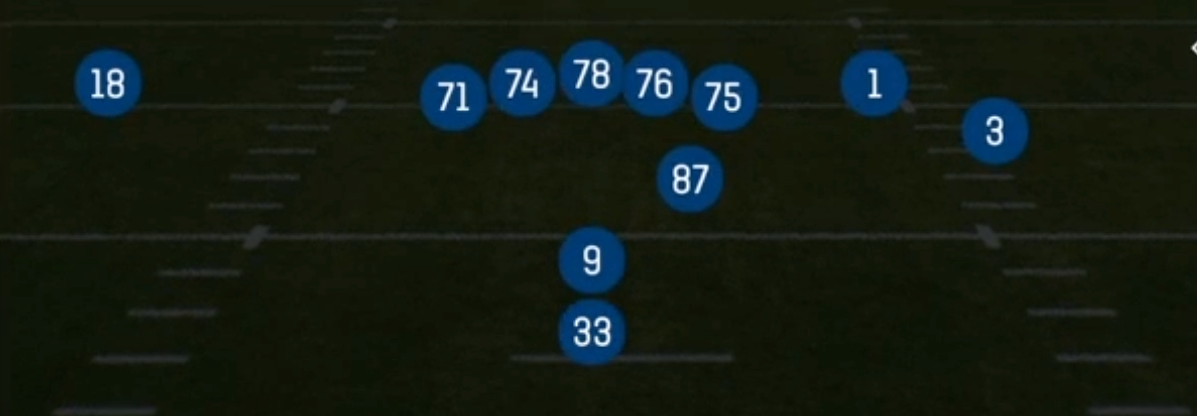
Pistol Trips puts three receiving threats to one side of the formation and leaves a lone X receiver isolated on the backside, all while keeping the running back aligned directly behind the quarterback in the Pistol alignment. That RB depth is the key difference from Gun Trips looks: you get a true downhill run game with HB Dive, HB Slam, Strong Power, HB Counter, and Pin Pull Sweep, plus full-field play-action. Other Pistol sets tend to balance the receivers or add bodies to the box. Trips forces the defense to declare its rotation to the three-receiver side before the snap, which tells you whether you are facing a trips check, a boundary safety rolled down, or a simple overload.
In 11 personnel, the formation spreads the defense horizontally with three receivers to one side, and the tight end gives you a legitimate run-blocking or seam option. Defenses that match with nickel have to decide whether to spin a safety toward the trips side or leave the backside X on an island. If they roll coverage to trips, your X gets single coverage on Slants, PA Comeback, and X Spot concepts. If they stay balanced, the trips side outnumbers them on Stick, Flood, Smash, and the RPO Alert Bubble tags. The tags on this set (3DRB, Gadget, SLWR) signal that it rewards a versatile back who can catch out of the backfield on HB Slip Screen and a shifty slot receiver who can win quickly on bubbles and option routes.
Conceptually, Pistol Trips is a stress formation. You can attack the perimeter with WR Screen, Bubble Screen, and RPO Zone Alert Bubble, hit the middle with Inside Cross, Inside Smash, and PA Dagger, and punish overpursuit with PA Boot, PA Boot Lt, and PA Ctr Waggle rollouts. Read Option and HB Draw keep edge defenders and spies honest, so a single look can threaten every level of the field without changing personnel.
Strengths
- RPO Alert Bubble and RPO Zone Alert Bubble give you a built-in numbers read: if the defense leaves only two defenders over the trips side, throw the bubble, and if they add a body there, hand off into a lighter box.
- The isolated backside X is a premium man beater target: when the defense rolls a safety to trips, Slants, PA Comeback, and X Spot give your X a clean one-on-one with no help over the top.
- Flood, Stick, and Smash overload Cover 3 and Cover 4 zones on the trips side, creating high-low and horizontal stretches that sink or split flat and curl defenders.
- Pistol RB depth makes play-action extremely convincing: PA Boot, PA Boot Lt, PA Ctr Waggle, and PA Deep In pull linebackers downhill after you establish HB Dive, Strong Power, and HB Counter, opening crossers and deep ins behind them.
- The screen package (HB Slip Screen, WR Screen, Bubble Screen) punishes heavy blitzers and aggressive press alignments, turning pressure into free yards after the catch.
Weaknesses
- With only five linemen plus a tight end and running back, overload and nano blitzes from the boundary side can beat protection before deeper concepts like Verticals or PA Dagger develop, especially on play-action with the QB turning his back.
- A user-controlled linebacker or safety sitting in the middle hook zone can erase Inside Cross, Inside Smash, and Slants, since so many of the quick throws funnel into the same window.
- The trips alignment is a strong pre-snap tell: defenses that check to a trips match or rotate coverage can bracket your best slot receiver and force you to the X, who may not win against a shutdown corner.
- Heavy boxes with a spy or QB contain assignments neutralize Read Option, and a disciplined edge defender kills the pitch or keep read, turning the option game into short gains.
- The backside is thin, so boundary rollouts like PA Boot away from trips offer few outlets if the defense leaves a flat defender or rushes contain on that side.
Usage Tips
Count the defenders over the trips side pre-snap: if you see two or fewer against three receivers, audible to Bubble Screen or RPO Alert Bubble, and if you see four, check to HB Dive, HB Slam, or Strong Power into the lighter box.
On 3rd and short, run Stick or Curl Flat and hot route the backside X to a slant; you get a quick man beater on one side and a zone beater on the other, so the read is set before the snap.
After two or three successful HB Counter or Strong Power runs, call PA Deep In or PA Ctr Waggle; the Pistol mesh freezes user linebackers and opens the intermediate window behind them.
If the defense shows single high man with a safety shaded toward trips, audible to X Spot or PA Comeback and throw to the isolated X early, or hot route him to a fade in the red zone.
Against blitz heavy opponents, keep HB Slip Screen and WR Screen in your audibles, and consider blocking the tight end or back with a hot route on longer developing concepts like Verticals and Flood.
Plays (30)
 Bubble ScreenScreen Pass, Bubble Screen, Pass Play
 Curl FlatCurl, Curl Flat, Pass Play +6
 FloodFlood, Pass Play, Cover 3 Beater +5
 HB CounterCounter, Run Play, Power Run
 HB DiveDive, Run Play
 HB DrawDraw, Run Play
 HB SlamDive, Run Play
 HB Slip ScreenScreen Pass, Hb Screen, Pass Play +3
 HB StretchOutside Zone, Run Play, Zone Run
 HB Zone WkInside Zone, Run Play, Zone Run
 Inside CrossCrosser, Pass Play, Block and Release +3
 Inside SmashSmash, Pass Play, Cover 2 Beater +4
 PA BootPlay Action, Pass Play, Block and Release +3
 PA Boot LtPlay Action, Pass Play, Deep Cross +4
 PA ComebackPlay Action, Comeback, Pass Play +4
- PA Ctr WagglePlay Action, Pass Play, Block and Release +3
 PA Ctr WaqgglePlay Action, Pass Play
 PA DaggerPlay Action, Dagger, Pass Play +8
 PA Deep InPlay Action, Pass Play, In +3
 Pin Pull SweepSweep, Pin And Pull, Run Play +1
 Read OptionRead Option, Run Play
 RPO Alert BubbleRPO, Pass Play, Run Play
- RPO Zone Alert BubbleRPO, Pass Play, Run Play +1
 SlantsSlant, Pass Play, Flat
 SmashSmash, Pass Play, Cover 2 Beater +4
 StickStick, Stick Concept, Pass Play +3
 Strong PowerPower, Run Play, Power Run
 VerticalsFour Verts, Pass Play, Cover 2 Beater +7
 WR ScreenScreen Pass, Wr Screen, Pass Play +1
- X SpotCorner, Curl, Flat +1