Playbooks

At a Glance
In 22 playbooks
Overview
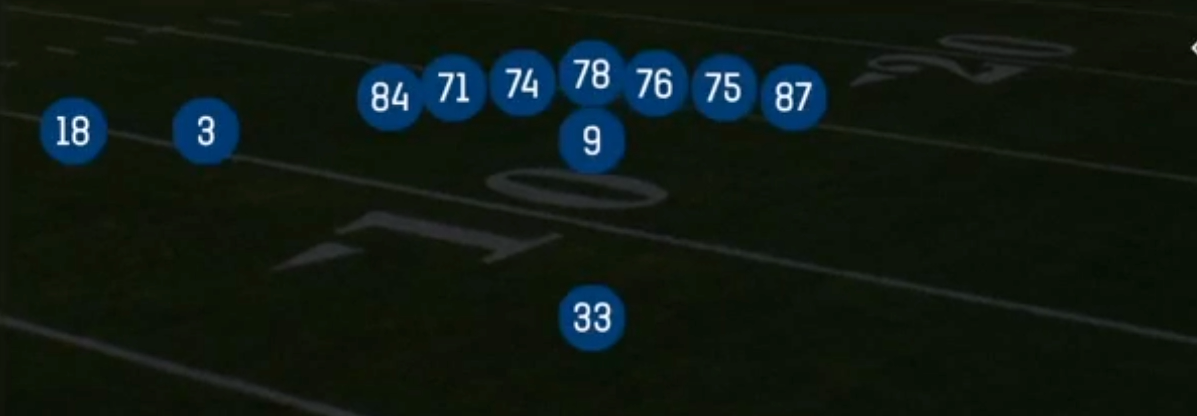
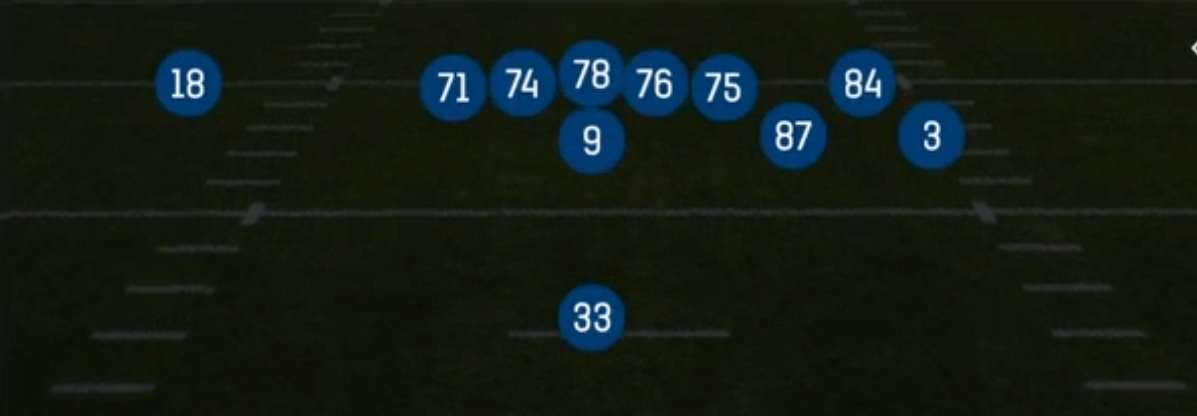
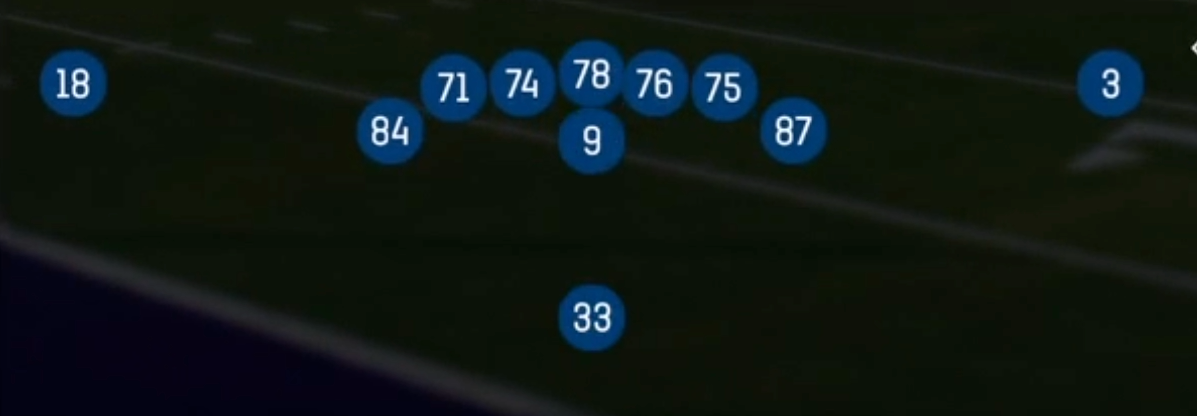
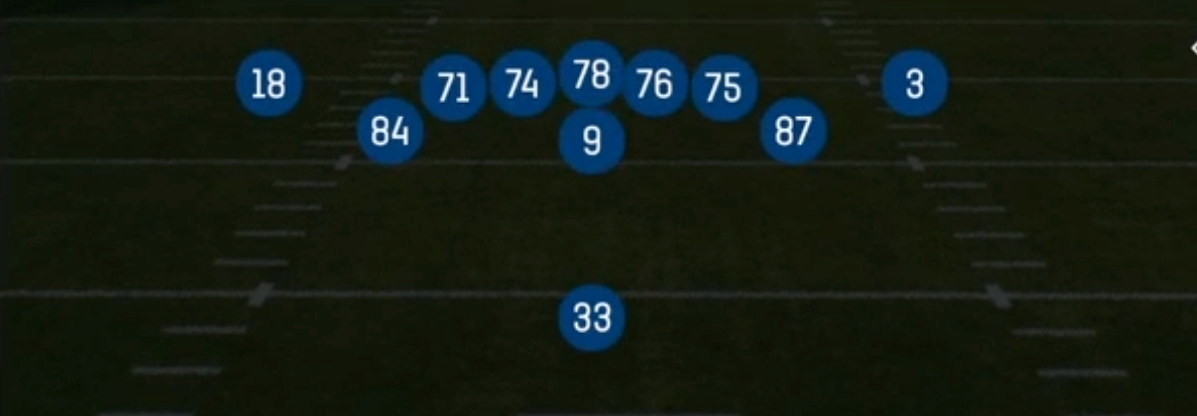
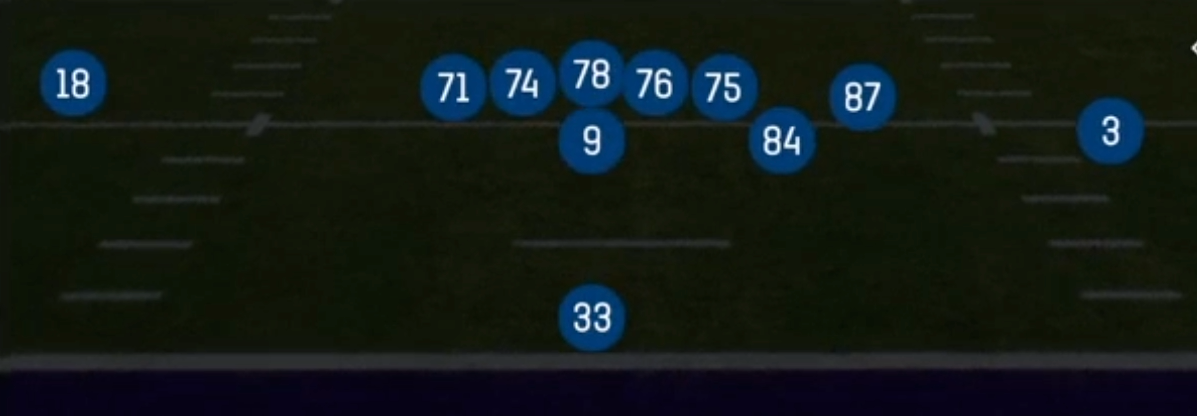
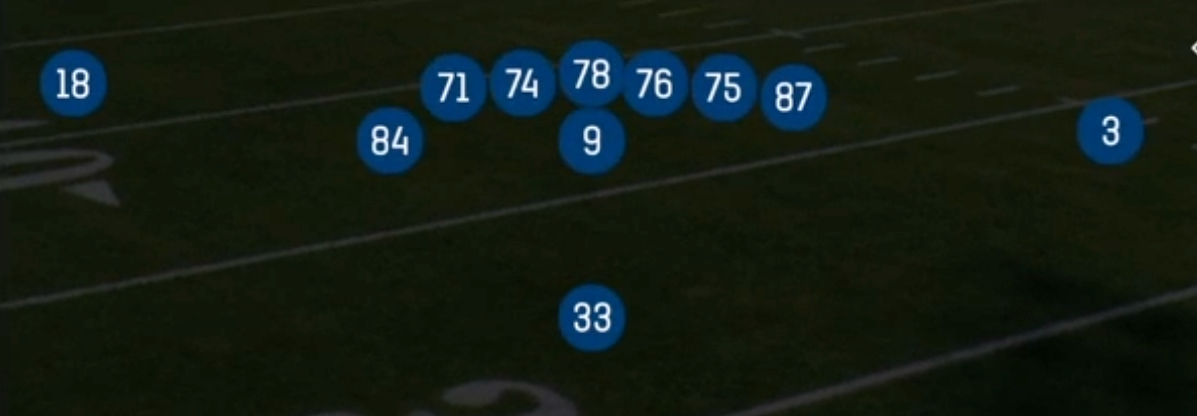
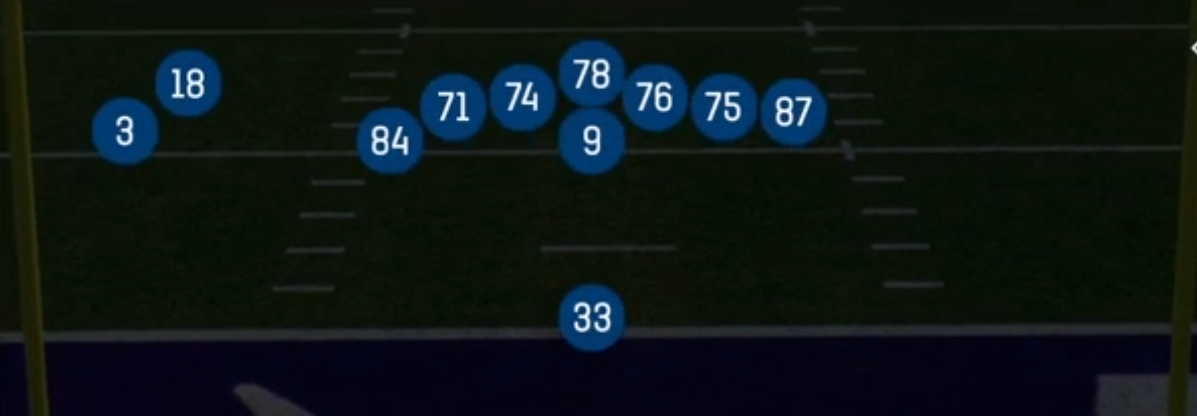
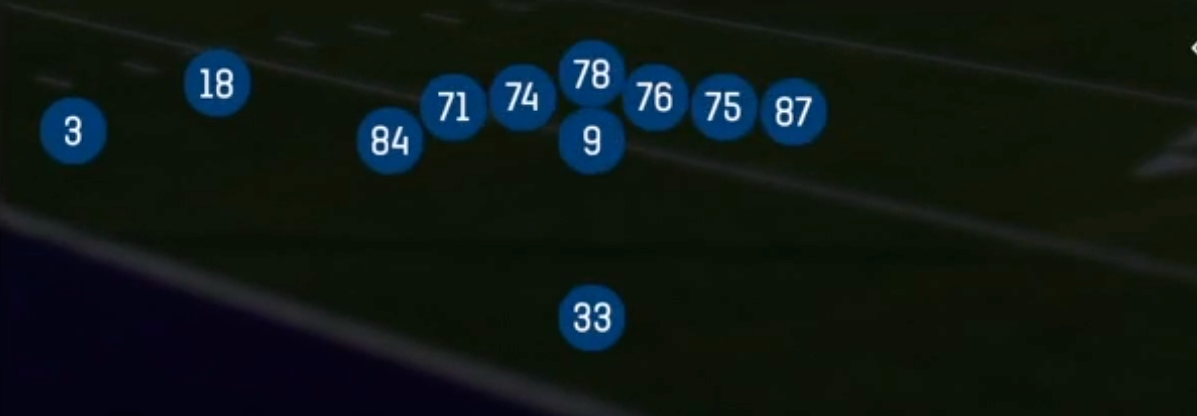
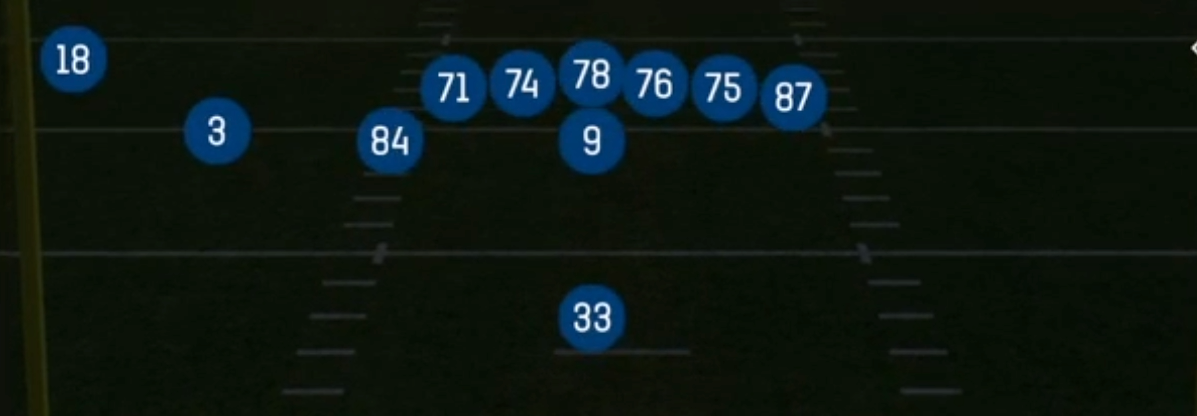
Wing Flex Close is a condensed 12 personnel look out of Singleback. One tight end aligns as a wing just off the edge, a second tight end sits flexed a step off the line, and the wide receivers take reduced, close splits near the formation. That tight alignment is what separates it from the more spread-out Singleback sets. Instead of stretching the defense horizontally with wide receivers, Wing Flex Close compresses everything inside the numbers. Defenders get pulled toward the box, and the wide field outside the receivers opens up for motion, crossers, and bootleg flood concepts.
The playbook leans heavily on Mountain (Mtn) Shanahan-style concepts. You get outside zone and stretch runs (Mtn HB Stretch, Mtn HB Stretch Wk, Mtn HB Stretch Lt), split zone with the wing tight end kicking back across the formation (Inside Zone Split, Mtn Inside Zone Split), and gap looks like HB Duo. Every run is paired with a play-action answer that looks the same pre-snap. Mtn PA Boot Corner, Mtn PA Boot Drive Corner, and Mtn PA Boot Cross Y-Corner all flow the tight ends and crossers against the grain once linebackers bite on stretch. The Gadget tag comes from the jet motion package: Jet Sweep, Zone Fake Jet, PA Jet Sweep, and Mtn Slot Option put a receiver in motion to stress the edge and freeze second-level defenders.
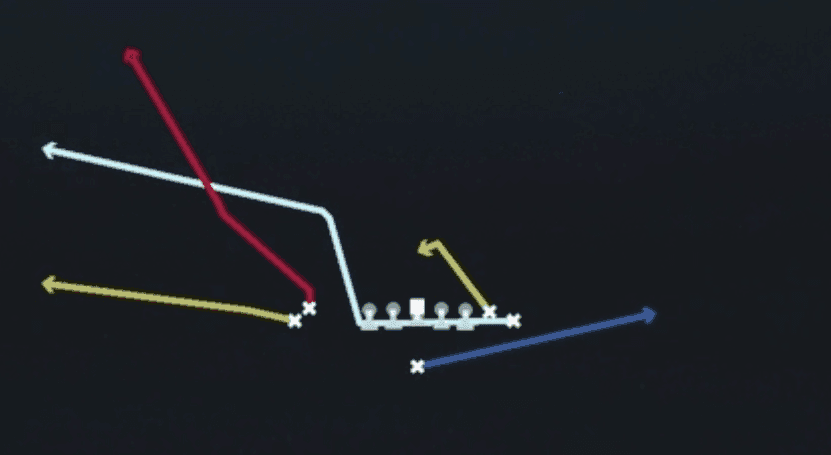
The personnel package is the matchup lever. Two tight ends force base defense or nickel with a linebacker on the field, so defenses have to pick a weakness. If they stay heavy, the close-split receivers get favorable releases against linebackers and safeties on crossers and corners. If they go light, the wing and flex tight ends become extra blockers who seal the edge on stretch and toss. The flexed tight end is especially valuable in the passing game. On Mtn Corner Y-Choice, Drive Y Corner, and Stick, he gets a free release and is isolated on a linebacker or safety, so he wins leverage battles that a boundary receiver could never get.
Strengths
- Reduced splits and the wing tight end create natural crack and seal angles, making Mtn HB Stretch, HB Toss Weak, and Jet Sweep elite edge runs against defenders who align too far inside or overplay the A and B gaps.
- Play-action and run plays share the same pre-snap look, so a stretch-heavy opening script turns Mtn PA Boot Corner and Mtn PA Boot Drive Corner into devastating zone beaters: linebackers flow with the run and the flat and corner routes flood the vacated side against Cover 3 and Cover 4.
- Close receiver alignments give free releases and natural rub concepts, so Drive Y Corner, Mtn Drive Shake, and PA Cross Country act as reliable man beaters where crossers pick trailing defenders in Cover 1 and Cover 0.
- The flexed tight end is a mismatch weapon on Mtn Corner Y-Choice and Stick, reading leverage against linebackers or safeties and winning with option routes that auto-adjust against man and zone.
- Jet motion on Zone Fake Jet, PA Jet Sweep, and Mtn Slot Option forces defensive shifts and linebacker hesitation, giving you pre-snap coverage reads and post-snap eye candy that slows down user-controlled defenders.
Weaknesses
- The condensed formation invites heavy box counts, and nano blitzes off the edge or A-gap pressure can blow up stretch and boot concepts before they develop, especially when a defender is unblocked on the backside of a bootleg.
- Boot and play-action concepts take time to set up, so contain pressure or a user-controlled edge defender squeezing the bootleg side can force sacks or rushed throws on Mtn PA Boot Cross Y-Corner and PA Boot Screen.
- Tight splits bring more defenders near the formation, so a disciplined user-controlled linebacker or robber dropping into the crossing lanes can jump shallow and intermediate crossers that are the core of the pass game.
- The set lacks true vertical spacing from wide alignments, which makes Four Verticals and PA Shot Post easier to bracket against Cover 2 Man or Cover 4 with cornerbacks sitting on the reduced receivers.
- Opponents who key on jet motion can spy the motion man or set a force defender to the jet side, limiting the effectiveness of Jet Sweep and Mtn Slot Option once your tendencies are on film.
Usage Tips
Open with Mtn HB Stretch and Inside Zone Split to establish the run and train linebackers to flow hard, then call Mtn PA Boot Corner or Mtn PA Boot Drive Corner from the identical look on the next early down to punish over-pursuit.
Read the box count pre-snap: against six or fewer defenders in the box, stay with HB Duo or HB Zone Wk, and against seven-plus with single-high safety, audible to Drive Y Corner or PA Cross Country to attack the voided second level.
Use Jet Sweep and Zone Fake Jet on 2nd and short or 1st and 10 when the defense is in base with slow linebackers, and watch how the defense rotates to the motion to identify man (defender follows) versus zone (shift or no movement).
On 3rd and medium, Stick and Mtn Corner Y-Choice are your safest calls. Hot route the running back to a quick out or block if you see a nano blitz look off the edge, and throw to the flexed tight end if he wins leverage on a linebacker.
In red zone and goal-line situations, the compressed alignment shines. Mtn PA Boot Cross Y-Corner and PA Cross Switch (M20) create layered flood reads that beat both Cover 1 and Cover 3 Match when defenders get condensed near the goal line.
Plays (27)
 Drive Y CornerCorner, Drive, Pass Play +6
 Four VerticalsFour Verts, Pass Play, Cover 2 Beater +4
 HB DiveDive, Run Play
- HB DuoRun Play
 HB StretchOutside Zone, Run Play, Zone Run
 HB Toss WeakToss, Run Play
 HB Zone WkInside Zone, Run Play, Zone Run
- Inside Zone SplitInside Zone, Run Play, Zone Run
 Jet SweepSweep, Jet Sweep, Motion +1
 Mtn Corner Y-ChoiceOption Route, Motion, Pass Play +4
- Mtn Drive ShakeBlock and Release, Slant, In +2
 Mtn HB StretchOutside Zone, Motion, Run Play +1
- Mtn HB Stretch LtRun Play
 Mtn HB Stretch WkOutside Zone, Motion, Run Play +1
 Mtn Inside Zone SplitInside Zone, Motion, Run Play +1
 Mtn PA Boot CornerPlay Action, Corner, Motion +4
 Mtn PA Boot Cross Y-CornerPlay Action, Corner, Crosser +5
- Mtn PA Boot Drive CornerCorner, Block and Release, Deep Cross +8
 Mtn Slot OptionOption Route, Motion, Pass Play +3
- PA Boot ScreenScreen Pass, Deep Cross, Crosser +3
 PA Cross CountryPlay Action, Crosser, Pass Play +3
 PA Cross Switch (M20)Play Action, Crosser, Pass Play +2
 PA Jet SweepSweep, Jet Sweep, Play Action +6
 PA Shot PostPlay Action, Post, Pass Play +3
 SmashSmash, Pass Play, Cover 2 Beater +4
 StickStick, Stick Concept, Pass Play +2
 Zone Fake JetMotion, Run Play