Playbooks

At a Glance
In 14 playbooks
Overview
Singleback Trips puts three receivers to one side of the formation with a single back directly behind the quarterback and the tight end attached on the backside. Singleback Ace and Doubles balance the field, but Trips overloads one side. The defense must either shift its coverage rotation toward the strength or accept a numbers disadvantage against the three receivers. In 11 personnel that trips side usually carries two wideouts and a slot, which creates a natural three-level stretch. The inline tight end on the backside works as an extra blocker for the run game or as a hidden target on crossers and boot concepts.
The set is balanced between run and pass. Sft Mtn Inside Zone, HB Power O, HB Stretch, and Cheat HB Stretch give you downhill and perimeter runs from a light box. The trips alignment pulls defenders out wide, so you often face six or fewer in the box when the defense honors the passing strength. Bubble Screen and RPO Stretch Alert Lookie punish defenses that stay heavy inside. Soft motion concepts like Sft Mtn PA Dagger Cross and Sft Mtn PA CoPo change the picture after the snap and force late coverage adjustments.
The matchup advantage comes from isolation. Trips forces most defenses to roll help toward the strength, which often leaves the backside X receiver or the tight end one on one. X Corner Post, WR Option, and 93 Up Y Option are built to attack that single coverage. Flood, Stick, Curl Combo, and Corner Double In let you read a triangle of defenders on the trips side against zone.
Strengths
- Overloaded trips side creates three-level stretches with PA Flood, Corner Double In, and Sft Mtn PA Dagger Cross that stress Cover 3 and Cover 4 flat and curl defenders
- Backside isolation on the X or tight end gives you clean man beaters like X Corner Post, WR Option, and PA Y Glance when the defense rotates coverage toward the strength
- Light box counts against trips make Sft Mtn Inside Zone, HB Power O, and HB Draw effective, and Bubble Screen and RPO Stretch Alert Lookie give you built-in answers when defenders cheat inside
- Deep play-action menu including PA Boot, PA Boot Lt, Cheat PA Boot Lt Flat, and PA Solid Corner lets you roll out against aggressive run fits and hit flat and corner high-low reads
- Soft motion and Cheat plays change the formation's alignment and leverage before the snap, which helps expose man versus zone checks and baits defenders into bad matchups
Weaknesses
- Only six potential blockers with the tight end detached from the trips side, so overload blitzes and nano pressure off the trips edge can get home before deep developing concepts like PA Solid Corner finish
- Competitive players pre-snap shade and cloud the trips side, bracketing the slot and flooding zones with a user-controlled linebacker sitting on crossers from Inside Cross and Slants
- The backside isolation route is easy to predict, and a user who shades over the top of the X or the tight end can take away X Corner Post and PA Y Glance
- Run game tendencies become obvious when the defense stays in a two-high shell, and a user-controlled defender crashing the edge can blow up HB Stretch and Cheat HB Stretch
- Boot concepts roll toward a specific side, so a contain call or a spy on the boot side shuts down PA Boot Lt and forces sacks or throwaways
Usage Tips
Count the box before every snap: if the defense shows six or fewer defenders inside, check to Sft Mtn Inside Zone or HB Power O, and if they load up, audible to Bubble Screen or RPO Stretch Alert Lookie
Against Cover 3, run PA Flood or Curl Combo toward the trips side and read the flat defender, and hot route the backside X to a streak to hold the deep safety
On third and short to medium, Stick and Slants give quick answers against man coverage, while Corner Double In beats Cover 2 by attacking the hole between the corner and safety
When the defense rolls its safety toward trips, attack the isolated backside with X Corner Post or 93 Up Y Option, and block the running back to buy time against pressure
Use Sft Mtn PA Dagger Cross or Sft Mtn PA Dagger Crosser after establishing inside zone, because the motion and run fake pull linebackers up and open the dig and deep crosser windows
Plays (28)
 93 Up Y OptionOption Route, Pass Play, Deep Cross +2
 Bubble ScreenScreen Pass, Bubble Screen, Pass Play
 Cheat Deep Hitch OverMotion, Pass Play, Comeback +3
 Cheat HB StretchOutside Zone, Motion, Run Play +1
 Cheat PA Boot Lt FlatPlay Action, Flat, Motion +4
 Corner Double InIn, Corner, Pass Play
 Curl ComboCurl, Pass Play, Flat +1
 HB DiveDive, Run Play
 HB DrawDraw, Run Play
 HB Power OPower, Run Play, Power Run
 HB StretchOutside Zone, Run Play, Zone Run
 HB Zone WkInside Zone, Run Play, Zone Run
 Inside CrossCrosser, Pass Play, Block and Release +3
 PA BootPlay Action, Pass Play, Block and Release +3
 PA Boot LtPlay Action, Pass Play, Deep Cross +4
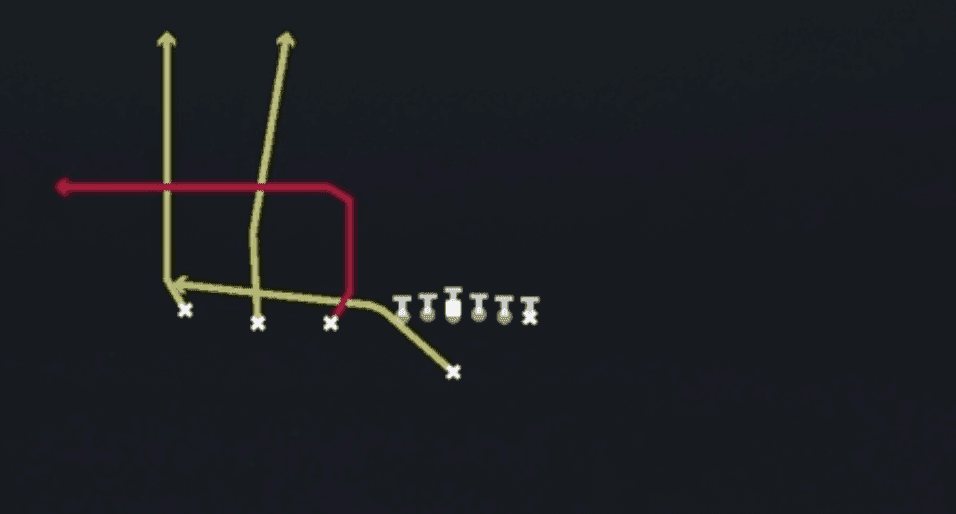 PA FloodPlay Action, Flood, Pass Play +5
 PA Solid CornerPlay Action, Corner, Pass Play +4
 PA Y GlancePlay Action, Pass Play, Fade +3
 RPO Stretch Alert LookieOutside Zone, RPO, Run Play +4
 Sft Mtn Inside ZoneInside Zone, Motion, Run Play +1
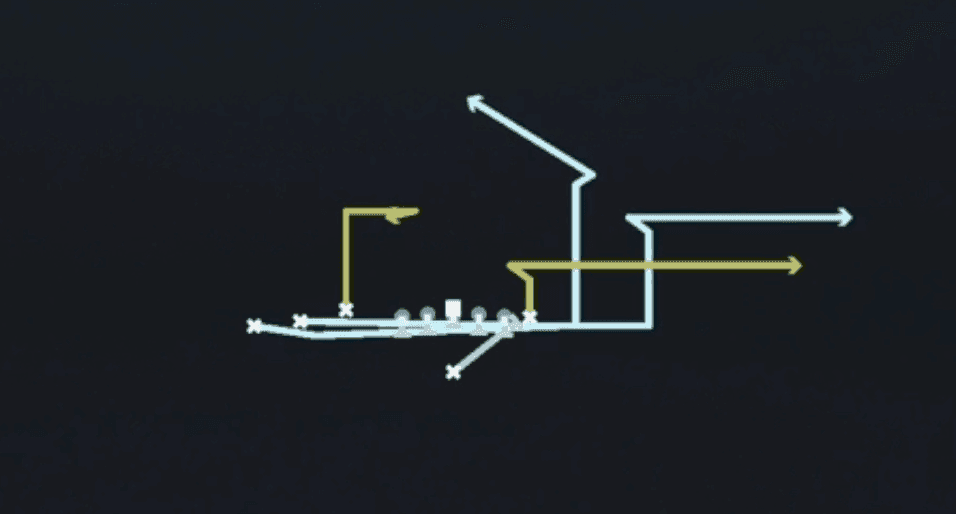 Sft Mtn PA CoPoPlay Action, Corner Post, Motion +6
 Sft Mtn PA Dagger CrossPlay Action, Crosser, Dagger +4
- Sft Mtn PA Dagger CrosserPlay Action, Crosser, Dagger +8
 SlantsSlant, Pass Play, Flat +1
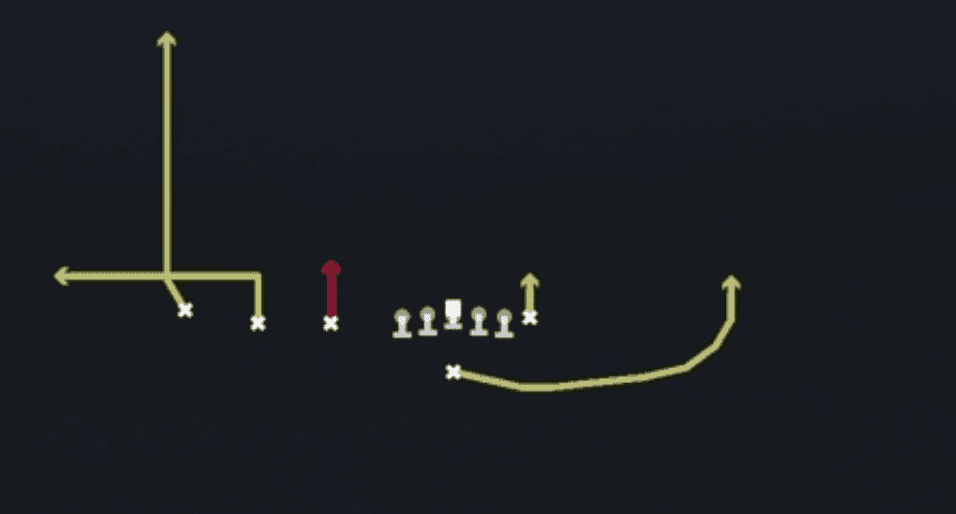 StickStick, Stick Concept, Pass Play +3
 TE InIn, Pass Play, Curl +3
 WR OptionOption Route, Pass Play, Post Corner +3
 X Corner PostCorner Post, Pass Play, Man Beater +4









