Playbooks

At a Glance
Overview
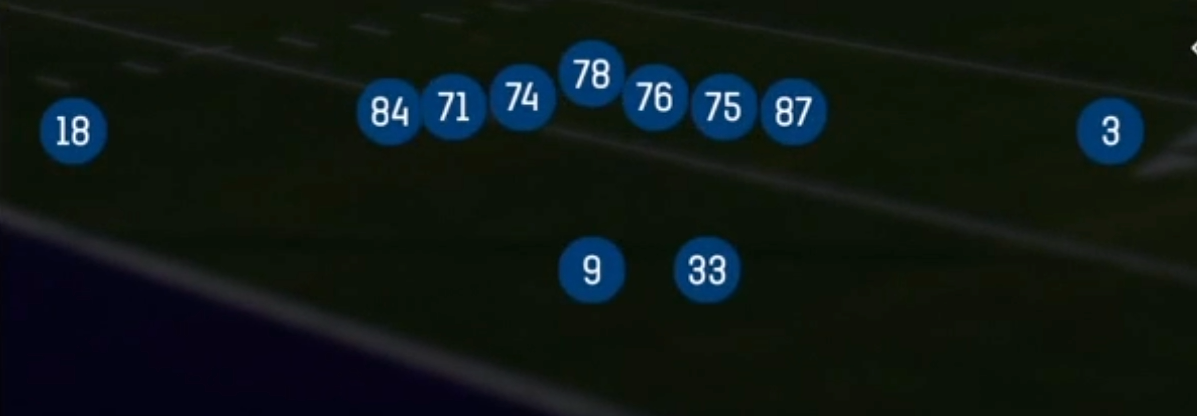
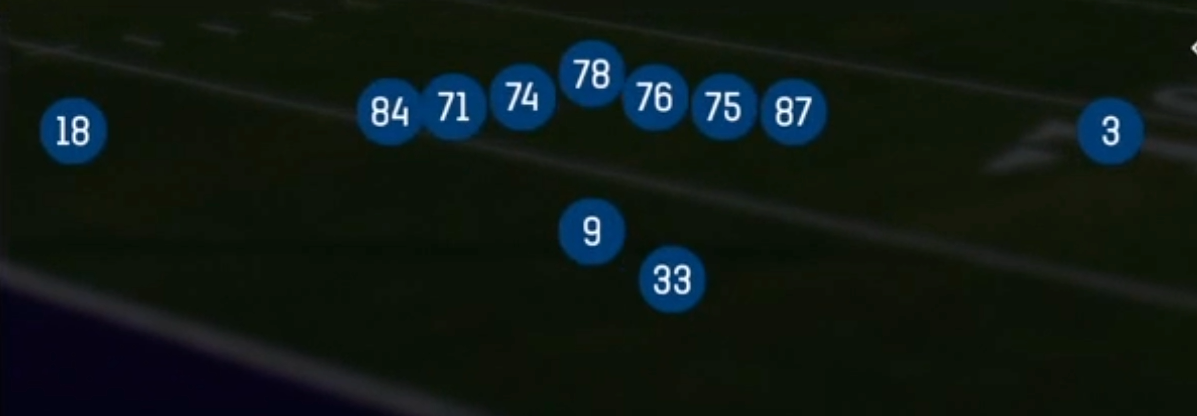
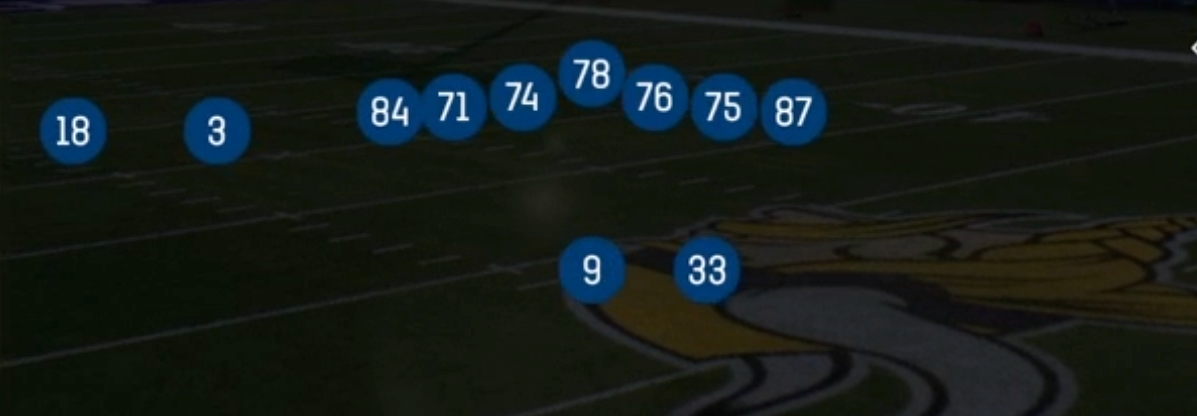
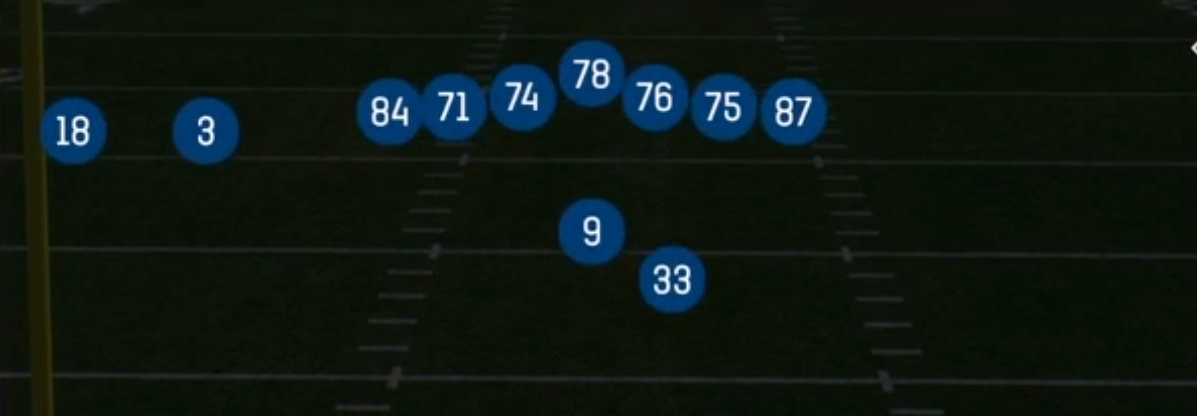
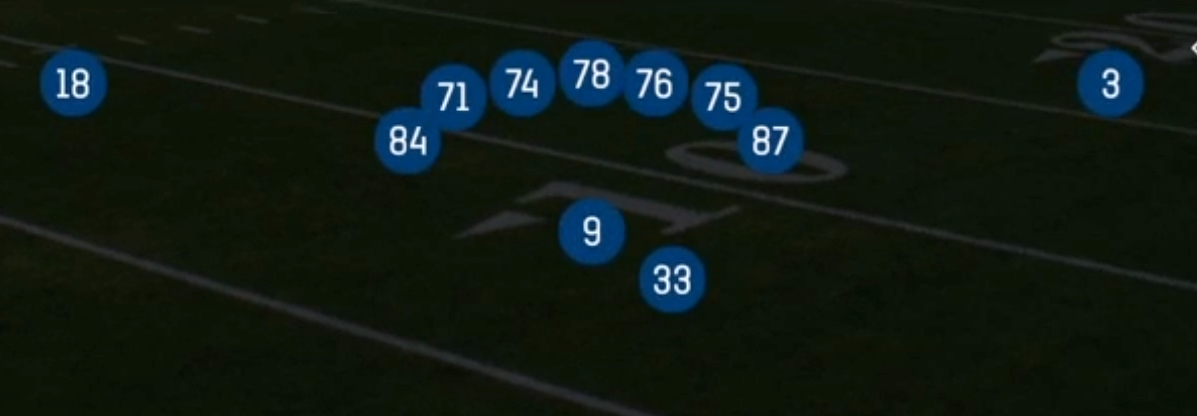
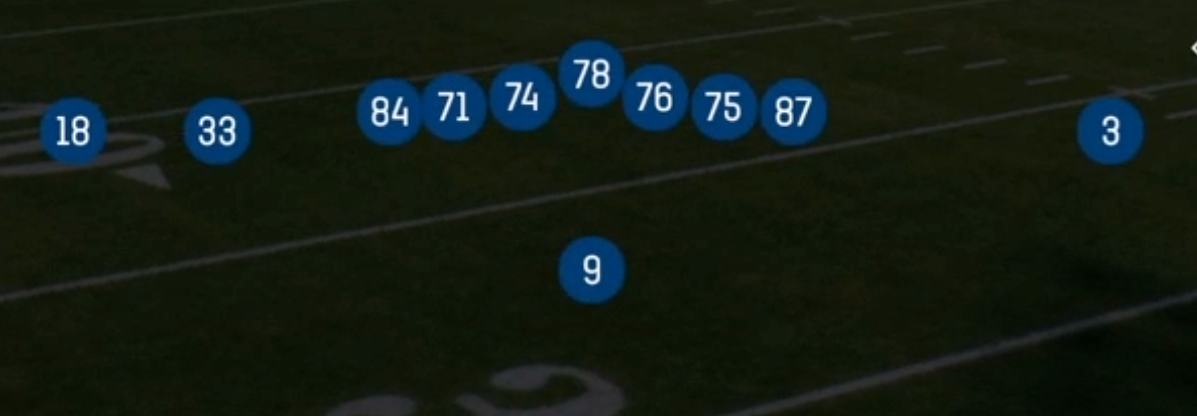
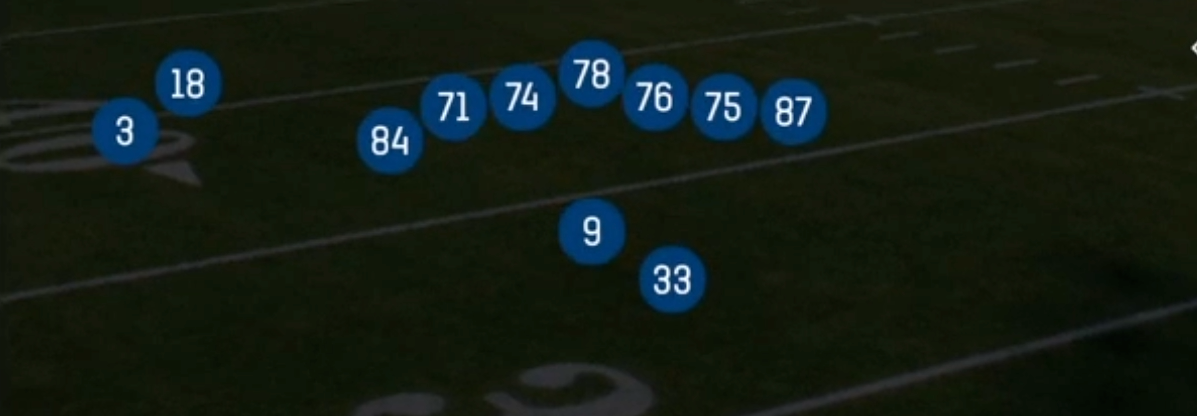
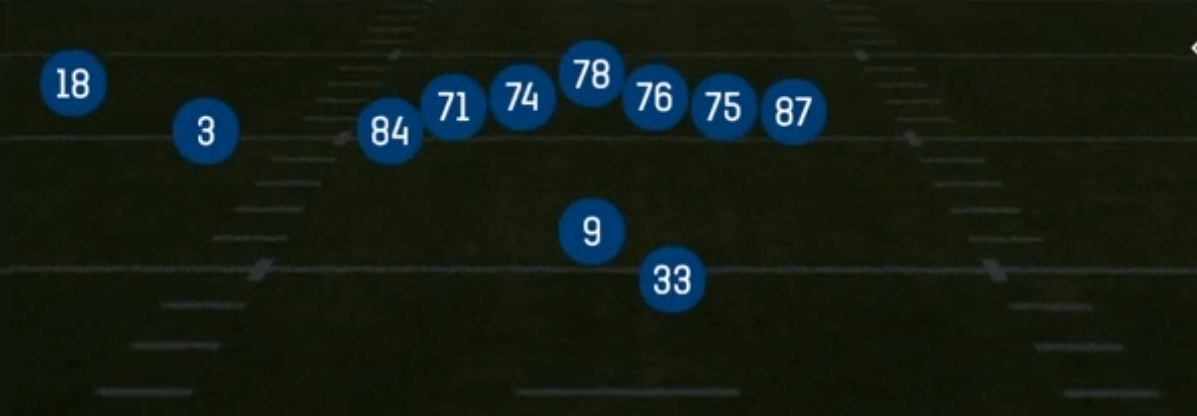
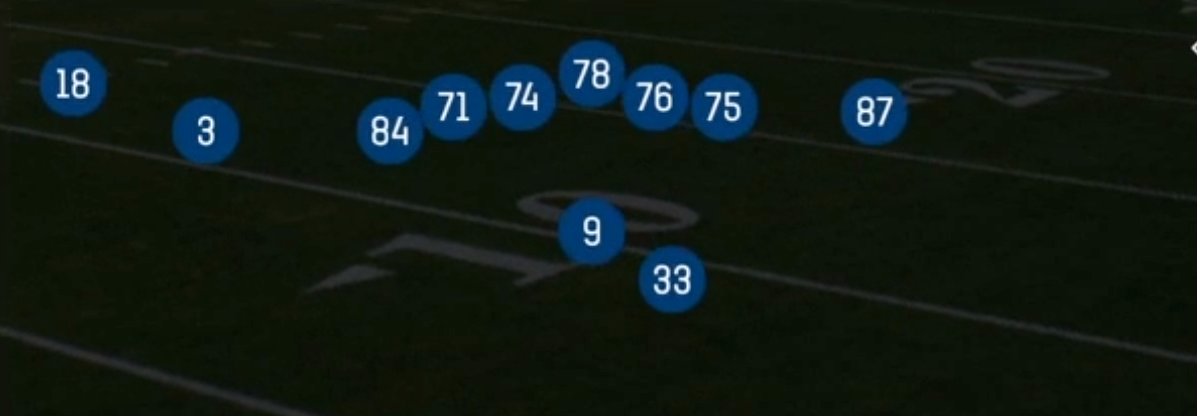
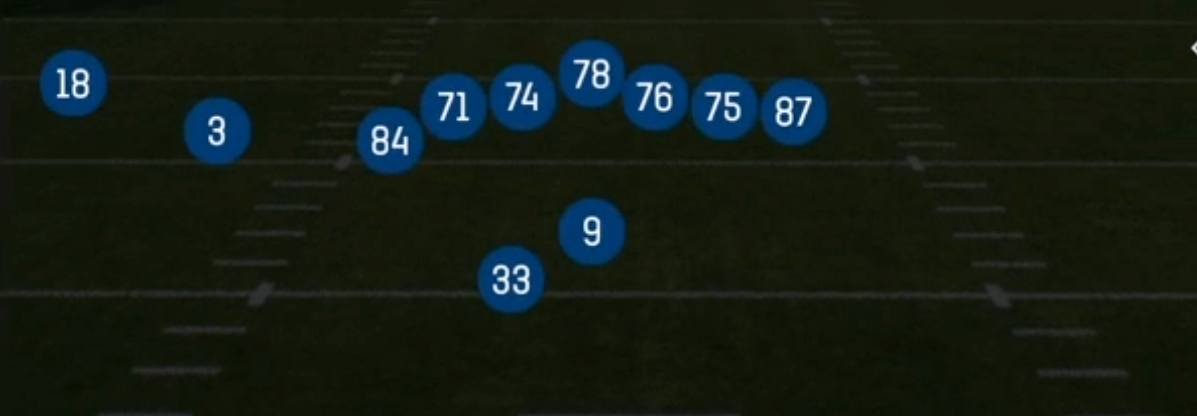
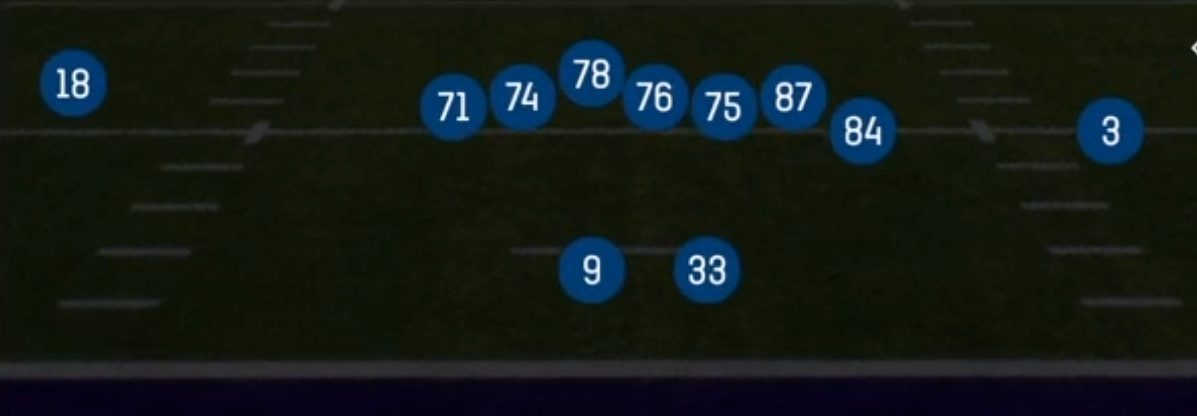
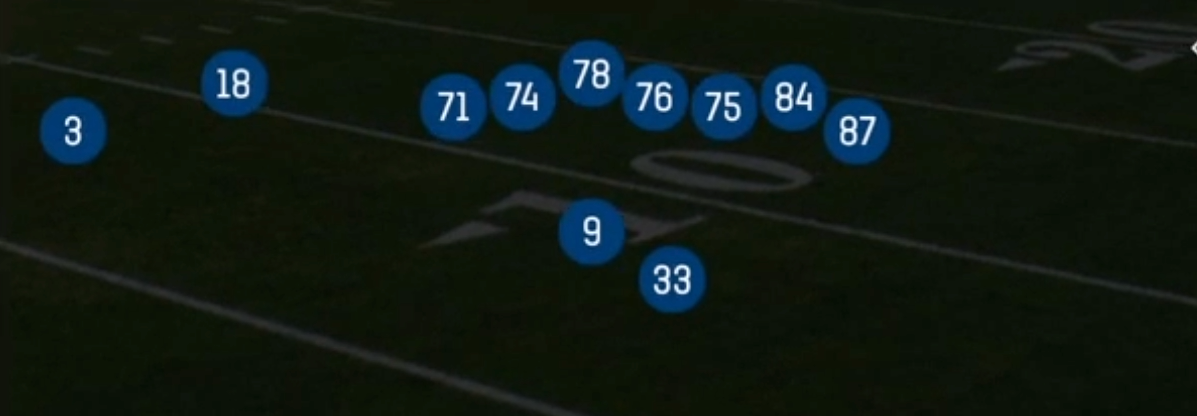
Shotgun Deuce Close puts 12 personnel (1 RB, 2 TE) in the gun and loads both tight ends to one side of the formation, with a receiver in a reduced split near the surface and the X isolated on the backside. That close alignment is the key difference from spread Shotgun sets. It builds a condensed, run-heavy strength that pulls the defense's linebackers and strong safety toward the tight end side, while the backside receiver gets one-on-one leverage in space. Defenses have to respect a legitimate downhill run game (Inside Zone, Counter Y, 0 1 Trap, Outside Zone), which makes nickel and dime personnel a liability against you.
The set is built on conflict. The RPO menu (RPO Read Mtn Stick, RPO Peek Stick, RPO Alert Omaha, RPO Counter Stick, RPO Split Peek Stick, RPO Read Y Jab Flat) puts the overhang defender in a bind: he either fits the run or carries the flat. Heavy play action (PA Deep Over, PA Post Cross, PA Deep Cross, PA Over Whip Out, PA Y Leak) punishes linebackers who trigger downhill against 12 personnel. Motion tags (Mtn, Return, Exit) let you shift the strength, create stacks, or reveal man versus zone before the snap, and HB Orbit plays turn the back into a moving mismatch against slow Mike linebackers.
The matchup advantage comes from personnel. Base defenses matched to two tight ends usually leave a linebacker or safety on your best TE, and the close alignment gives him free releases and natural pick angles on concepts like Mesh Spot, Mtn Y Option, and Mtn Return Y-Shake. The isolated X becomes a true man beater target on Corner N Go's, Bench X Dig, and Chip PoCo X Dig, because the safety rotation is almost always pulled toward the loaded side.
Strengths
- The loaded two TE surface creates natural rub and bunch releases, so Mesh Spot, Mtn Y Option, and Mtn Return Y-Shake beat Cover 1 and Cover 0 by picking man defenders at the mesh point and forcing linebackers to cover TEs in space.
- The RPO package (RPO Alert Omaha, RPO Peek Stick, RPO Counter Stick, RPO Read Flat Wheel) stresses the overhang and flat defender every snap. You read one player and get either a clean run lane or an easy Stick throw against Cover 3 and Cover 4.
- The play action depth is elite for a gun set. PA Deep Over, PA Post Cross, and PA Over Whip Out hit the void behind linebackers who bite on the Inside Zone and Counter Y fakes, which is the best zone beater answer to Cover 3 Buzz and match coverage.
- The backside X is isolated on nearly every snap, so Corner N Go's, Bench X Dig, and Chip PoCo X Dig let a SLWR or speed X attack single high press coverage while the safety is rotated toward the TE strength.
- The Mtn, Return, and Exit motion variants act as built in pre snap reads. A defender trailing motion across the formation tells you man, and a bumped linebacker tells you zone, which lets you audible between Exit Dagger, Exit Drive, and Exit X Over with confidence.
Weaknesses
- Both TEs are condensed to one side, so pressure off the weak edge is dangerous. An overload or nano blitz from the backside has a short path to the QB, especially on longer developing PA Deep Cross and PA Deep Curls concepts.
- Only three true vertical threats are on the field, and the TEs are slow, so Cover 2 Man and 2 Man Under with a good user in the hook can take away the middle breaking routes that this set relies on.
- A user controlled linebacker or safety sitting on the TE side can jump the Stick and Y Option throws, and the backside isolation means you have few answers if a shutdown corner removes the X with inside leverage.
- The run heavy look is easy to diagnose, so opponents who simply play base personnel and crash the edge will squeeze Outside Zone and Lead Read Option without giving up numbers in coverage.
- HB Orbit and screen concepts (HB Orbit TE Mid Screen, HB Orbit Mesh Spot) are vulnerable to spy and QB contain calls, and a defender reading the orbit motion can blow the play up before the handoff or throw.
Usage Tips
Treat first and 10 as your run and RPO down. Call Inside Zone, Counter Y, or RPO Alert Omaha against base defense, and if the opponent answers with nickel or dime, keep pounding the ball with the Power HB tag behind the extra TE.
Use the motion plays as coverage checks. If a defender follows the Return or Mtn motion across the formation, audible to Mesh Spot or Mtn Return Y-Shake for a man beater. If the defense shifts instead, go to Stick, Spacing Switch, or RPO Peek Stick to attack zone.
After two or three successful runs, call PA Deep Over or PA Post Cross on second and short. Hot route the backside X to a streak to hold the single high safety and open the crosser in the linebacker void.
On third and medium, Chip PoCo X Dig and Bench X Dig are strong calls because the chip helps against edge pressure. Consider a slant hot route on the isolated X for a quick answer to Cover 0 blitzes.
In the red zone, lean on Return RZ Trail, Corner Go's Flat, and PA Y Leak. The tight TE surface draws the defense to the strength, and the leak or corner to the boundary gets lost in condensed coverage.
Plays (53)
 0 1 TrapTrap, Run Play, Power Run
 BenchBench, Pass Play, Block and Release +2
 Bench Dig CurlCurl, Dig, Pass Play +5
 Bench SwapBench, Pass Play, Corner +2
 Bench X DigDig, Pass Play, Bench +4
 Both StickStick, Stick Concept, Pass Play +3
 Chip Dig 7 StopDig, Pass Play, Block and Release +2
 Chip PoCo X DigDig, Post Corner, Pass Play +4
 Corner Go's FlatFlat, Corner, Go +5
 Corner N Go'sCorner, Go, Pass Play +3
 Counter YCounter, Run Play, Power Run
- Exit DaggerBlock and Release, Corner, Drag +4
- Exit DriveCorner, Dig, Out +3
- Exit X OverCurl, Deep Cross, Crosser +4
 HB Orbit Mesh SpotSpot, Mesh, Motion +8
 HB Orbit SpacingSpacing, Motion, Pass Play +6
 HB Orbit TE Mid ScreenScreen Pass, Hb Screen, Te Screen +6
 Inside ZoneInside Zone, Run Play, Zone Run
 Inside Zone SplitInside Zone, Run Play, Zone Run
 Lead Read OptionRead Option, Run Play
 Mesh SpotSpot, Mesh, Pass Play +7
 Mtn PA SlidePlay Action, Slide, Motion +6
 Mtn Return HB TossToss, Motion, Run Play
 Mtn Return Y-ShakeMotion, Flat, Option Route +4
- Mtn RPO Zone StickRPO, Stick, Stick Concept +7
 Mtn StickStick, Stick Concept, Motion +4
 Mtn WR CornerCorner, Motion, Pass Play +3
 Mtn Y CornerCorner, Motion, Pass Play +4
 Mtn Y OptionOption Route, Motion, Pass Play +6
 Mtn Zone SplitMotion, Inside Zone, Run Play +1
 Outside ZoneOutside Zone, Run Play, Zone Run
- PA Deep CrossPlay Action, Crosser, Pass Play +2
 PA Deep CurlsPlay Action, Pass Play, Block and Release +2
 PA Deep OutPlay Action, Out, Pass Play +3
 PA Deep OverPlay Action, Deep Over, Pass Play +4
- PA Over Whip OutOut, Whip, Block and Release +5
 PA Post CrossPlay Action, Post, Pass Play +5
 PA SlidePlay Action, Slide, Pass Play +5
 PA Y LeakPlay Action, Pass Play, Corner +4
 Post WheelPost, Wheel, Pass Play +4
 Return PA SlidePlay Action, Slide, Motion +6
 Return RPO Read Flat WheelRPO, Flat, Wheel +5
 Return RZ TrailMotion, Trail, Pass Play +3
 RPO Alert OmahaRPO, Pass Play, Run Play +1
- RPO Counter StickCounter, RPO, Stick +6
 RPO Peek StickRPO, Stick, Stick Concept +4
 RPO Read CntrRPO, Pass Play, Run Play
 RPO Read Flat WheelRPO, Flat, Wheel +4
 RPO Read Mtn StickRPO, Stick, Stick Concept +3
- RPO Read Y Jab FlatFlat, Pass Play, Run Play
- RPO Split Peek StickStick, Flat, Hitch +2
 Spacing SwitchSpacing, Pass Play, Cover 3 Beater +5
 StickStick, Stick Concept, Pass Play +3