Playbooks

Ace Offset

SpecialistsGadget
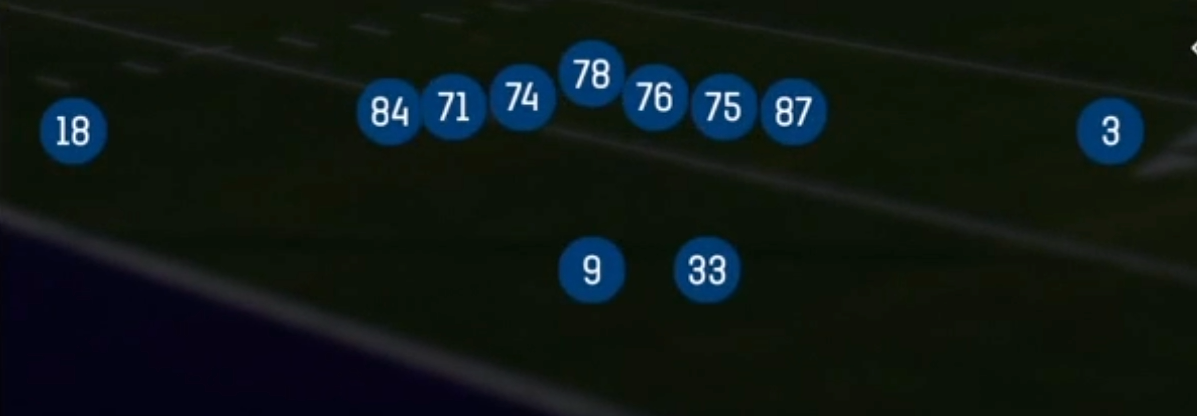
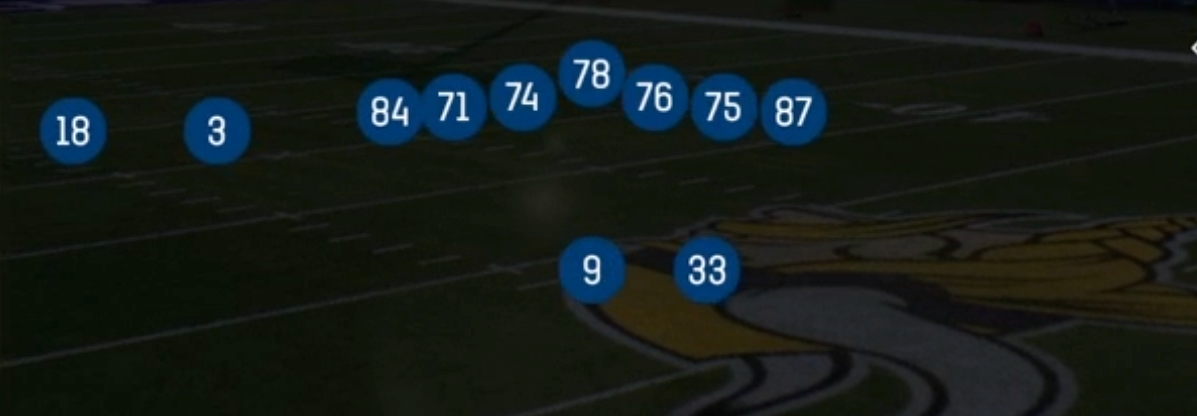
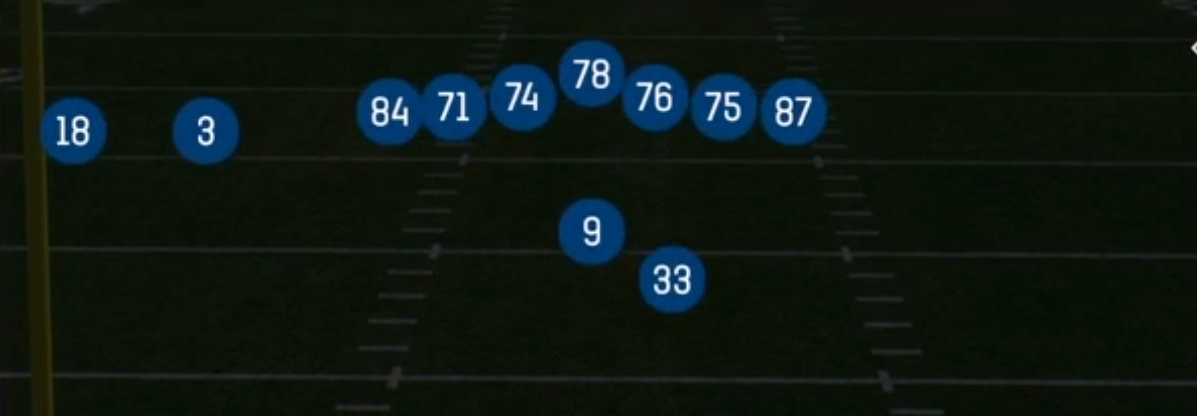
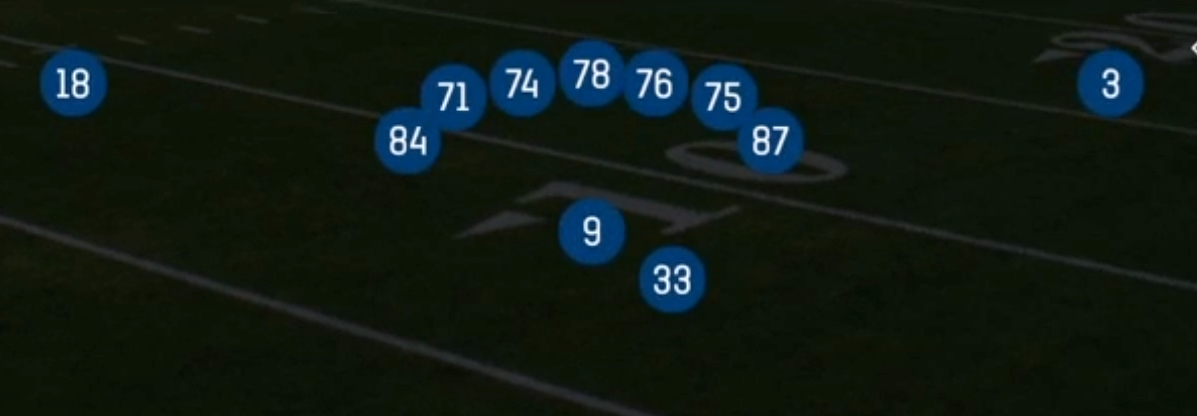
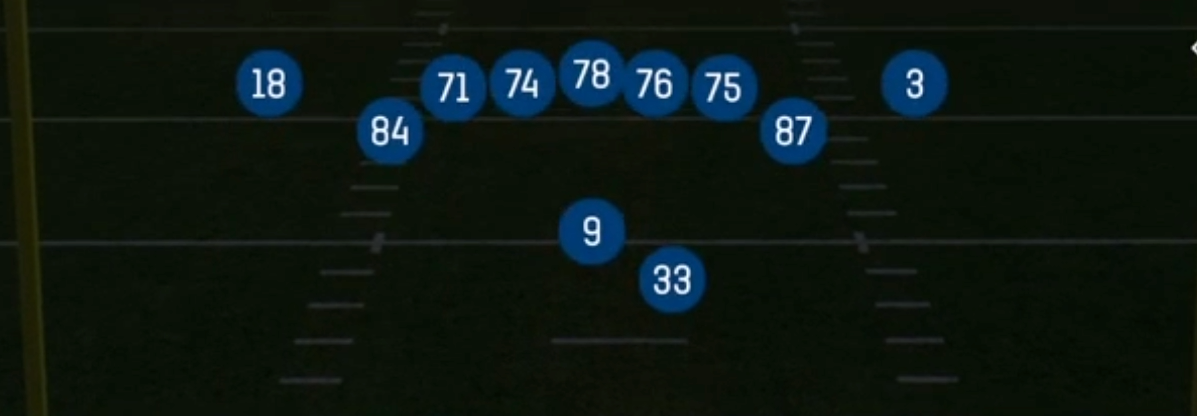
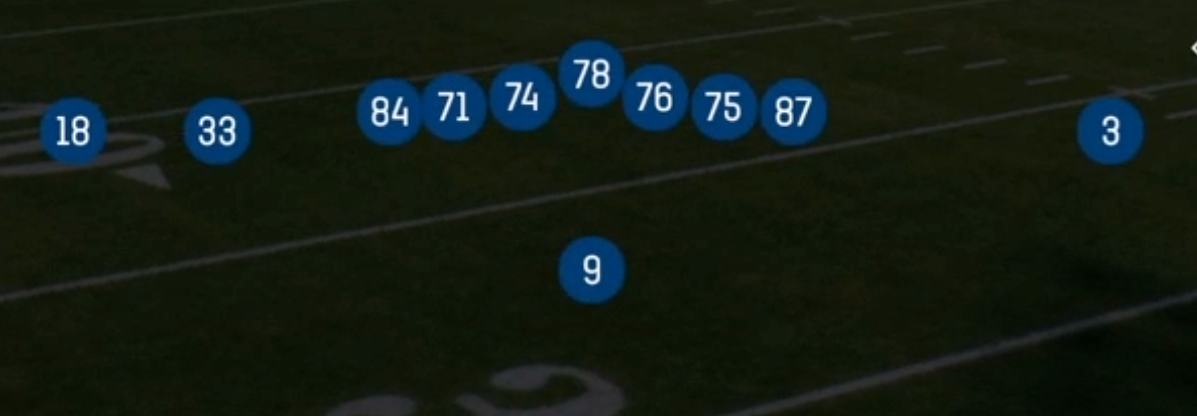
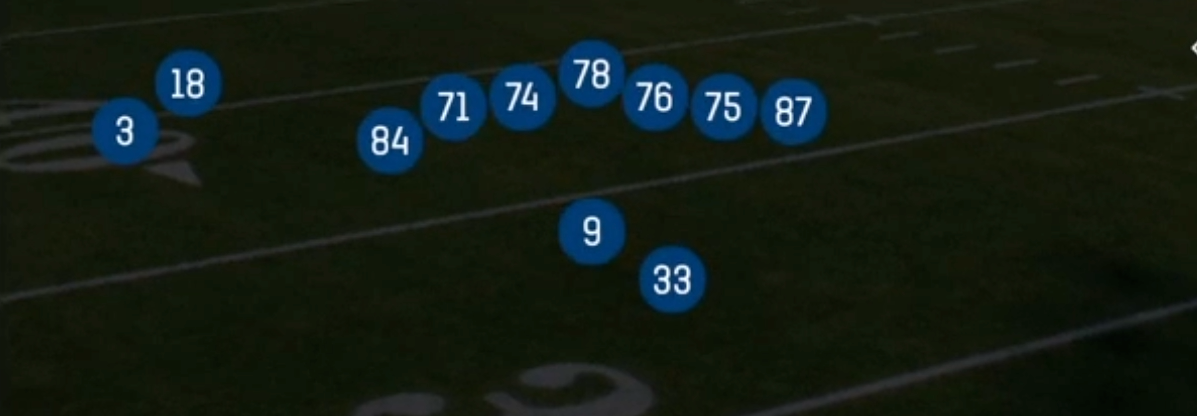
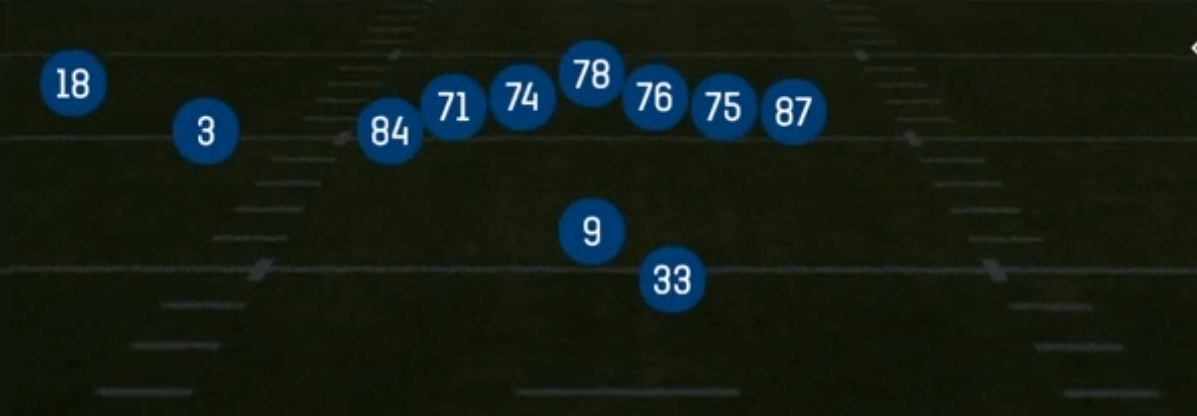
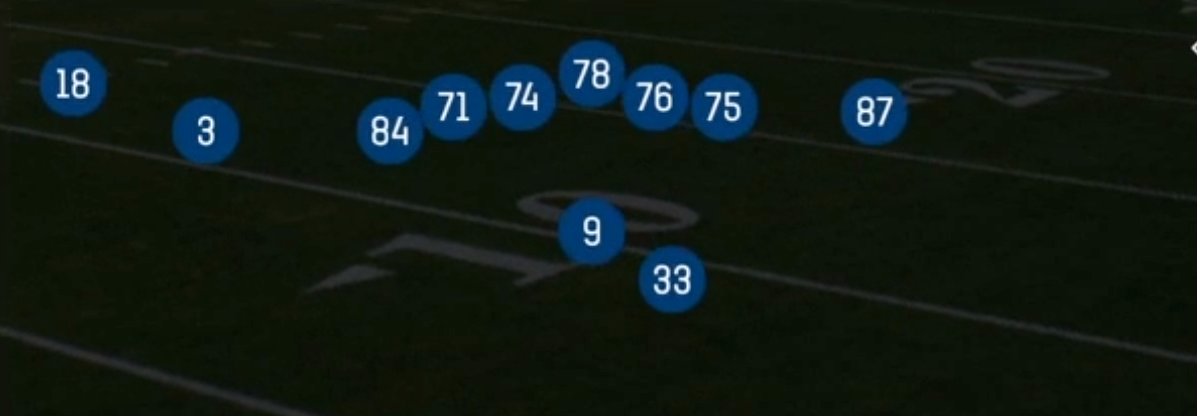
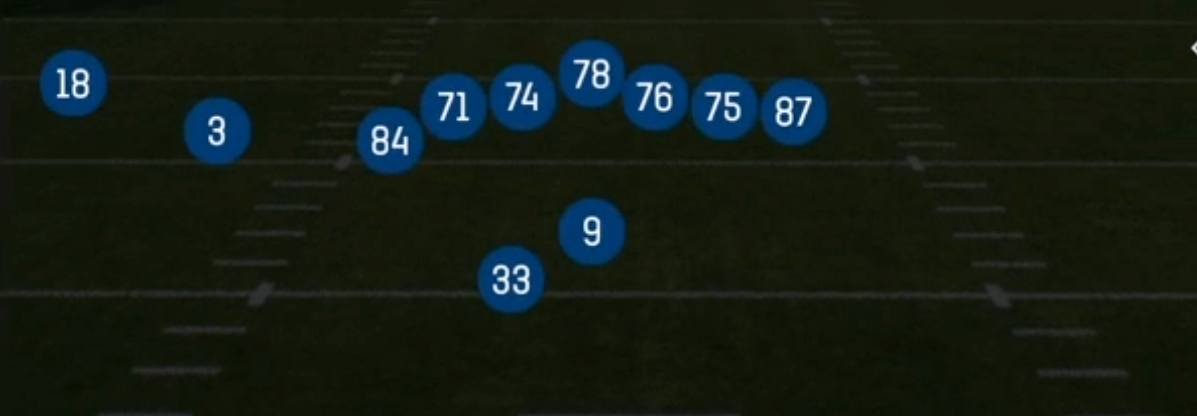
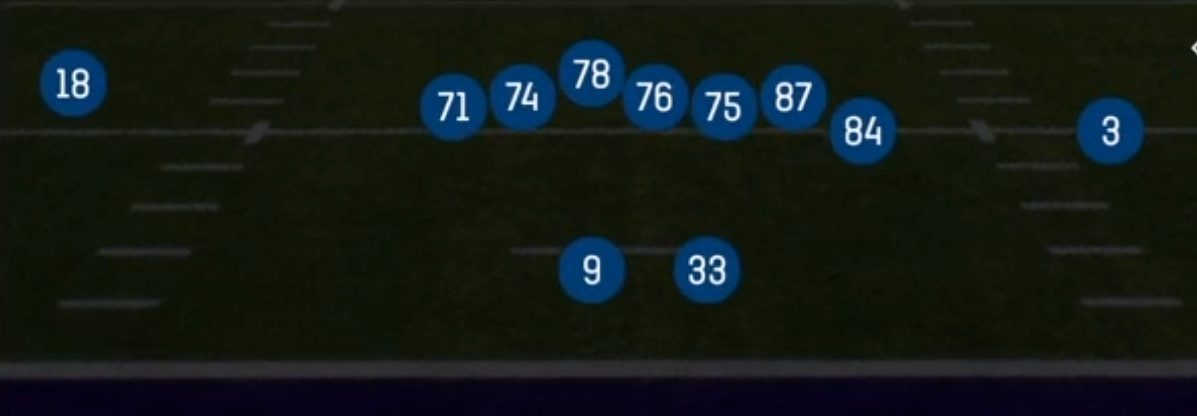
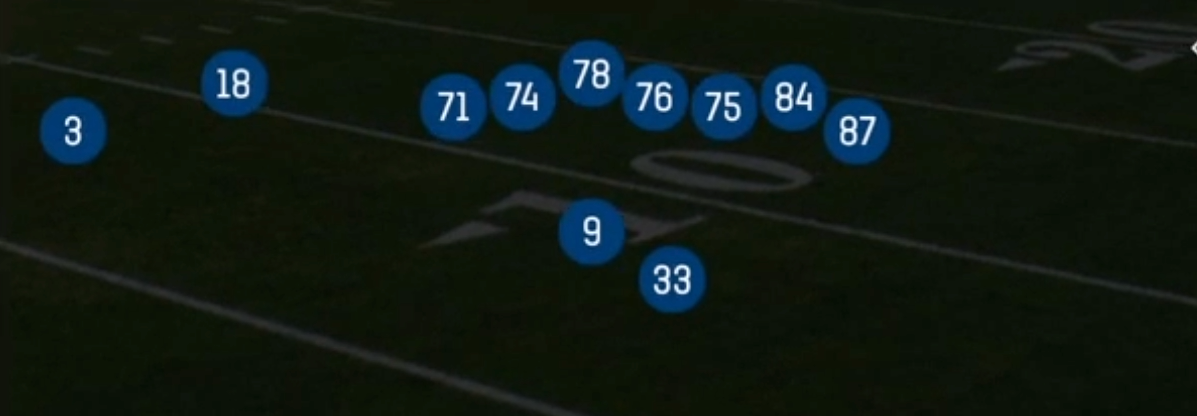
Set alignment for Ace Offset from Shotgun in Madden 27

At a Glance

FormationShotgun
Plays15

Overview

Ace Offset is Shotgun's 12 personnel workhorse set, built around a tight formation with both tight ends attached or flexed off the line and the halfback offset to one side of the quarterback rather than aligned directly next to him. That offset back placement is the whole point: it declares your run strength before the snap, gives you a clean angle for Inside Zone and Outside Zone, and lets the back release into the flat or on Mtn HB Slip Screen without fighting through traffic. Compared to more spread out Shotgun sets that stretch defenses horizontally with three and four receiver looks, Ace Offset keeps bodies condensed, which pulls linebackers and safeties tighter to the box and shrinks the throwing windows outside the numbers while opening them up over the middle.

The 12 personnel package is what generates the matchup edges here. Defenses that answer 12 personnel with base 4-3 or 3-4 nickel packages are forced to cover two tight ends with linebackers or a third safety, and if you have a receiving tight end with real speed and route running, Corner Strike and PA Comeback Seam isolate him against a linebacker in man coverage almost every time. If the defense counters by going lighter with dime or big nickel, Buck Sweep, Read Option, HB Punch, and the zone runs punish undersized fronts. That constant push and pull is why Ace Offset works so well as a base set rather than a situational one.

Concept wise, this set covers the entire route tree. Curl Flats and Quick Slants give you fast, high percentage answers against pressure. Flanker Drive and Dagger attack zone coverage with layered crossers and deep dig combos that put safeties in conflict. Z Spot is a triangle read that hits every level short and intermediate. The play action package (PA Comeback Seam, PA Read) sells the zone run and gets linebackers biting downhill before you throw behind them. Jet Touch Pass adds a gadget wrinkle that stresses the perimeter and forces defenses to respect motion, which is exactly why this set carries the Gadget tag.

Strengths

  • Dagger and Flanker Drive are elite zone beaters, with the deep dig and layered crossers occupying the hook defender while the vertical clears out the safety, and users who sit in the middle get pulled out of position by the crossing action.
  • Corner Strike and PA Comeback Seam isolate the tight end against linebacker coverage, which is a free win against most man shells and a soft spot against Cover 3 with the seam bending behind the curl to flat defender.
  • Z Spot gives you a genuine three level triangle read that beats both man and zone, and hot routing the offset back on a flat or angle route adds a fourth checkdown option that punishes a blitzing nickel.
  • The run game is layered and self correcting: Inside Zone, Outside Zone, Buck Sweep, HB Punch, and Read Option let you attack any front, and the offset back tells you pre snap whether your best gap is strong or weak.
  • Play action off the zone concepts is legitimate here because the run threat is real, so PA Read and PA Comeback Seam get linebackers stepping up and open intermediate windows you would never see out of a pure passing set.
  • Mtn HB Slip Screen and Jet Touch Pass are perfect calls against heavy pressure, turning aggressive blitzes and nano look fronts into chunk plays on the perimeter.

Weaknesses

  • The condensed formation means fewer natural leverage advantages outside the numbers, so if your opponent plays hard outside technique and squeezes the sideline, your boundary throws get contested quickly.
  • Two tight end personnel limits your true speed on the field, which makes deep shot concepts less threatening and lets safeties play flatter and more aggressive downhill.
  • Overload blitzes to the side away from the offset back can outnumber your protection, and if the defense sends the nickel or a slot corner from that side, the back is not in position to pick it up unless you manually block him.
  • User controlled defenders sitting in the middle of the field can jump Quick Slants, the Z Spot sit route, and the Dagger dig because the tight formation funnels most of the traffic between the numbers.
  • Repeated Inside Zone and Outside Zone calls out of the same offset alignment give away your run direction, and a smart opponent will slide the front and set the edge before the snap.
  • Jet Touch Pass and other gadget looks lose all value once your opponent recognizes them, and a blown assignment on the motion turns into a tackle for loss behind the line.

Usage Tips

Use Ace Offset as your base set on first and second down between the twenties, alternating zone runs with PA Read so the defense never gets to commit fully to either.

Read the box pre snap: if the defense answers 12 personnel with base linebackers, call Corner Strike or PA Comeback Seam and target the tight end mismatch, and if they go light with extra corners, hammer Buck Sweep and HB Punch.

Against single high shells, Dagger is your money call because the dig sits behind the linebacker level while the vertical occupies the deep middle, and against two high, Flanker Drive and Z Spot attack the underneath zones that get vacated.

Always hot route the offset halfback to a flat or angle route on passing concepts you expect pressure on, and use manual block assignment on the back when you diagnose an overload to the weak side.

Save Mtn HB Slip Screen and Jet Touch Pass for third down or after you have been blitzed on consecutive plays, since both punish aggression and reset the down and distance conversation.

Motion the flexed tight end or a receiver pre snap to identify man versus zone, then audible to Quick Slants or Curl Flats if you confirm man coverage with tight leverage.

Plays (15)

Plays in Ace Offset
PlayDiagramOpen
Buck SweepSweep, Run Play
Corner StrikeCorner, Pass Play
Curl FlatsCurl, Pass Play, Flat
DaggerDagger, Pass Play, Cover 2 Beater +1
Flanker DriveDrive, Pass Play, Cover 4 Beater
HB PunchRun Play, Power Run, Power +2
Inside ZoneInside Zone, Run Play, Zone Run
Jet Touch PassMotion
Mtn HB Slip ScreenScreen Pass, Hb Screen, Motion +1
Outside ZoneOutside Zone, Run Play, Zone Run
PA Comeback SeamPlay Action, Comeback, Seam +1
PA ReadPlay Action, Pass Play
Quick SlantsSlant, Pass Play
Read OptionRead Option, Run Play
Z SpotSpot, Pass Play, Cover 3 Beater

Other Sets in Shotgun

4wr Pack Trips

18 Plays · 1 RB, 0 TE, 4 WR

4WR Trips Strong

18 Plays · 1 RB, 0 TE, 4 WR

5WR Flex Trey

16 Plays · 0 RB, 1 TE, 4 WR

5WR Tight

12 Plays · 0 RB, 0 TE, 5 WR

5WR Trio

24 Plays · 1 RB, 1 TE, 3 WR

5WR Trips

18 Plays · 0 RB, 0 TE, 5 WR

Ace

28 Plays · 1 RB, 2 TE, 2 WR

Ace Slot

16 Plays · 1 RB, 2 TE, 2 WR

Ace Slot Offset

19 Plays · 1 RB, 2 TE, 2 WR

Box

18 Plays · 1 RB, 0 TE, 4 WR

Box HB Strong

6 Plays · 1 RB, 1 TE, 3 WR

Box Offset Wk

19 Plays · 1 RB, 1 TE, 3 WR

Box Y Off

6 Plays · 1 RB, 1 TE, 3 WR

Bunch

53 Plays · 1 RB, 1 TE, 3 WR

Bunch HB Str

12 Plays · 1 RB, 1 TE, 3 WR

Bunch Offset

31 Plays · 1 RB, 1 TE, 3 WR

Bunch Offset Close

11 Plays · 1 RB, 1 TE, 3 WR

Bunch Open

9 Plays · 1 RB, 0 TE, 4 WR

Bunch Open Offset

18 Plays · 1 RB, 1 TE, 3 WR

Bunch Open TE

13 Plays · 1 RB, 1 TE, 3 WR

Bunch Quads

9 Plays · 1 RB, 1 TE, 3 WR

Bunch Quads Close

6 Plays · 1 RB, 1 TE, 3 WR

Bunch Spread

24 Plays · 1 RB, 1 TE, 3 WR

Bunch Spread Nasty

35 Plays · 1 RB, 1 TE, 3 WR

Bunch Str Nasty

33 Plays · 1 RB, 1 TE, 3 WR

Bunch Str Offset

45 Plays · 1 RB, 1 TE, 3 WR

Bunch TE

51 Plays · 1 RB, 1 TE, 3 WR

Bunch TE Str

13 Plays · 1 RB, 1 TE, 3 WR

Bunch TE Wk

18 Plays · 1 RB, 1 TE, 3 WR

Bunch Trio Open

12 Plays · 1 RB, 1 TE, 3 WR

Bunch Wide

26 Plays · 1 RB, 1 TE, 3 WR

Bunch Wide Nasty

23 Plays · 1 RB, 1 TE, 3 WR

Bunch X Nasty

61 Plays · 1 RB, 1 TE, 3 WR

Bunch Y-Flex

32 Plays · 1 RB, 1 TE, 3 WR

Bunch Y-Trips

15 Plays · 1 RB, 1 TE, 3 WR

Cluster

14 Plays · 1 RB, 1 TE, 3 WR

Cluster HB Str

18 Plays · 1 RB, 1 TE, 3 WR

Dbls Flex Y Off Close

21 Plays · 1 RB, 1 TE, 3 WR

Deebo Package

6 Plays · Unknown

Deuce

18 Plays · 1 RB, 2 TE, 2 WR

Deuce Close

47 Plays · 1 RB, 2 TE, 2 WR

Doubles

65 Plays · 1 RB, 1 TE, 3 WR

Doubles Flex

27 Plays · 1 RB, 1 TE, 3 WR

Doubles Flex WK Pats

13 Plays · Unknown

Doubles Flex Wk Swap

12 Plays · 1 RB, 1 TE, 3 WR

Doubles Flex Y Off Close

21 Plays · 1 RB, 1 TE, 3 WR

Doubles HB Wk

46 Plays · 1 RB, 1 TE, 3 WR

Doubles Hip

13 Plays · 1 RB, 1 TE, 3 WR

Doubles Off Close

10 Plays · 1 RB, 1 TE, 3 WR

Doubles Off Close Wk

13 Plays · 1 RB, 1 TE, 3 WR

Doubles Offset

43 Plays · 1 RB, 1 TE, 3 WR

Doubles Offset Wk

42 Plays · 1 RB, 1 TE, 3 WR

Double Stack

13 Plays · 1 RB, 1 TE, 3 WR

Doubles Y-Flex

28 Plays · 1 RB, 1 TE, 3 WR

Doubles Y-Flex Offset

15 Plays · 1 RB, 1 TE, 3 WR

Doubles Y Off

42 Plays · 1 RB, 1 TE, 3 WR

Doubles Y Off Nasty

20 Plays · 1 RB, 1 TE, 3 WR

Doubles Y Off WK

2 Plays · 1 RB, 1 TE, 3 WR

Doubles Z Close

14 Plays · 1 RB, 1 TE, 3 WR

Doubles Z Close Wk

17 Plays · 1 RB, 1 TE, 3 WR

Double Wing

9 Plays · 2 RB, 3 TE, 0 WR

Duo Slot Open

10 Plays · 2 RB, 0 TE, 3 WR

Duo Twins Flex

9 Plays · 2 RB, 1 TE, 2 WR

Empty Ace

12 Plays · 1 RB, 2 TE, 2 WR

Empty Base

33 Plays · 1 RB, 1 TE, 3 WR

Empty Base Flex

35 Plays · 1 RB, 1 TE, 3 WR

Empty Base Trio

17 Plays · 1 RB, 1 TE, 3 WR

Empty Bunch

9 Plays · 1 RB, 1 TE, 3 WR

Empty Bunch Open

17 Plays · 1 RB, 1 TE, 3 WR

Empty Bunch Tight

12 Plays · 1 RB, 1 TE, 3 WR

Empty Bunch Wide

13 Plays · 1 RB, 1 TE, 3 WR

Empty Bunch Y Flex

9 Plays · 1 RB, 1 TE, 3 WR

Empty Chips

9 Plays · 1 RB, 1 TE, 3 WR

Empty Chips Nasty

10 Plays · 1 RB, 1 TE, 3 WR

Empty Chips Quads

9 Plays · 1 RB, 1 TE, 3 WR

Empty Chips Tight

11 Plays · 1 RB, 1 TE, 3 WR

Empty HB Wide

13 Plays · 1 RB, 1 TE, 3 WR

Empty Quads

9 Plays · 0 RB, 1 TE, 4 WR

Empty Sketch Stack

10 Plays · 1 RB, 1 TE, 3 WR

Empty Steeler

12 Plays · 1 RB, 1 TE, 3 WR

Empty Strong Slots

9 Plays · 1 RB, 1 TE, 3 WR

Empty Trey

21 Plays · 1 RB, 1 TE, 3 WR

Empty Trey Flex

12 Plays · Unknown

Empty Trey Stack

15 Plays · 1 RB, 1 TE, 3 WR

Empty Triple Stack

3 Plays · 1 RB, 1 TE, 3 WR

Empty Trips Speed

15 Plays · 1 RB, 1 TE, 3 WR

Empty Y Slot

15 Plays · 1 RB, 1 TE, 3 WR

Flanker Close

14 Plays · 1 RB, 0 TE, 4 WR

Flex Y Off

20 Plays · 1 RB, 1 TE, 3 WR

Flex Y Off Close

16 Plays · 1 RB, 1 TE, 3 WR

Flex Y Off Wk

27 Plays · 1 RB, 1 TE, 3 WR

Gadget Backfield

6 Plays · 3 RB, 1 TE, 1 WR

Gadget Package

6 Plays · 3 RB, 1 TE, 1 WR

Go Go Twins Flex

9 Plays · 2 RB, 1 TE, 2 WR

Heavy Panther

9 Plays · 2 RB, 3 TE, 0 WR

Monster

3 Plays · 1 RB, 1 TE, 3 WR

Normal Flex Snug

17 Plays · 1 RB, 1 TE, 3 WR

Normal Flex Wing

12 Plays · 1 RB, 1 TE, 3 WR

Normal Off Close Wk

21 Plays · 1 RB, 1 TE, 3 WR

Normal Y Off

50 Plays · 1 RB, 1 TE, 3 WR

Normal Y Off Close

49 Plays · 1 RB, 1 TE, 3 WR

Normal Y Off Wk

34 Plays · 1 RB, 1 TE, 3 WR

Open Flex

10 Plays · 1 RB, 1 TE, 3 WR

Slot Left

9 Plays · 1 RB, 1 TE, 3 WR

Slot Right

22 Plays · 1 RB, 1 TE, 3 WR

Slot WR Backfield

7 Plays · Unknown

Split Close

30 Plays · 2 RB, 0 TE, 3 WR

Split Close Pro

15 Plays · 2 RB, 1 TE, 2 WR

Split Cowboy

17 Plays · 1 RB, 1 TE, 3 WR

Split Flanker Close

9 Plays · 2 RB, 0 TE, 3 WR

Split Offset

34 Plays · 2 RB, 0 TE, 3 WR

Split Pro Offset Wk

6 Plays · 2 RB, 1 TE, 2 WR

Split Slot Offset

41 Plays · 2 RB, 0 TE, 3 WR

Split Slot Open

33 Plays · 2 RB, 0 TE, 3 WR

Split Twins

6 Plays · 2 RB, 1 TE, 2 WR

Split Twins Offset

13 Plays · 2 RB, 1 TE, 2 WR

Split Twins Stack

6 Plays · 2 RB, 1 TE, 2 WR

Split Wing Nasty

6 Plays · 2 RB, 2 TE, 1 WR

Split WR Backfield

9 Plays · 1 RB, 1 TE, 3 WR

Split Y-Flex

15 Plays · 2 RB, 1 TE, 2 WR

Split Y Off

19 Plays · 2 RB, 1 TE, 2 WR

Split Y Off Close

10 Plays · 1 RB, 1 TE, 3 WR

Spread

69 Plays · 1 RB, 0 TE, 4 WR

Spread 4wr

1 Play · 1 RB, 1 TE, 3 WR

Spread Dbl Flex

40 Plays · 1 RB, 1 TE, 3 WR

Spread Dbl Flex Wk

22 Plays · 1 RB, 1 TE, 3 WR

Spread Flex

15 Plays · 1 RB, 1 TE, 3 WR

Spread Slots Close

22 Plays · 1 RB, 0 TE, 4 WR

Spread Y-Flex

54 Plays · 1 RB, 1 TE, 3 WR

Spread Y-Flex Wk

40 Plays · 1 RB, 1 TE, 3 WR

Spread Y-Slot

61 Plays · 1 RB, 1 TE, 3 WR

Spread Y-Slot Wk

49 Plays · 1 RB, 1 TE, 3 WR

Stack HB WK

9 Plays · 1 RB, 1 TE, 3 WR

Stack Y-Flex

15 Plays · 1 RB, 1 TE, 3 WR

Stack Y Off

14 Plays · 1 RB, 1 TE, 3 WR

Tackle Over

9 Plays · 1 RB, 1 TE, 3 WR

Tackle Over Trips

10 Plays · 1 RB, 1 TE, 3 WR

Tight

31 Plays · 1 RB, 1 TE, 3 WR

Tight Base Flex

9 Plays · 2 RB, 1 TE, 2 WR

Tight Doubles

18 Plays · 1 RB, 1 TE, 3 WR

Tight Flex

25 Plays · 1 RB, 1 TE, 3 WR

Tight Flex Wk

18 Plays · 1 RB, 1 TE, 3 WR

Tight Offset TE

18 Plays · 1 RB, 1 TE, 3 WR

Tight Open

52 Plays · 1 RB, 1 TE, 3 WR

Tight Slot Flip

9 Plays · 1 RB, 1 TE, 3 WR

Tight Slot Open

10 Plays · 1 RB, 1 TE, 3 WR

Tight Slots

36 Plays · 1 RB, 1 TE, 3 WR

Tight Slots HB Wk

19 Plays · 1 RB, 1 TE, 3 WR

Tight Y Off

42 Plays · 1 RB, 1 TE, 3 WR

Tight Y Off Wk

47 Plays · 1 RB, 1 TE, 3 WR

Trey

12 Plays · 1 RB, 1 TE, 3 WR

Trey 4WR

21 Plays · 1 RB, 0 TE, 4 WR

Trey Offset

24 Plays · 1 RB, 1 TE, 3 WR

Trey Open

68 Plays · 1 RB, 1 TE, 3 WR

Trey Open HB Str

22 Plays · 1 RB, 1 TE, 3 WR

Trey Open Offset

37 Plays · 1 RB, 1 TE, 3 WR

Trey Y-Flex

38 Plays · 1 RB, 1 TE, 3 WR

Trey Y-Flex Str

21 Plays · 1 RB, 1 TE, 3 WR

Trey Y Iso

15 Plays · 1 RB, 1 TE, 3 WR

Trio

30 Plays · 1 RB, 1 TE, 3 WR

Trio HB Wk

30 Plays · 1 RB, 1 TE, 3 WR

Trio Offset

18 Plays · 1 RB, 1 TE, 3 WR

Trio Offset Wk

12 Plays · 1 RB, 1 TE, 3 WR

Trio Rt Open

1 Play · 1 RB, 1 TE, 3 WR

Trio Y-Flex

30 Plays · 1 RB, 1 TE, 3 WR

Trips

39 Plays · 1 RB, 0 TE, 4 WR

Trips HB Wk

53 Plays · 1 RB, 0 TE, 4 WR

Trips Slots Close

27 Plays · 1 RB, 0 TE, 4 WR

Trips TE

59 Plays · 1 RB, 1 TE, 3 WR

Trips TE Flex

23 Plays · 1 RB, 1 TE, 3 WR

Trips TE Offset

22 Plays · 1 RB, 1 TE, 3 WR

Trips TE Offset Wk

14 Plays · 1 RB, 1 TE, 3 WR

Trips X Nasty

22 Plays · 1 RB, 1 TE, 3 WR

Trips X Nasty Offset WK

12 Plays · 1 RB, 1 TE, 3 WR

Trips X Nasty Off Wk

12 Plays · 1 RB, 1 TE, 3 WR

Trips Y-Flex

21 Plays · 1 RB, 1 TE, 3 WR

Trips Y Slot Str

6 Plays · 1 RB, 1 TE, 3 WR

U Off Stack

13 Plays · 1 RB, 2 TE, 2 WR

U Off Trips

22 Plays · 1 RB, 2 TE, 2 WR

U Off Trips Flex

15 Plays · 1 RB, 2 TE, 2 WR

U Off Trips Wk

17 Plays · 1 RB, 2 TE, 2 WR

Wide 5wr

24 Plays · Unknown

Wide Slot Left

16 Plays · Unknown

Wide Slot Right WK

15 Plays · 1 RB, 1 TE, 3 WR

Wide Trips

15 Plays · 1 RB, 0 TE, 4 WR

Wide Y Trips WK

16 Plays · Unknown

Wing

15 Plays · 1 RB, 2 TE, 2 WR

Wing Flex Offset

22 Plays · 1 RB, 2 TE, 2 WR

Wing Flex Offset Wk

24 Plays · 1 RB, 2 TE, 2 WR

Wing HB Wk Close

9 Plays · 1 RB, 2 TE, 2 WR

Wing Pair

16 Plays · 1 RB, 3 TE, 1 WR

Wing Slot Offset

68 Plays · 1 RB, 2 TE, 2 WR

Wing Slot Wk

47 Plays · 1 RB, 2 TE, 2 WR

Wing Stack

21 Plays · 1 RB, 2 TE, 2 WR

Wing Stack Wk

13 Plays · 1 RB, 2 TE, 2 WR

Wing Tight

9 Plays · 1 RB, 3 TE, 1 WR

Wing Tight Flip

12 Plays · 1 RB, 3 TE, 1 WR

Wing Tight Nasty

6 Plays · 1 RB, 3 TE, 1 WR

Wing Tight Z

10 Plays · 1 RB, 3 TE, 1 WR

Wing Trio

15 Plays · 1 RB, 1 TE, 3 WR

Wing Trips Wk Nasty

15 Plays · 1 RB, 1 TE, 3 WR

Y Off Trio Close

25 Plays · 1 RB, 1 TE, 3 WR

Y Off Trio Wk

55 Plays · 1 RB, 1 TE, 3 WR

Y Off Trips

54 Plays · 1 RB, 1 TE, 3 WR

Y Off Trips Close

31 Plays · 1 RB, 1 TE, 3 WR

Y Off Trips Nasty

15 Plays · 1 RB, 1 TE, 3 WR

Y Off Trips Pats

32 Plays · Unknown

Y Off Trips Stack

3 Plays · Unknown

Y Off Trips Wk

60 Plays · 1 RB, 1 TE, 3 WR

Y Trio Offset Wk

23 Plays · 1 RB, 1 TE, 3 WR

Y Trips 1 Slot

1 Play · 1 RB, 1 TE, 3 WR

Y Trips Offset

25 Plays · 1 RB, 1 TE, 3 WR

Y Trips Offset Wk

15 Plays · 1 RB, 1 TE, 3 WR

Y Trips Wk

92 Plays · 1 RB, 1 TE, 3 WR