Playbooks

At a Glance
In 23 playbooks
Overview
Bunch Y-Flex is a Shotgun 11 personnel set that pairs a tight three receiver bunch to one side with the Y tight end detached in a flexed alignment, off the line and outside the tackle. The RB sits beside the QB. The flexed Y is the key difference from standard Gun Bunch or Trips TE sets. Because he is not attached to the line, he gets a clean release into routes like the Y Swirl, Y-Corner, and dig stems. He can still work back into the box on Inside Zone and HB Power. Defenses have to decide whether to treat him as a blocker or a receiver before the snap, and that decision tells you a lot about the call.
The bunch side is built for stacked releases and rub concepts. Smash Return, Dig Return, Branch Return, Spacing Switch, and Mtn Dagger Sit use the bunch to create natural picks against press man and to flood a single zone defender. A slot receiver (SLWR) at the point or inside of the bunch gets free access to the middle on Choice Shallow Dig, Z Shallow Cross, and the Mtn Double Cross family. The flexed Y on the backside draws single coverage from a linebacker or safety. That leaves you with a mismatch isolation whenever the defense rolls extra help toward the bunch.
The set also carries a deep run and RPO menu: Inside Zone, HB Power, HB Choice, 49er HB Choice, RPO Alert Out, and RPO Zone Alert Omaha. Gadget looks round it out, including Jet Pull Shallow, HB Slip Screen, and the Mountain reverse dragon concepts. A three down back (3DRB) can punish linebackers on choice routes. A Power HB can hammer downhill runs behind the flexed Y. That balance makes Bunch Y-Flex a legitimate base set rather than a situational passing package.
Strengths
- The bunch rub game is elite against man coverage. Smash Return, Dig Return, and Mtn Cross Out use stacked releases to create natural picks that free the point receiver against press and Cover 1.
- The flexed Y gives you a built in isolation on the backside. When the defense rolls coverage to the bunch, Y Swirl, PA Post Y-Corner, and Curls Y Swirl leave the tight end one on one with a linebacker or safety.
- The zone beaters are layered and flood friendly. Flood, Dagger, Mtn Dagger Sit, and Spacing stretch Cover 3 and Cover 4 horizontally and vertically, with sit routes that settle into holes versus hook and curl drops.
- The RPOs are balanced and punish box counts. RPO Alert Out and RPO Zone Alert Omaha give you a pre-snap and post-snap read that keeps defenses honest against Inside Zone and HB Power.
- Gadget and screen looks like Jet Pull Shallow, HB Slip Screen, and Mtn DBL Post Reverse Dragon punish aggressive users and pressure heavy defenses that overplay the bunch.
Weaknesses
- The compressed bunch lets defenses bracket it with a single zone rotation. Cover 3 Buzz or Match Quarters can sit on the bunch and funnel everything into underneath robbers.
- The backside has limited width, especially when the Y is flexed tight. Cloud or trap coverage to the Y side can take away the isolation and force the QB to hold the ball.
- With 11 personnel and three receivers bunched, protection gets thin against six man pressure. Nano blitzes off the edge opposite the bunch can get home before deeper developing concepts like Verticals or Mtn Inside Post finish.
- A user controlled middle linebacker or hook defender can sit on the crossers. Choice Shallow Dig, Redzone Crossers, and Z Shallow Cross become risky if you do not read where the user drops before the snap.
- The set can become tendency heavy. Opponents who see repeated rub concepts will press bail or play off man with inside leverage, which kills pick timing and forces you into slower developing reads.
Usage Tips
Before the snap, read the defender over the flexed Y. A linebacker or safety walked up in man is your cue to target the Y on Y Swirl or PA Post Y-Corner. A defender playing off in zone means you work the bunch flood side.
On 3rd and short, call Smash Return, Dig Return, or Mtn Cross Out against man looks. The bunch rubs create quick separation, and you can hot route the point receiver to a slant for an extra quick answer against Cover 0.
In the red zone, lean on Redzone Crossers, Mtn Dagger Sit, and Bench Pivot against compressed coverage. The bunch creates traffic that tight zones struggle to pass off near the goal line.
On early downs, use Inside Zone, HB Power, and the RPOs when the defense shows a light box. Audible between RPO Alert Out and HB Power based on whether a safety rotates down, and motion the Y back into the box to add a blocker for Power HB runs.
Against heavy blitz tendencies, block the RB or flexed Y, or audible to HB Slip Screen or Jet Pull Shallow. Once the opponent respects the screen, return to Speed Dig Out and Dagger to punish two high shells.
Plays (37)
- 49er HB ChoiceOption Route, Pass Play, Corner +4
- Bench PivotPivot, Corner, In +4
 Branch ReturnMotion, Corner, Option Route +4
 Choice Shallow DigDig, Shallow Cross, Option Route +3
 Curls Y SwirlCurl, Pass Play, Deep Cross +3
 DaggerDagger, Pass Play, Cover 2 Beater +7
 Dig ReturnDig, Motion, Pass Play +5
 FloodFlood, Pass Play, Cover 3 Beater +5
 HB ChoiceOption Route, Pass Play
 HB PowerPower, Run Play, Power Run
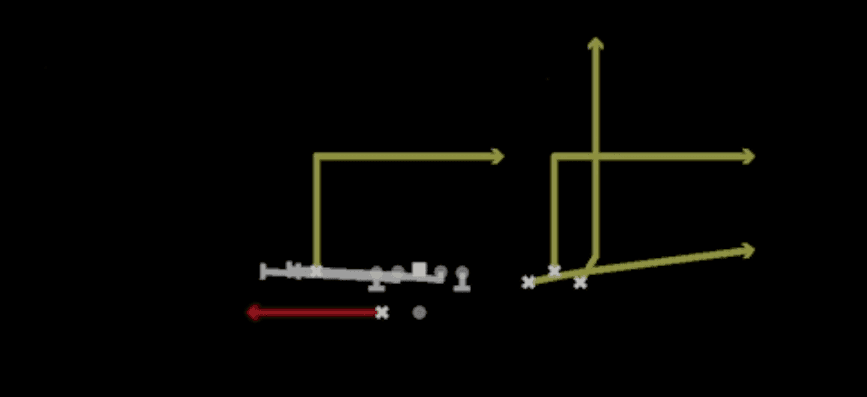 HB Slip ScreenScreen Pass, Hb Screen, Pass Play +4
 Inside ZoneInside Zone, Run Play, Zone Run
 Jet Pull ShallowShallow Cross, Motion, Pass Play +5
- Mtn Cross OutOut, Crosser, Block and Release +3
- Mtn Cross Stop PostPost, Crosser, Block and Release +4
 Mtn Dagger SitSit, Dagger, Motion +9
 Mtn DBL Post Reverse DragonReverse, Post, Double Posts +5
- Mtn Double CrossCrosser, Block and Release, Deep Cross +4
- Mtn Double Post Reverse DragonReverse, Post, Double Posts +9
 Mtn Drive ZigDrive, Motion, Pass Play +6
 Mtn Inside PostPost, Motion, Pass Play +4
 Mtn Spacing SwitchSpacing, Motion, Pass Play +4
- PA Post X-cornerPlay Action, Corner, Post +3
 PA Post Y-CornerPlay Action, Corner, Post +1
 Redzone CrossersCrosser, Pass Play, Deep Cross +4
 RPO Alert OutRPO, Out, Pass Play +1
- RPO Zone Alert OmahaRPO, Pass Play, Run Play +2
 Smash ReturnSmash, Motion, Pass Play +6
 SpacingSpacing, Pass Play, Cover 3 Beater +4
 Spacing SwitchSpacing, Pass Play, Cover 3 Beater +4
 Speed DigDig, Pass Play, Comeback +4
 Speed Dig OutOut, Dig, Pass Play +4
 Swirl Hook N GoGo, Pass Play, Flat +3
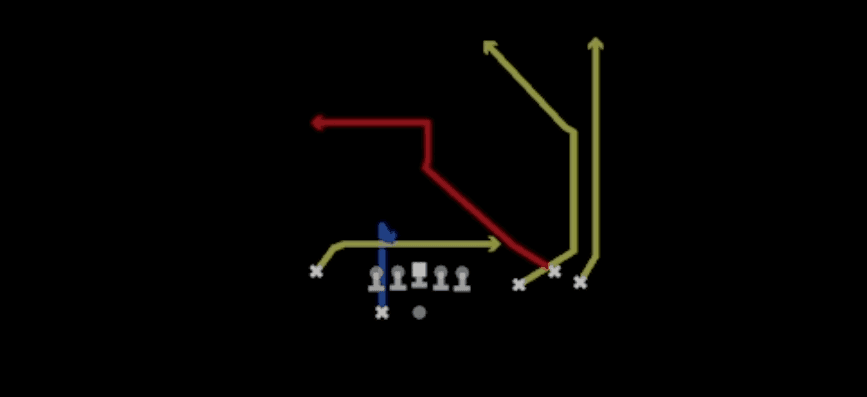 Switch MillsMills, Pass Play, Cover 4 Beater +6
 VerticalsFour Verts, Pass Play, Cover 2 Beater +7
- Z Shallow CrossShallow Cross, Crosser, Corner +5
 Z SpotSpot, Pass Play, Cover 3 Beater +3









