Playbooks

Quick Reference
Breakdown
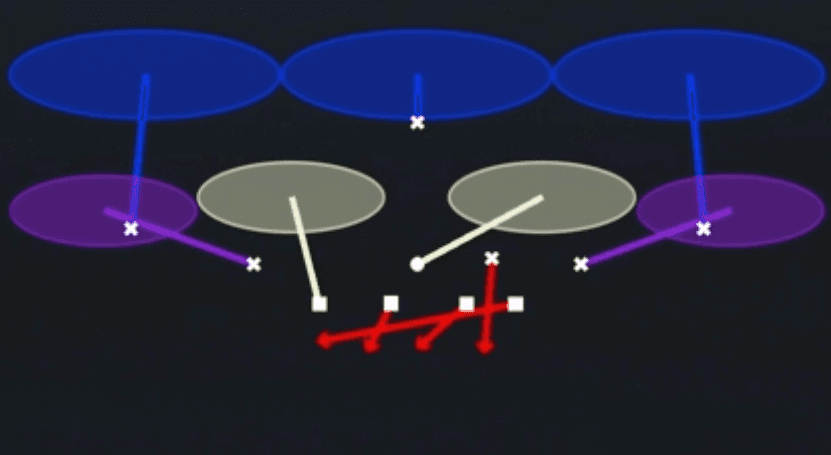
Dime Blitz 2 is a Cover 2 zone blitz out of the Dime 4-1-6 personnel package. The diagram shows two deep half safeties sitting at the top of the screen, five underneath defenders dropping into shallow zones (two flats and three underneath hook/curl zones), and a five man rush with an overload look sending extra pressure off one edge. This is a five man pressure package designed to disguise where the extra rusher comes from while still keeping two deep safeties over the top, making it a hybrid blitz and zone beater killer that punishes both quick game and shallow crossers.
Defensive Reads
Watch for empty backfield or spread formations pre-snap since the five man rush overwhelms max protect and slide protection schemes without a sixth blocker. Identify if the offense is running quick game or all verticals, because the two deep safeties can be attacked on seam routes if the underneath zone defenders bite on shallow crossers. Post-snap, key the running back's release since Dime Blitz 2 is vulnerable to check release routes into the flat vacated by the blitzing defender. If the quarterback audibles to a screen play, this call gets exposed quickly since the extra rush defender is out of position to defend a bubble or tunnel screen. Look for the offense to attack the deep middle seam between the two safeties, especially against four vertical concepts, since the underneath zone defenders are occupied with shallow drops.
Usage Tips
Call this on early down passing situations or third and medium when you expect the offense to throw quick game or shallow crossers underneath.
Check the offensive formation pre-snap for trips or bunch looks since the underneath zone defenders can get outnumbered and picked apart by natural combo routes.
Use the five man rush to attack empty backfield sets where the quarterback has no extra blocker to pick up the overload rusher.
Pair this with Cover 2 Hard Flat and Cover 2 Roll in the same play calling sequence so quarterbacks cannot key the extra rusher just from your pre-snap alignment.
User the underneath defender closest to the overload side to either spy the running back or jump the quick out, since the zone drop alone will not stop hot throws to the flat.
Other Plays in Rush
- Cover 1 ContainCover 1, Contain, Man Coverage
 Cover 1 Contain SpyCover 1, Spy, Contain +1
 Cover 1 Robber PressCover 1, Cover 1 Robber, Press Man +1
 Cover 2 Hard FlatCover 2, Zone Coverage
 Cover 2 ManCover 2 Man, Man To Man, Man Coverage
 Cover 2 RollCover 2, Zone Coverage
 Cover 3 Buzz MatchCover 3, Cover 3 Buzz, Cover 3 Match +1
 Cover 3 CloudCover 3, Cover 3 Cloud, Zone Coverage
 Cover 4 PalmsCover 4, Cover 4 Palms, Zone Coverage
 Cover 4 QuartersCover 4, Quarters, Zone Coverage
 Cover 6Cover 6, Zone Coverage
 DB BlitzBlitz, DB Blitz
 Dbl Safety BlitzBlitz, Safety Blitz
 Fox Fire Zone PressZone, Blitz, Fire Zone +2
 FS Middle Blitz 3Cover 3, Blitz, Safety Blitz +1
 Mug Blitz Tex 3Cover 3, Blitz, Zone Coverage
 Mug Dt Loop 1Cover 1, Line Stunt, Man Coverage
 Mug Sim PressureSimulated Pressure, Blitz
 SS Overload 3Cover 3, Overload Blitz, Zone Coverage +1
 SS Sim Pressure 3Cover 3, Simulated Pressure, Zone Coverage +1
 Tampa 2Cover 2, Tampa 2, Zone Coverage