Playbooks

Quick Reference
Receiver routes
Depth-chart slots are shown as they line up in the base package for this set.
| Player | Side | Route |
|---|---|---|
| HB1 | Left | Flat |
| FB1 | Right | Flat |
| WR1 | Left | Comeback |
| WR2 | Right | Deep Post |
| TE1 | Right | Speed In |
Read progression
- HB1 left, Flat
- FB1 right, Flat or TE1 right, Speed In
- WR1 left, Comeback or WR2 right, Deep Post
Breakdown
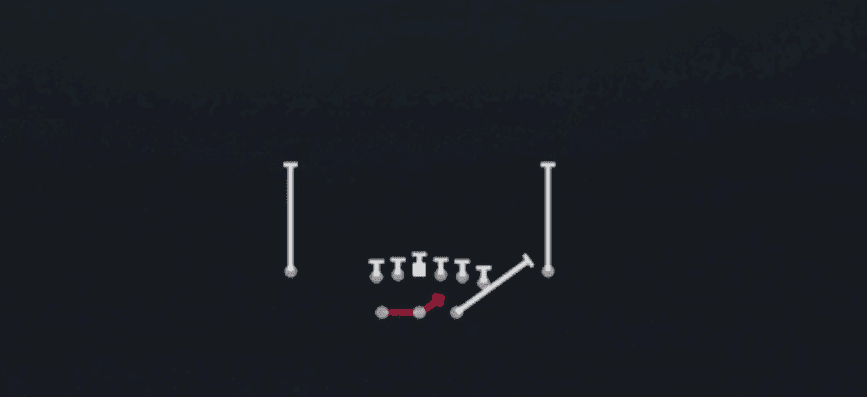
Backs Cross out of Shotgun Split Y Off (21 personnel) is a crossing-heavy man beater built around a true backs cross underneath. The diagram shows the outside receiver running a deep corner/go route to clear space, the slot receiver working a deep in-cut across the middle, and the tight end running a shallow drag under both. The two backs release from the backfield on crossing paths, one settling shallow left while the other clears to the opposite flat, creating natural traffic for man defenders. Primary read progression starts with the shallow backs cross for an easy completion against man coverage, then works up to the TE drag, and finally to the deep in route on the slot if the middle of the field opens up.
Defensive Reads
Pre-snap, identify if the defense is showing two deep safeties, which signals zone and tells you to prioritize the deep in route over the crossing backs. Watch for a single high safety with corners playing tight press, which usually means man coverage and makes the backs cross the go-to route for an easy pickup. Post-snap, key the middle linebacker's drop: if he sinks into the crossing lanes as a user-controlled lurk defender, hold the ball and let the deep in route develop instead of forcing the backs cross. Look for blitz packages that bring extra rushers off the edge, since the backs cross concept holds one back in as a check-release blocker and can expose overloaded pressure looks. If the defense clogs the shallow crossing lanes with a spy or scraping linebacker, climb the ladder to the TE drag or deep in route rather than forcing a throw into traffic.
Usage Tips
Use this play on second or third and short to medium since the shallow backs cross gives you a high-percentage completion against man coverage.
Check the linebacker depth pre-snap: if the MIKE and WILL are sitting shallow, hot route the TE drag into a quick out to beat any wall-off zone defenders.
Against man coverage, trust the crossing backs to create natural picks and rub off defenders, then attack the pick with a quick throw before the user-controlled defender can recover.
Against zone shells like Cover 3 or Cover 4, look to the deep in route from the slot since the crossing traffic underneath will occupy the underneath zones and open the middle void.
Pair this play with Mtn Lead Swing or Mtn Lead Swing Spacing from the same set to keep defenses honest on backfield motion, then hit them with Backs Cross once they start jumping the swing route.
Other Plays in Split Y Off
 Corner StrikeCorner, Pass Play, Flat +1
 HB InsideDive, Run Play
 HB Slip ScreenScreen Pass, Hb Screen, Pass Play +4
 H ChoiceOption Route, Pass Play, Corner +2
 Inside Zone SplitInside Zone, Run Play, Zone Run
 Mtn H AngleAngle, Motion, Pass Play +5
 Mtn H Angle N OutOut, Angle, Motion +1
- Mtn H Angle N UpAngle, Motion, Pass Play +6
 Mtn H SneakMotion, Drag, Crosser +5
- Mtn Lead SwingSwing, Option Route, Pass Play
- Mtn Lead Swing SpacingSwing, Hitch, Pass Play
- Mtn Mesh RailCurl, Flat, Option Route +2
 Mtn PA HB SeamPlay Action, Seam, Motion +4
 Mtn Split Lead ZoneMotion, Run Play
 Mtn Triple Option LtTriple Option, Motion, Run Play
 Outside ZoneOutside Zone, Run Play, Zone Run
 PA HB SneakPlay Action, Pass Play, Deep Cross +3
 PA Snag HB WheelPlay Action, Wheel, Snag +6
 Read OptionRead Option, Run Play
- RPO Zone PeekSlant, Pass Play, Run Play
 Wheel TrailWheel, Pass Play, Trail +5
 Y CurlCurl, Pass Play, Out +1