Playbooks

Split U Off Close

Specialists3DRBGadgetPower HB

Overview

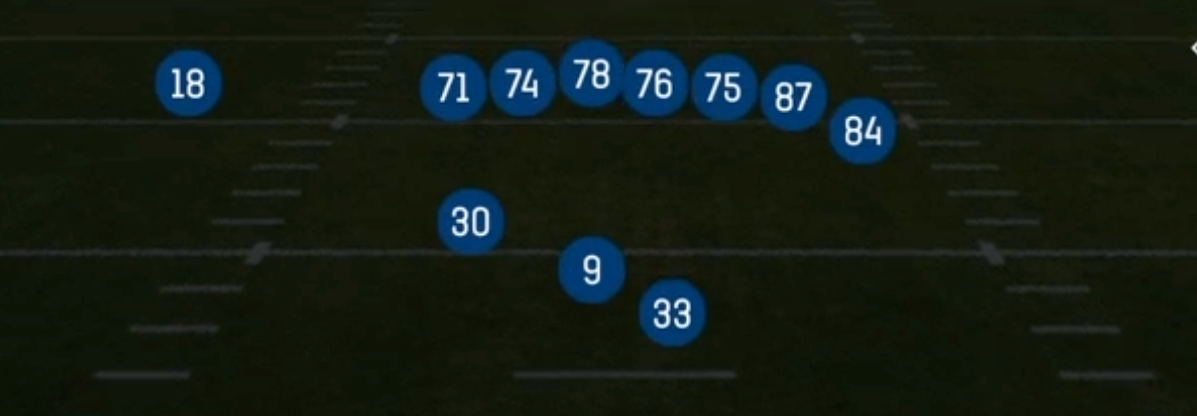
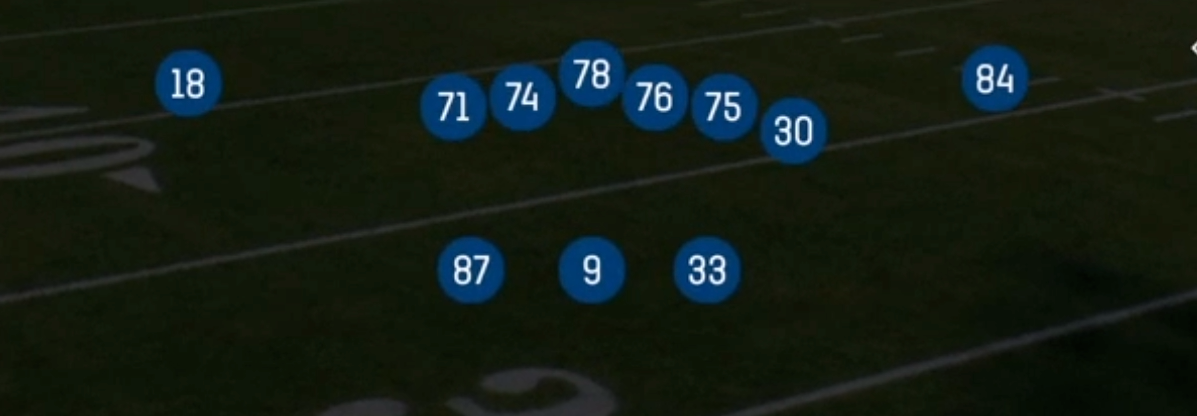
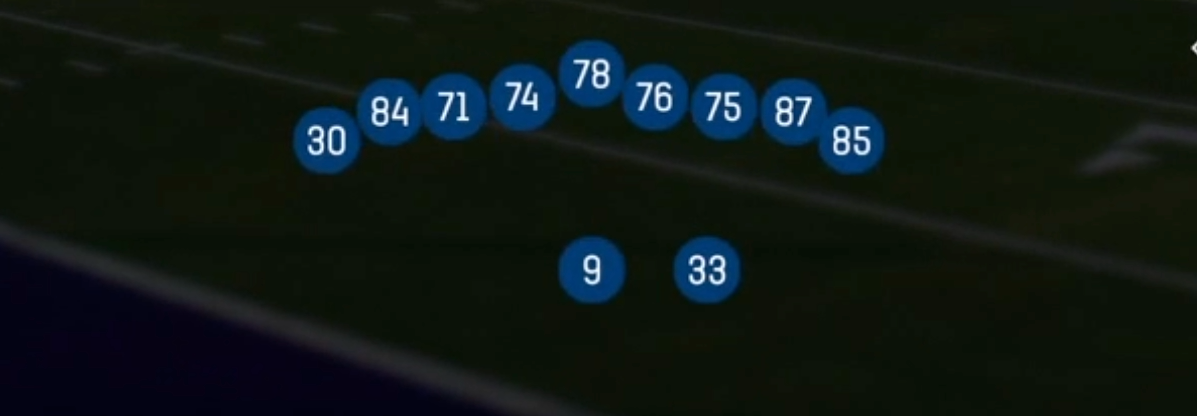
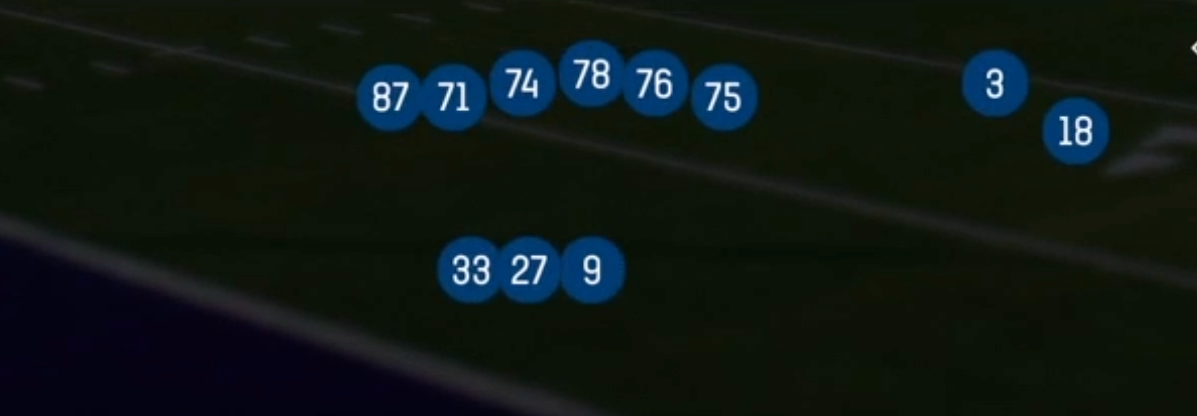
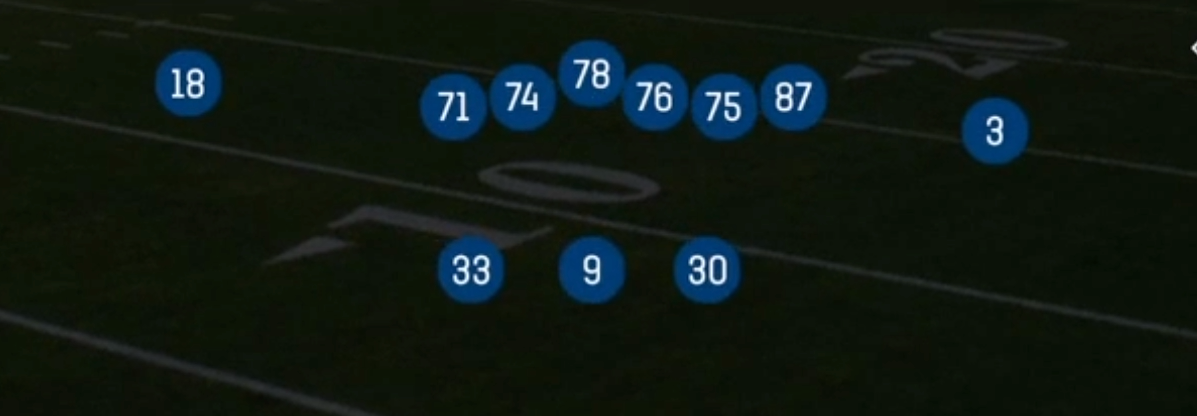
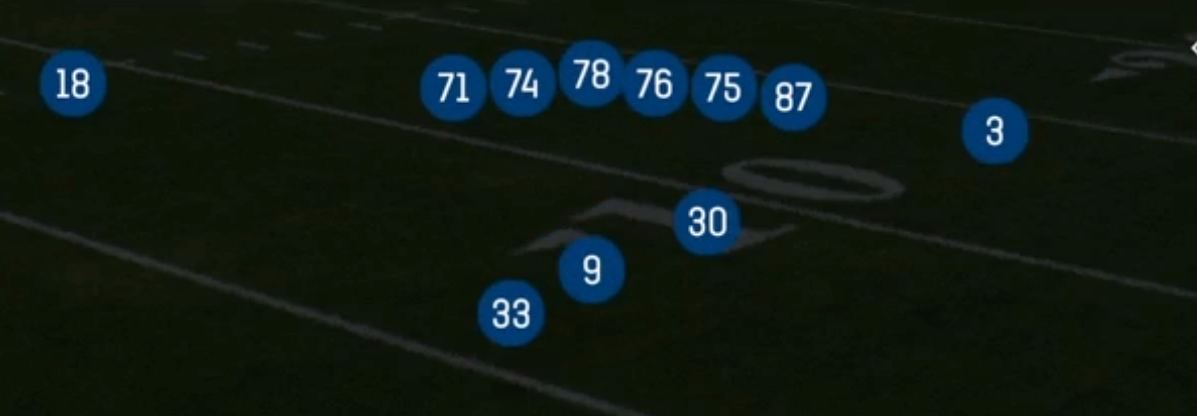
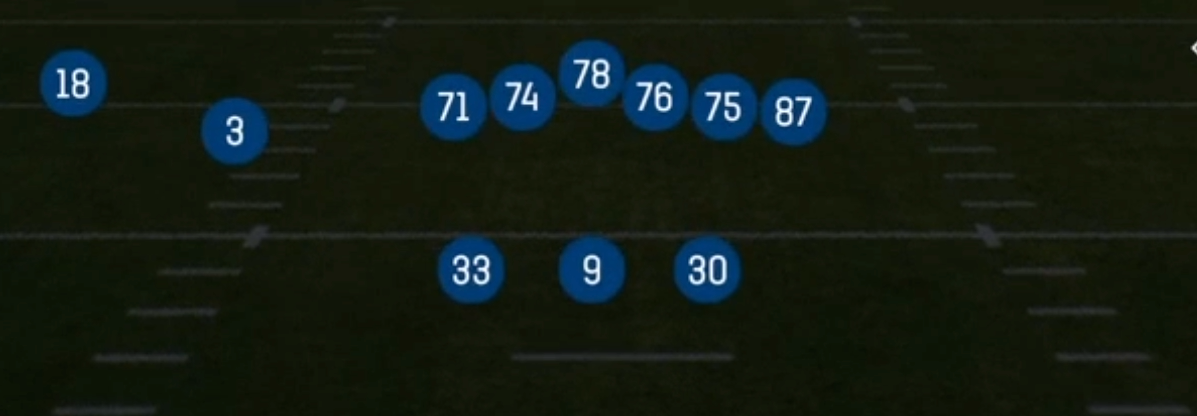
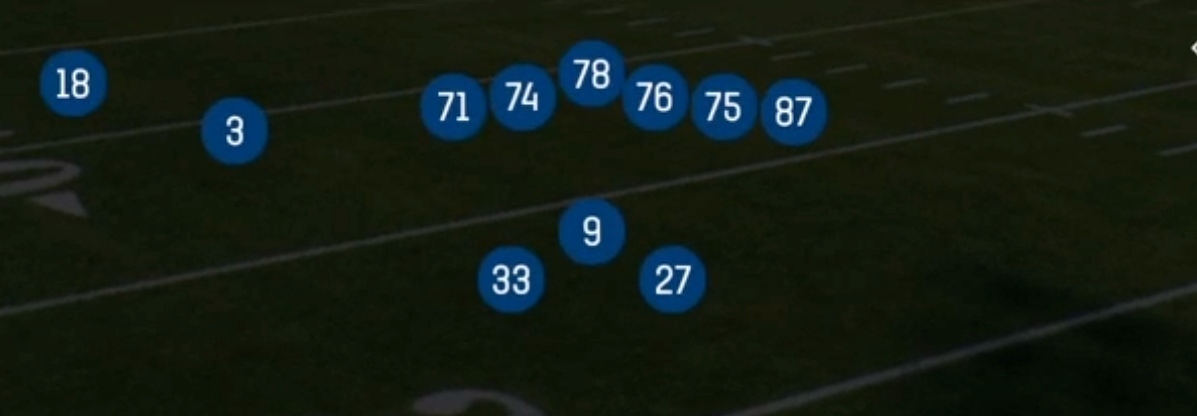
Split U Off Close is the heavy personnel wrinkle inside Shotgun, running 22 personnel with two backs split on either side of the quarterback and the receiving corps condensed tight to the formation. Where standard Shotgun sets stretch the field horizontally with three and four wide looks, Split U Off Close compresses everything inside the numbers and pairs it with a split backfield. That alignment forces the defense into a run-first shell, and because both backs are eligible, you get flood and swing concepts developing from spots the defense does not normally have to account for in Shotgun.

The condensed splits are the real weapon here. Defenders lined up in tight leverage cannot play outside shade cleanly, so option routes, spot concepts, and mesh crossers all get free releases inside. Plays like Smash Spot and Mesh Spot Rails punish man coverage because the traffic created by the compressed alignment naturally rubs defenders off, and the rail route out of the backfield attacks the void behind a rotating Cover 3 flat defender. Against zone, Spinner Post Flood floods one side with three levels while the backside receiver holds the middle third honest.

The 22 personnel package is also what creates the matchup edge. Defenses answering this set with base personnel are putting linebackers on your second back, and any back with real receiving grades becomes a mismatch on a swing or rail. Conversely, if the opponent goes nickel or dime to match the passing concepts, Outside Zone Lt, Mtn Inside Zone, and Spinner HB Zone let you run directly at the lightened box with a lead blocker already in the formation. The 3DRB, Gadget, and Power HB tags mean you can swap in different back types and completely change what the set threatens without ever showing a new formation.

Strengths

  • Mesh Spot Rails is a premier man beater: the mesh crossers create natural rubs from the condensed splits while the rail route out of the backfield takes the top off against any linebacker forced into coverage.
  • Smash Spot attacks Cover 2 and Cover 4 simultaneously with the corner route over the flat defender and the spot sitting in the zone window underneath, giving you a high low read that works against most coverage shells.
  • PA Spinner Post Flood gives you a three level flood on one side with play action holding the linebackers, which is lethal after establishing the zone run game from this same alignment.
  • Two backs in the formation mean you always have a lead blocker or a checkdown, so Outside Zone Lt, Mtn Inside Zone, and Spinner HB Zone all run with extra leverage at the point of attack against nickel and dime personnel.
  • Condensed receiver splits make press man difficult to execute because defenders lack the outside leverage they need, so hot routing an outside receiver to a fade or slant produces free releases.

Weaknesses

  • Compressed splits mean everything develops inside the numbers, so a user-controlled safety sitting in the middle of the field can read your mesh and spot windows and take away the primary read on every concept.
  • 22 personnel invites the opponent to load the box with base or even 4-4 style alignments, and inside nano blitz looks through the A gaps get home fast because your split backs are not always in protection on the play art.
  • The set has no true vertical field stretch: with no wide splits, the boundary is dead space and your outside leverage throws are nonexistent until you motion someone out.
  • Defenses that recognize the run heavy personnel will commit run blitzes on early downs, and the gadget and power back options do not change the fact that Outside Zone Lt gets strung out when the defense sets a hard edge.
  • Route concepts here are mostly short to intermediate, which makes it a poor choice for two minute situations where you need to attack the sideline and stop the clock.

Usage Tips

Run the zone plays first on early downs to force the defense into base personnel, then come back with Mesh Spot Rails or PA Spinner Post Flood once you see linebackers matching your backs.

Check the safety alignment pre-snap: single high means Smash Spot and the flood concepts are live, while two high tells you to lean on the inside zone game and the spot windows.

Motion one of your backs or a condensed receiver out wide to diagnose man versus zone, and if a defender follows all the way, hot route the mesh side to sit and let the rub do the work.

Against inside pressure, block one of the split backs on pass protection and turn the other into a swing or angle release so you always have a fast outlet on Mtn PA HB Swing or Texas U-Out.

Use the 3DRB and Gadget tags in third down situations: putting your best receiving back in the split alignment turns a linebacker matchup into a guaranteed conversion on the rail or swing.

Plays (9)

Plays in Split U Off Close
PlayOpen
Mesh Spot Rails
Mtn Cross Screen
Mtn Inside Zone
Mtn PA HB Swing
Outside Zone Lt
PA Spinner Post Flood
Smash Spot
Spinner HB Zone
Texas U-Out

Other Sets in Shotgun

4wr Pack Trips

18 Plays · 1 RB, 0 TE, 4 WR

4WR Trips Strong

18 Plays · 1 RB, 0 TE, 4 WR

5WR Flex Trey

16 Plays · 0 RB, 1 TE, 4 WR

5WR Tight

15 Plays · 0 RB, 0 TE, 5 WR

5WR Trio

31 Plays · 1 RB, 1 TE, 3 WR

5WR Trips

18 Plays · 0 RB, 0 TE, 5 WR

Ace

28 Plays · 1 RB, 2 TE, 2 WR

Ace Offset

17 Plays · 1 RB, 2 TE, 2 WR

Ace Slot

16 Plays · 1 RB, 2 TE, 2 WR

Ace Slot Offset

22 Plays · 1 RB, 2 TE, 2 WR

Box

18 Plays · 1 RB, 0 TE, 4 WR

Box HB Strong

6 Plays · 1 RB, 1 TE, 3 WR

Box Offset Wk

19 Plays · 1 RB, 1 TE, 3 WR

Box Y Off

12 Plays · 1 RB, 1 TE, 3 WR

Box Y Split

24 Plays · 1 RB, 1 TE, 3 WR

Bunch

54 Plays · 1 RB, 1 TE, 3 WR

Bunch HB Str

12 Plays · 1 RB, 1 TE, 3 WR

Bunch Offset

31 Plays · 1 RB, 1 TE, 3 WR

Bunch Offset Close

11 Plays · 1 RB, 1 TE, 3 WR

Bunch Open

9 Plays · 1 RB, 0 TE, 4 WR

Bunch Open Offset

19 Plays · 1 RB, 1 TE, 3 WR

Bunch Open TE

16 Plays · 1 RB, 1 TE, 3 WR

Bunch Quads

9 Plays · 1 RB, 1 TE, 3 WR

Bunch Quads Close

6 Plays · 1 RB, 1 TE, 3 WR

Bunch Quads Open

6 Plays · 1 RB, 1 TE, 3 WR

Bunch Spread

24 Plays · 1 RB, 1 TE, 3 WR

Bunch Spread Nasty

38 Plays · 1 RB, 1 TE, 3 WR

Bunch Str Nasty

33 Plays · 1 RB, 1 TE, 3 WR

Bunch Str Offset

46 Plays · 1 RB, 1 TE, 3 WR

Bunch TE

57 Plays · 1 RB, 1 TE, 3 WR

Bunch TE Str

13 Plays · 1 RB, 1 TE, 3 WR

Bunch TE Wk

18 Plays · 1 RB, 1 TE, 3 WR

Bunch Trio Open

12 Plays · 1 RB, 1 TE, 3 WR

Bunch Wide

29 Plays · 1 RB, 1 TE, 3 WR

Bunch Wide Nasty

23 Plays · 1 RB, 1 TE, 3 WR

Bunch X Nasty

61 Plays · 1 RB, 1 TE, 3 WR

Bunch Y-Flex

37 Plays · 1 RB, 1 TE, 3 WR

Bunch Y-Trips

15 Plays · 1 RB, 1 TE, 3 WR

Cluster

15 Plays · 1 RB, 1 TE, 3 WR

Cluster HB Str

18 Plays · 1 RB, 1 TE, 3 WR

Dbls Flex Y Off Close

24 Plays · 1 RB, 1 TE, 3 WR

Deebo Package

6 Plays · Unknown

Deuce

26 Plays · 1 RB, 2 TE, 2 WR

Deuce Close

53 Plays · 1 RB, 2 TE, 2 WR

Doubles

69 Plays · 1 RB, 1 TE, 3 WR

Doubles Flex

27 Plays · 1 RB, 1 TE, 3 WR

Doubles Flex WK Pats

13 Plays · Unknown

Doubles Flex Wk Swap

12 Plays · 1 RB, 1 TE, 3 WR

Doubles Flex Y Off Close

21 Plays · 1 RB, 1 TE, 3 WR

Doubles HB Wk

48 Plays · 1 RB, 1 TE, 3 WR

Doubles Hip

13 Plays · 1 RB, 1 TE, 3 WR

Doubles Off Close

10 Plays · 1 RB, 1 TE, 3 WR

Doubles Off Close Wk

22 Plays · 1 RB, 1 TE, 3 WR

Doubles Offset

44 Plays · 1 RB, 1 TE, 3 WR

Doubles Offset Wk

57 Plays · 1 RB, 1 TE, 3 WR

Doubles Stack Clamp

27 Plays · 1 RB, 1 TE, 3 WR

Double Stack

21 Plays · 1 RB, 1 TE, 3 WR

Doubles Y-Flex

29 Plays · 1 RB, 1 TE, 3 WR

Doubles Y-Flex Offset

15 Plays · 1 RB, 1 TE, 3 WR

Doubles Y Off

73 Plays · 1 RB, 1 TE, 3 WR

Doubles Y Off Nasty

21 Plays · 1 RB, 1 TE, 3 WR

Doubles Y Off WK

29 Plays · 1 RB, 1 TE, 3 WR

Doubles Z Close

14 Plays · 1 RB, 1 TE, 3 WR

Doubles Z Close Wk

20 Plays · 1 RB, 1 TE, 3 WR

Double Wing

9 Plays · 2 RB, 3 TE, 0 WR

Duo Offset

19 Plays · Unknown

Duo Slot Open

19 Plays · 2 RB, 0 TE, 3 WR

Duo Twins Flex

9 Plays · 2 RB, 1 TE, 2 WR

Empty Ace

15 Plays · 1 RB, 2 TE, 2 WR

Empty Base

35 Plays · 1 RB, 1 TE, 3 WR

Empty Base Flex

35 Plays · 1 RB, 1 TE, 3 WR

Empty Base Trio

21 Plays · 1 RB, 1 TE, 3 WR

Empty Bunch

9 Plays · 1 RB, 1 TE, 3 WR

Empty Bunch Open

17 Plays · 1 RB, 1 TE, 3 WR

Empty Bunch Tight

12 Plays · 1 RB, 1 TE, 3 WR

Empty Bunch Wide

16 Plays · 1 RB, 1 TE, 3 WR

Empty Bunch Y Flex

9 Plays · 1 RB, 1 TE, 3 WR

Empty Chips

9 Plays · 1 RB, 1 TE, 3 WR

Empty Chips Nasty

12 Plays · 1 RB, 1 TE, 3 WR

Empty Chips Quads

9 Plays · 1 RB, 1 TE, 3 WR

Empty Chips Tight

11 Plays · 1 RB, 1 TE, 3 WR

Empty HB Wide

13 Plays · 1 RB, 1 TE, 3 WR

Empty Quads

9 Plays · 0 RB, 1 TE, 4 WR

Empty Sketch Stack

10 Plays · 1 RB, 1 TE, 3 WR

Empty Steeler

12 Plays · 1 RB, 1 TE, 3 WR

Empty Strong Slots

9 Plays · 1 RB, 1 TE, 3 WR

Empty Trey

21 Plays · 1 RB, 1 TE, 3 WR

Empty Trey Flex

12 Plays · Unknown

Empty Trey Stack

15 Plays · 1 RB, 1 TE, 3 WR

Empty Triple Stack

3 Plays · 1 RB, 1 TE, 3 WR

Empty Trips Speed

15 Plays · 1 RB, 1 TE, 3 WR

Empty Y Slot

15 Plays · 1 RB, 1 TE, 3 WR

Flanker Close

17 Plays · 1 RB, 0 TE, 4 WR

Flanker Close WK

9 Plays · 1 RB, 1 TE, 3 WR

Flex Y Off

20 Plays · 1 RB, 1 TE, 3 WR

Flex Y Off Close

19 Plays · 1 RB, 1 TE, 3 WR

Flex Y Off Wk

30 Plays · 1 RB, 1 TE, 3 WR

Gadget Backfield

6 Plays · 3 RB, 1 TE, 1 WR

Gadget Package

6 Plays · 3 RB, 1 TE, 1 WR

Go Go Twins Flex

9 Plays · 2 RB, 1 TE, 2 WR

Heavy Panther

9 Plays · 2 RB, 3 TE, 0 WR

Monster

3 Plays · 1 RB, 1 TE, 3 WR

Normal Flex Snug

17 Plays · 1 RB, 1 TE, 3 WR

Normal Flex Wing

12 Plays · 1 RB, 1 TE, 3 WR

Normal Off Close Wk

24 Plays · 1 RB, 1 TE, 3 WR

Normal Wing Pats Close

7 Plays · Unknown

Normal Y Off

64 Plays · 1 RB, 1 TE, 3 WR

Normal Y Off Close

62 Plays · 1 RB, 1 TE, 3 WR

Normal Y Off Wk

40 Plays · 1 RB, 1 TE, 3 WR

Open Flex

10 Plays · 1 RB, 1 TE, 3 WR

Slot Left

9 Plays · 1 RB, 1 TE, 3 WR

Slot Right

23 Plays · 1 RB, 1 TE, 3 WR

Slot WR Backfield

7 Plays · Unknown

Split Close

30 Plays · 2 RB, 0 TE, 3 WR

Split Close Pro

15 Plays · 2 RB, 1 TE, 2 WR

Split Cowboy

17 Plays · 1 RB, 1 TE, 3 WR

Split Flanker Close

9 Plays · 2 RB, 0 TE, 3 WR

Split Offset

34 Plays · 2 RB, 0 TE, 3 WR

Split Pro Near

18 Plays · 2 RB, 1 TE, 2 WR

Split Pro Offset Wk

6 Plays · 2 RB, 1 TE, 2 WR

Split Slot Offset

47 Plays · 2 RB, 0 TE, 3 WR

Split Slot Open

50 Plays · 2 RB, 0 TE, 3 WR

Split Twins

6 Plays · 2 RB, 1 TE, 2 WR

Split Twins Offset

13 Plays · 2 RB, 1 TE, 2 WR

Split Twins Offset Close

15 Plays · 2 RB, 1 TE, 2 WR

Split Twins Stack

6 Plays · 2 RB, 1 TE, 2 WR

Split Wing Nasty

6 Plays · 2 RB, 2 TE, 1 WR

Split WR Backfield

9 Plays · 1 RB, 1 TE, 3 WR

Split Y-Flex

33 Plays · 2 RB, 1 TE, 2 WR

Split Y Off

23 Plays · 2 RB, 1 TE, 2 WR

Split Y Off Close

10 Plays · 1 RB, 1 TE, 3 WR

Spread

85 Plays · 1 RB, 0 TE, 4 WR

Spread 4wr

1 Play · 1 RB, 1 TE, 3 WR

Spread Dbl Flex

43 Plays · 1 RB, 1 TE, 3 WR

Spread Dbl Flex Wk

22 Plays · 1 RB, 1 TE, 3 WR

Spread Flex

29 Plays · 1 RB, 1 TE, 3 WR

Spread Slots Close

22 Plays · 1 RB, 0 TE, 4 WR

Spread Y-Flex

69 Plays · 1 RB, 1 TE, 3 WR

Spread Y-Flex Wk

50 Plays · 1 RB, 1 TE, 3 WR

Spread Y-Slot

93 Plays · 1 RB, 1 TE, 3 WR

Spread Y-Slot Wk

56 Plays · 1 RB, 1 TE, 3 WR

Stack HB WK

15 Plays · 1 RB, 1 TE, 3 WR

Stack Y-Flex

16 Plays · 1 RB, 1 TE, 3 WR

Stack Y Off

17 Plays · 1 RB, 1 TE, 3 WR

Tackle Over

9 Plays · 1 RB, 1 TE, 3 WR

Tackle Over Trips

10 Plays · 1 RB, 1 TE, 3 WR

Tight

34 Plays · 1 RB, 1 TE, 3 WR

Tight Base Flex

9 Plays · 2 RB, 1 TE, 2 WR

Tight Doubles

19 Plays · 1 RB, 1 TE, 3 WR

Tight Flex

25 Plays · 1 RB, 1 TE, 3 WR

Tight Flex Offset

15 Plays · 1 RB, 1 TE, 3 WR

Tight Flex Wk

24 Plays · 1 RB, 1 TE, 3 WR

Tight Offset TE

18 Plays · 1 RB, 1 TE, 3 WR

Tight Open

55 Plays · 1 RB, 1 TE, 3 WR

Tight Slot Flip

9 Plays · 1 RB, 1 TE, 3 WR

Tight Slot Open

10 Plays · 1 RB, 1 TE, 3 WR

Tight Slots

40 Plays · 1 RB, 1 TE, 3 WR

Tight Slots HB Wk

19 Plays · 1 RB, 1 TE, 3 WR

Tight Y Off

43 Plays · 1 RB, 1 TE, 3 WR

Tight Y Off Wk

54 Plays · 1 RB, 1 TE, 3 WR

Trey

12 Plays · 1 RB, 1 TE, 3 WR

Trey 4WR

21 Plays · 1 RB, 0 TE, 4 WR

Trey Offset

24 Plays · 1 RB, 1 TE, 3 WR

Trey Open

85 Plays · 1 RB, 1 TE, 3 WR

Trey Open HB Str

48 Plays · 1 RB, 1 TE, 3 WR

Trey Open Offset

42 Plays · 1 RB, 1 TE, 3 WR

Trey Y-Flex

47 Plays · 1 RB, 1 TE, 3 WR

Trey Y-Flex Str

22 Plays · 1 RB, 1 TE, 3 WR

Trey Y Iso

15 Plays · 1 RB, 1 TE, 3 WR

Trio

30 Plays · 1 RB, 1 TE, 3 WR

Trio 4wr Str

15 Plays · 1 RB, 0 TE, 4 WR

Trio HB Wk

30 Plays · 1 RB, 1 TE, 3 WR

Trio Offset

18 Plays · 1 RB, 1 TE, 3 WR

Trio Offset Wk

17 Plays · 1 RB, 1 TE, 3 WR

Trio Rt Open

1 Play · 1 RB, 1 TE, 3 WR

Trio Y-Flex

32 Plays · 1 RB, 1 TE, 3 WR

Trips

49 Plays · 1 RB, 0 TE, 4 WR

Trips HB Wk

61 Plays · 1 RB, 0 TE, 4 WR

Trips Slots Close

27 Plays · 1 RB, 0 TE, 4 WR

Trips TE

65 Plays · 1 RB, 1 TE, 3 WR

Trips TE Flex

25 Plays · 1 RB, 1 TE, 3 WR

Trips TE Flex Close WK

30 Plays · 1 RB, 1 TE, 3 WR

Trips TE Offset

24 Plays · 1 RB, 1 TE, 3 WR

Trips TE Offset Wk

25 Plays · 1 RB, 1 TE, 3 WR

Trips X Nasty

23 Plays · 1 RB, 1 TE, 3 WR

Trips X Nasty Offset WK

12 Plays · 1 RB, 1 TE, 3 WR

Trips X Nasty Off Wk

12 Plays · 1 RB, 1 TE, 3 WR

Trips Y-Flex

22 Plays · 1 RB, 1 TE, 3 WR

Trips Y Iso

12 Plays · 1 RB, 1 TE, 3 WR

Trips Y Slot Str

6 Plays · 1 RB, 1 TE, 3 WR

U Off Stack

13 Plays · 1 RB, 2 TE, 2 WR

U Off Trips

30 Plays · 1 RB, 2 TE, 2 WR

U Off Trips Flex

15 Plays · 1 RB, 2 TE, 2 WR

U Off Trips Wk

23 Plays · 1 RB, 2 TE, 2 WR

Wide 5wr

24 Plays · Unknown

Wide Doubles Y Off WK

10 Plays · 1 RB, 1 TE, 3 WR

Wide Normal Y Off

6 Plays · 1 RB, 1 TE, 3 WR

Wide Slot Left

16 Plays · Unknown

Wide Slot Right WK

16 Plays · 1 RB, 1 TE, 3 WR

Wide Trips

15 Plays · 1 RB, 0 TE, 4 WR

Wide Trips HB WK

16 Plays · 1 RB, 0 TE, 4 WR

Wide Y Off Trips

11 Plays · 1 RB, 1 TE, 3 WR

Wide Y Trips WK

16 Plays · Unknown

Wing

15 Plays · 1 RB, 2 TE, 2 WR

Wing Close Offset

10 Plays · Unknown

Wing Flex Offset

27 Plays · 1 RB, 2 TE, 2 WR

Wing Flex Offset Wk

24 Plays · 1 RB, 2 TE, 2 WR

Wing HB Wk Close

9 Plays · 1 RB, 2 TE, 2 WR

Wing Pair

16 Plays · 1 RB, 3 TE, 1 WR

Wing Slot Offset

75 Plays · 1 RB, 2 TE, 2 WR

Wing Slot Offset WK

21 Plays · 1 RB, 2 TE, 2 WR

Wing Slot Wk

50 Plays · 1 RB, 2 TE, 2 WR

Wing Stack

21 Plays · 1 RB, 2 TE, 2 WR

Wing Stack Wk

26 Plays · 1 RB, 2 TE, 2 WR

Wing Tight

16 Plays · 1 RB, 3 TE, 1 WR

Wing Tight Flip

12 Plays · 1 RB, 3 TE, 1 WR

Wing Tight Nasty

6 Plays · 1 RB, 3 TE, 1 WR

Wing Tight Z

10 Plays · 1 RB, 3 TE, 1 WR

Wing Trio

18 Plays · 1 RB, 1 TE, 3 WR

Wing Trips WK

30 Plays · 1 RB, 1 TE, 3 WR

Wing Trips Wk Nasty

16 Plays · 1 RB, 1 TE, 3 WR

Wing Trips WK Nasty Mug

20 Plays · Unknown

Y Off Trio Close

35 Plays · 1 RB, 1 TE, 3 WR

Y Off Trio Close WK

21 Plays · 1 RB, 1 TE, 3 WR

Y Off Trio Wk

55 Plays · 1 RB, 1 TE, 3 WR

Y Off Trips

64 Plays · 1 RB, 1 TE, 3 WR

Y Off Trips Close

31 Plays · 1 RB, 1 TE, 3 WR

Y Off Trips Nasty

15 Plays · 1 RB, 1 TE, 3 WR

Y Off Trips Pats

32 Plays · Unknown

Y Off Trips Stack

3 Plays · Unknown

Y Off Trips Wk

68 Plays · 1 RB, 1 TE, 3 WR

Y Trio Offset Wk

23 Plays · 1 RB, 1 TE, 3 WR

Y Trips

4 Plays · 1 RB, 1 TE, 3 WR

Y Trips 1 Slot

1 Play · 1 RB, 1 TE, 3 WR

Y Trips Offset

25 Plays · 1 RB, 1 TE, 3 WR

Y Trips Offset Wk

15 Plays · 1 RB, 1 TE, 3 WR

Y Trips Wk

100 Plays · 1 RB, 1 TE, 3 WR