Playbooks

Go Go Twins Flex

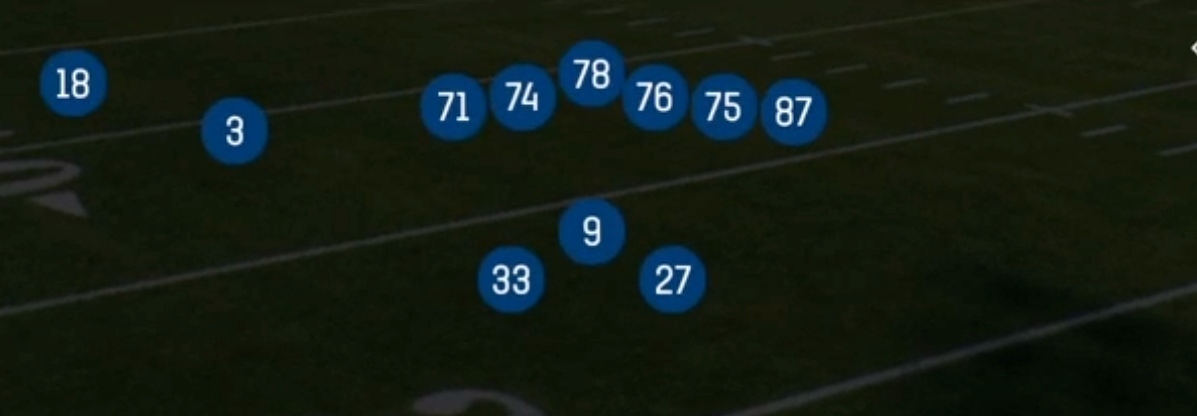
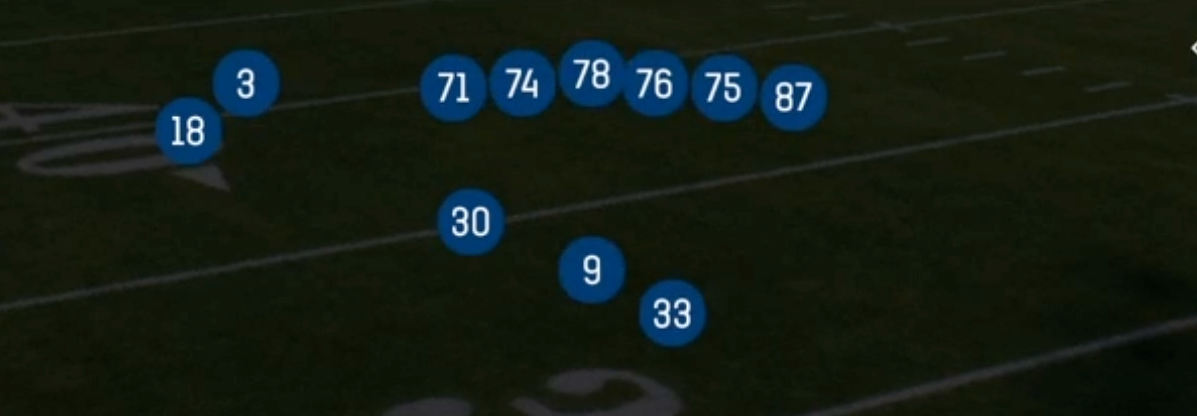
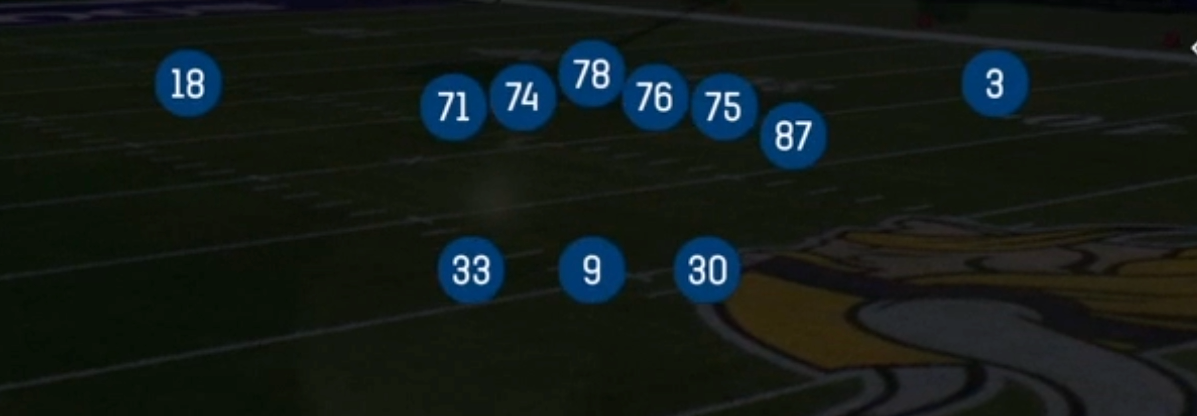
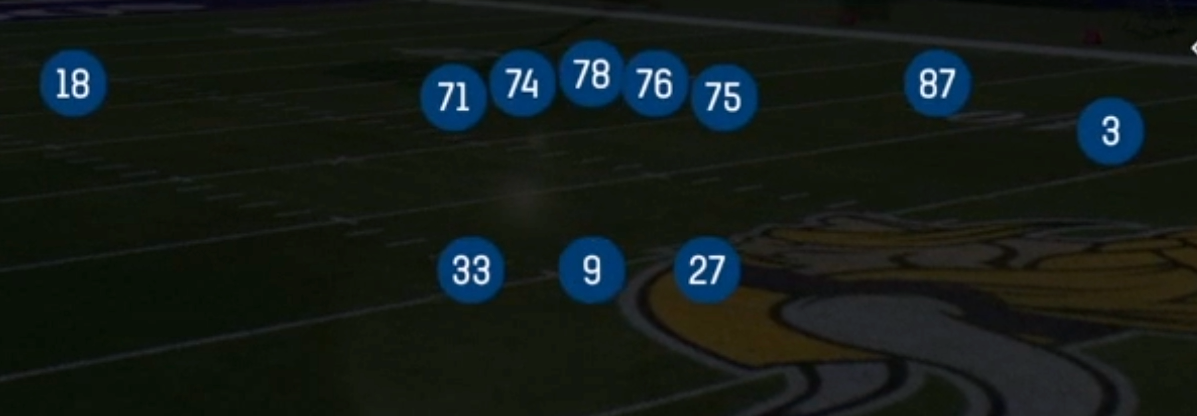
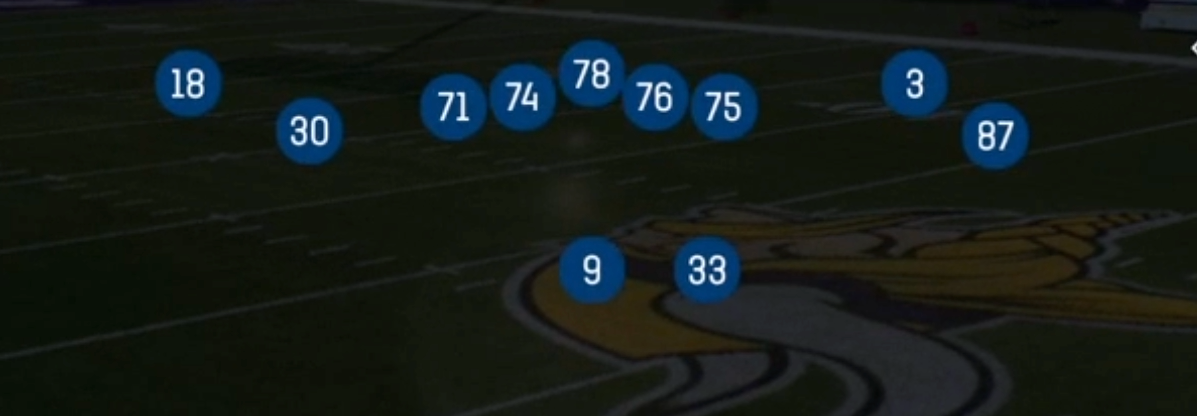
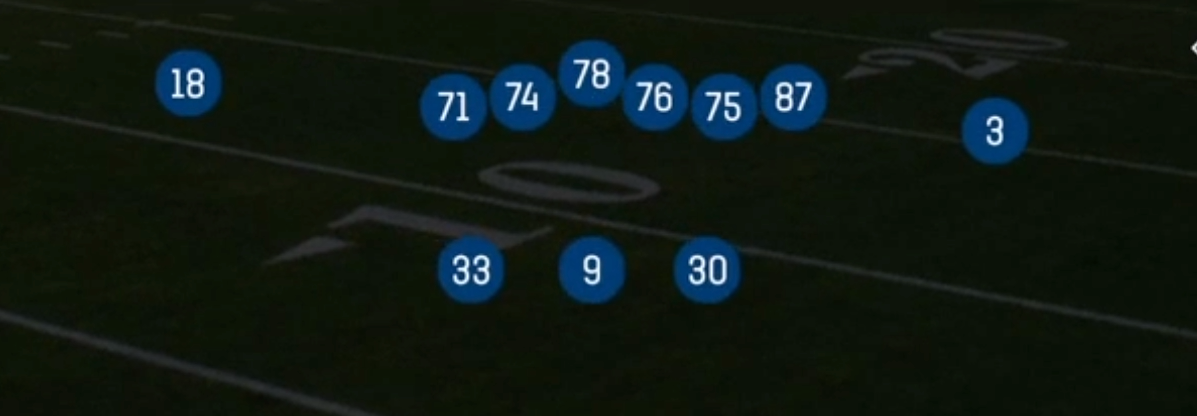
Set alignment for Go Go Twins Flex from Shotgun in Madden 27

At a Glance

FormationShotgun
Plays9

Not in any team playbook.

Overview

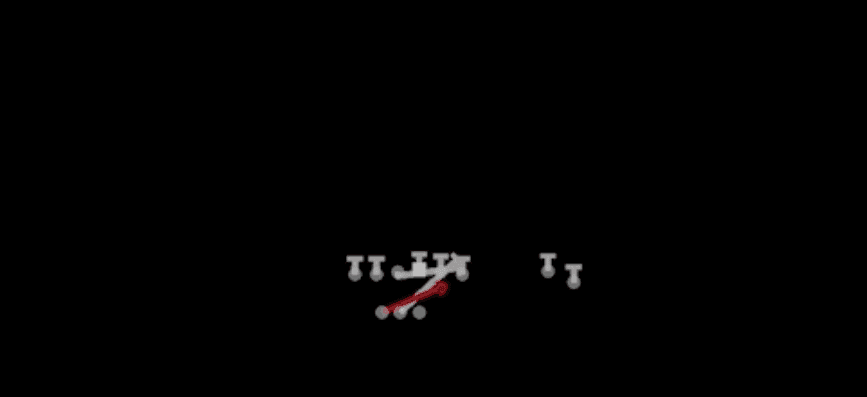
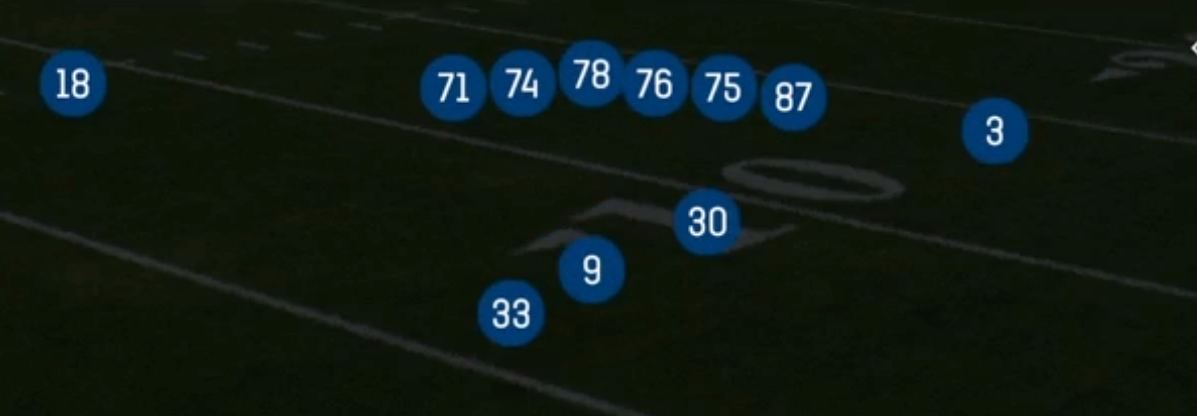
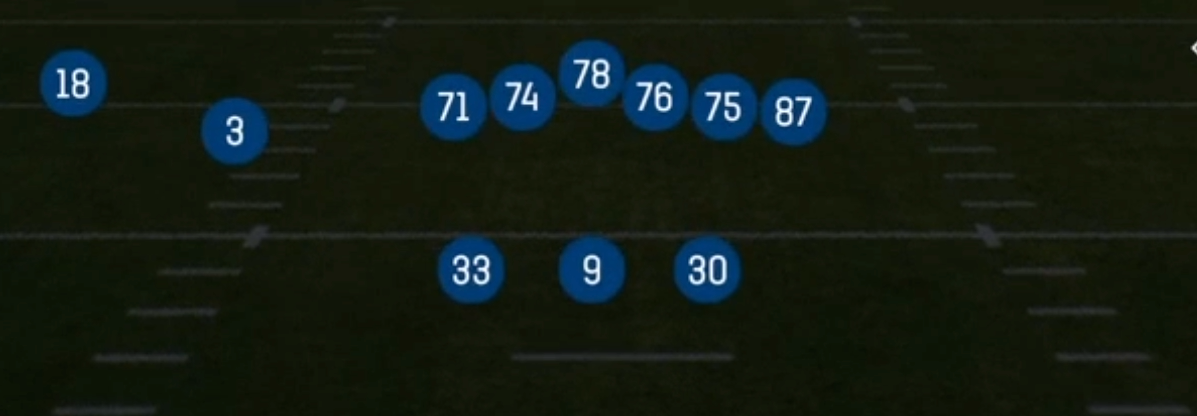
Go Go Twins Flex is a 21 personnel Shotgun set that keeps two backs on the field while still giving you a legitimate three-receiver picture. The quarterback sits in the gun with the halfback offset, the second back (usually a fullback or a receiving back listed at RB) flexed out wide, and twin receivers stacked to the other side with the tight end flexed off the line. That alignment is the whole point: defenses that check into base personnel to match 21 have to cover a flexed back with a linebacker or a slower safety, and you get to attack that matchup with a real route tree instead of a checkdown.

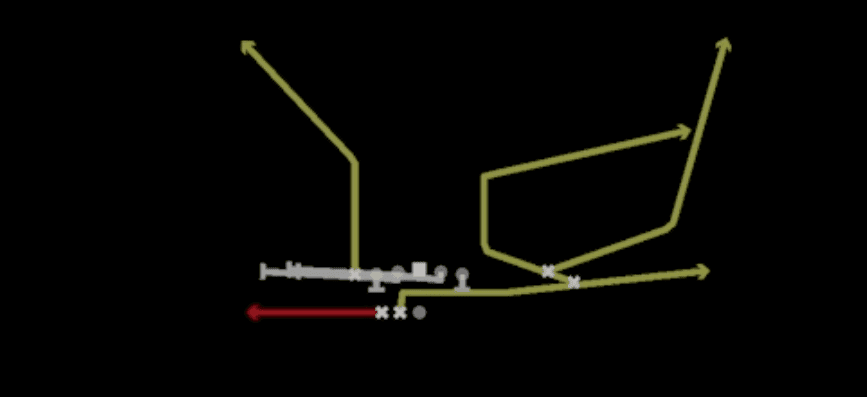
Where other Shotgun sets in the formation family lean on either pure spread splits or heavy inline blocking, Go Go Twins Flex lives in the middle. You keep the full complement of gap and zone run concepts (HB Counter, Inside Zone Split, HB Lead Draw, HB Base) because you have a second body to pull, kick out, or lead up through the hole, but the passing menu is built off high-level NFL spacing concepts: Mesh Traffic and Mesh Switch Rail for man coverage, Texas X-Choice for the middle of the field, PA Flood H-Corner for three-level flood work off play action, and HB Slip Screen to punish aggressive edge pressure.

The twins side gives you natural stack and switch releases that kill press man, and the flexed back on the other side is your isolation piece. If the defense leaves a linebacker across from him, motion him tighter or hot route him on an angle or a slot fade and win before the ball is even snapped. If they kick a corner over to him, you now have a light box against your gap run game with the tight end and second back both available as extra blockers. That two-way conflict is why this set is so hard to defend with a single personnel call.

Strengths

  • Mesh Traffic and Mesh Switch Rail are elite man beaters, with the crossers rubbing off each other and the rail route from the back running away from any linebacker matched in Cover 1 or Cover 0.
  • The flexed back creates an immediate personnel mismatch, since defenses that check base to match 21 have to put a linebacker or third safety in space against him.
  • PA Flood H-Corner gives you a true three-level flood against Cover 3 and Cover 2 with the corner route sitting over the flat defender and behind the deep third.
  • Texas X-Choice attacks the middle of the field on option routes, which is a clean answer against man-heavy users who like to shade coverage outside and rely on a user-controlled middle linebacker.
  • The run game is full featured for a gun set: HB Counter and Inside Zone Split give you gap and zone answers with an extra blocker, and HB Lead Draw punishes light boxes when the defense chases your twins side.

Weaknesses

  • Only three real route runners on most concepts means A gap and mug pressure can shrink your reads fast, especially if the second back is asked to block instead of release.
  • Mesh concepts take time to develop, so nano blitzes and free interior rushers get home before the crossers clear traffic.
  • A user-controlled defender parked over the middle can sit on Mesh and Texas X-Choice, since both concepts funnel receivers into the same interior window.
  • If your second back has poor route running and catching ratings, the flex matchup advantage disappears and the defense can safely ignore him with a zone drop.
  • HB Slip Screen is easily blown up by defenses that hold their edge or user the outside defender, and repeated screen calls tip the tendency quickly.

Usage Tips

Read the defender across from your flexed back pre-snap: linebacker means throw it his way, corner means run the ball into a light box with HB Counter or Inside Zone Split.

Use Mesh Switch Rail on third down when you see press man or a single high shell, and let the rail route clear before you climb the mesh.

Save PA Flood H-Corner for after you have established the run out of this set, since the play action pull holds linebackers just long enough for the corner route to break open behind the flat defender.

Hot route the flexed back on an angle or slot fade against Cover 0 and Cover 1 blitz looks, and block the halfback to buy the extra half second you need.

Motion the flexed back tighter to identify man versus zone, then check to HB Lead Draw or HB Base if the defense rotates a defender with him and leaves the box undermanned.

Keep HB Slip Screen in the back pocket for opponents who bring heavy outside pressure, and mix it in on second and medium rather than obvious passing downs.

Plays (9)

Plays in Go Go Twins Flex
PlayDiagramOpen
HB BaseDive, Run Play
HB CounterCounter, Run Play, Power Run
HB Lead DrawDraw, Run Play, Iso +1
HB Slip ScreenScreen Pass, Hb Screen, Pass Play
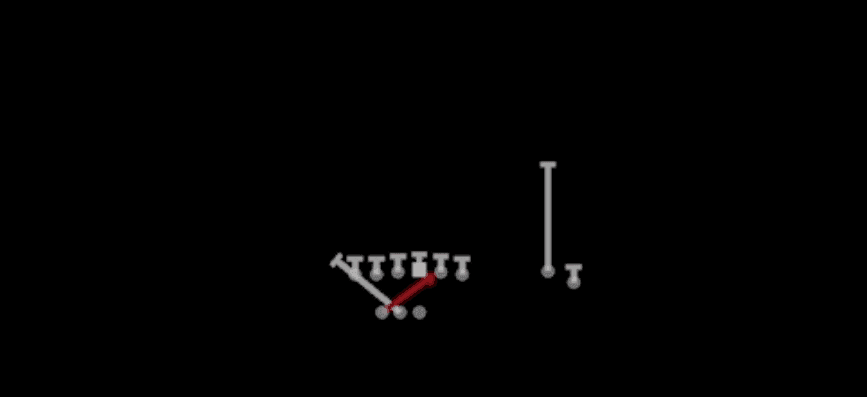
Inside Zone SplitInside Zone, Run Play, Zone Run
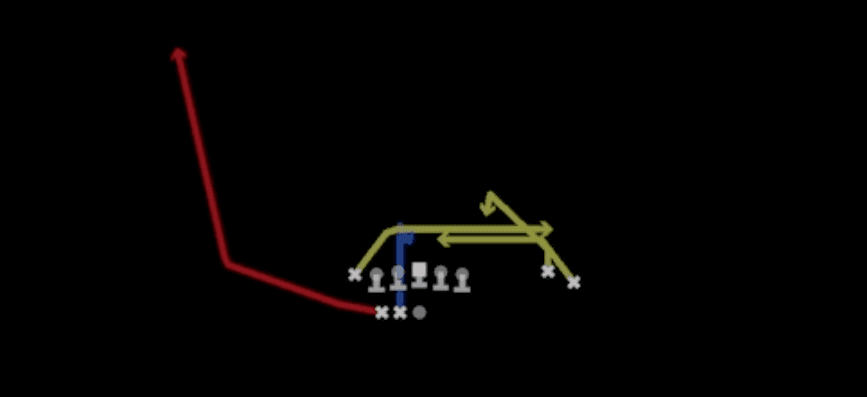
Mesh Switch RailMesh, Pass Play, Man Beater
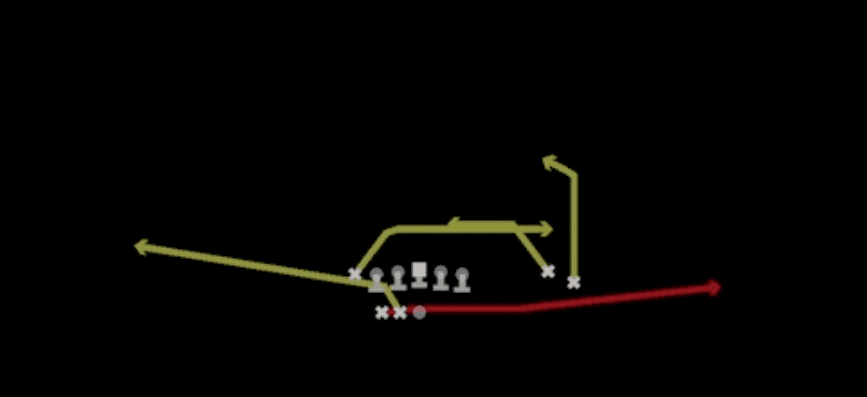
Mesh TrafficMesh, Pass Play, Man Beater
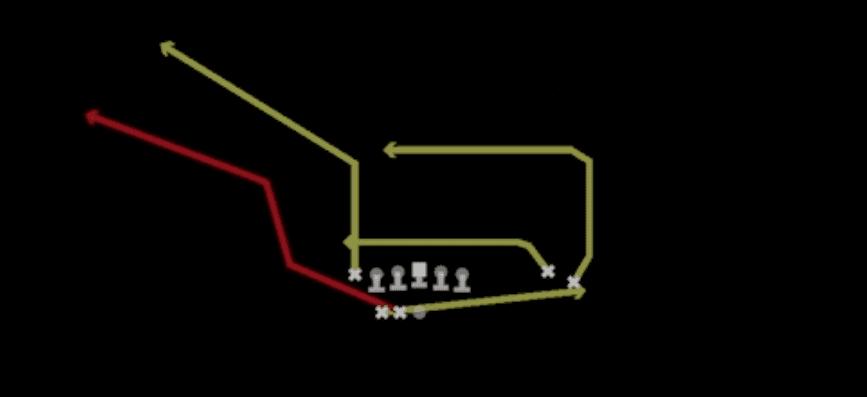
PA Flood H-CornerPlay Action, Corner, Flood +2
Texas X-ChoiceOption Route, Texas, Texas Concept +1
Other Sets in Shotgun

4wr Pack Trips

18 Plays · 1 RB, 0 TE, 4 WR

4WR Trips Strong

18 Plays · 1 RB, 0 TE, 4 WR

5WR Flex Trey

16 Plays · 0 RB, 1 TE, 4 WR

5WR Tight

12 Plays · 0 RB, 0 TE, 5 WR

5WR Trio

24 Plays · 1 RB, 1 TE, 3 WR

5WR Trips

18 Plays · 0 RB, 0 TE, 5 WR

Ace

28 Plays · 1 RB, 2 TE, 2 WR

Ace Offset

15 Plays · 1 RB, 2 TE, 2 WR

Ace Slot

16 Plays · 1 RB, 2 TE, 2 WR

Ace Slot Offset

19 Plays · 1 RB, 2 TE, 2 WR

Box

18 Plays · 1 RB, 0 TE, 4 WR

Box HB Strong

6 Plays · 1 RB, 1 TE, 3 WR

Box Offset Wk

19 Plays · 1 RB, 1 TE, 3 WR

Box Y Off

6 Plays · 1 RB, 1 TE, 3 WR

Bunch

53 Plays · 1 RB, 1 TE, 3 WR

Bunch HB Str

12 Plays · 1 RB, 1 TE, 3 WR

Bunch Offset

31 Plays · 1 RB, 1 TE, 3 WR

Bunch Offset Close

11 Plays · 1 RB, 1 TE, 3 WR

Bunch Open

9 Plays · 1 RB, 0 TE, 4 WR

Bunch Open Offset

18 Plays · 1 RB, 1 TE, 3 WR

Bunch Open TE

13 Plays · 1 RB, 1 TE, 3 WR

Bunch Quads

9 Plays · 1 RB, 1 TE, 3 WR

Bunch Quads Close

6 Plays · 1 RB, 1 TE, 3 WR

Bunch Spread

24 Plays · 1 RB, 1 TE, 3 WR

Bunch Spread Nasty

35 Plays · 1 RB, 1 TE, 3 WR

Bunch Str Nasty

33 Plays · 1 RB, 1 TE, 3 WR

Bunch Str Offset

45 Plays · 1 RB, 1 TE, 3 WR

Bunch TE

51 Plays · 1 RB, 1 TE, 3 WR

Bunch TE Str

13 Plays · 1 RB, 1 TE, 3 WR

Bunch TE Wk

18 Plays · 1 RB, 1 TE, 3 WR

Bunch Trio Open

12 Plays · 1 RB, 1 TE, 3 WR

Bunch Wide

26 Plays · 1 RB, 1 TE, 3 WR

Bunch Wide Nasty

23 Plays · 1 RB, 1 TE, 3 WR

Bunch X Nasty

61 Plays · 1 RB, 1 TE, 3 WR

Bunch Y-Flex

32 Plays · 1 RB, 1 TE, 3 WR

Bunch Y-Trips

15 Plays · 1 RB, 1 TE, 3 WR

Cluster

14 Plays · 1 RB, 1 TE, 3 WR

Cluster HB Str

18 Plays · 1 RB, 1 TE, 3 WR

Dbls Flex Y Off Close

21 Plays · 1 RB, 1 TE, 3 WR

Deebo Package

6 Plays · Unknown

Deuce

18 Plays · 1 RB, 2 TE, 2 WR

Deuce Close

47 Plays · 1 RB, 2 TE, 2 WR

Doubles

65 Plays · 1 RB, 1 TE, 3 WR

Doubles Flex

27 Plays · 1 RB, 1 TE, 3 WR

Doubles Flex WK Pats

13 Plays · Unknown

Doubles Flex Wk Swap

12 Plays · 1 RB, 1 TE, 3 WR

Doubles Flex Y Off Close

21 Plays · 1 RB, 1 TE, 3 WR

Doubles HB Wk

46 Plays · 1 RB, 1 TE, 3 WR

Doubles Hip

13 Plays · 1 RB, 1 TE, 3 WR

Doubles Off Close

10 Plays · 1 RB, 1 TE, 3 WR

Doubles Off Close Wk

13 Plays · 1 RB, 1 TE, 3 WR

Doubles Offset

43 Plays · 1 RB, 1 TE, 3 WR

Doubles Offset Wk

42 Plays · 1 RB, 1 TE, 3 WR

Double Stack

13 Plays · 1 RB, 1 TE, 3 WR

Doubles Y-Flex

28 Plays · 1 RB, 1 TE, 3 WR

Doubles Y-Flex Offset

15 Plays · 1 RB, 1 TE, 3 WR

Doubles Y Off

42 Plays · 1 RB, 1 TE, 3 WR

Doubles Y Off Nasty

20 Plays · 1 RB, 1 TE, 3 WR

Doubles Y Off WK

2 Plays · 1 RB, 1 TE, 3 WR

Doubles Z Close

14 Plays · 1 RB, 1 TE, 3 WR

Doubles Z Close Wk

17 Plays · 1 RB, 1 TE, 3 WR

Double Wing

9 Plays · 2 RB, 3 TE, 0 WR

Duo Slot Open

10 Plays · 2 RB, 0 TE, 3 WR

Duo Twins Flex

9 Plays · 2 RB, 1 TE, 2 WR

Empty Ace

12 Plays · 1 RB, 2 TE, 2 WR

Empty Base

33 Plays · 1 RB, 1 TE, 3 WR

Empty Base Flex

35 Plays · 1 RB, 1 TE, 3 WR

Empty Base Trio

17 Plays · 1 RB, 1 TE, 3 WR

Empty Bunch

9 Plays · 1 RB, 1 TE, 3 WR

Empty Bunch Open

17 Plays · 1 RB, 1 TE, 3 WR

Empty Bunch Tight

12 Plays · 1 RB, 1 TE, 3 WR

Empty Bunch Wide

13 Plays · 1 RB, 1 TE, 3 WR

Empty Bunch Y Flex

9 Plays · 1 RB, 1 TE, 3 WR

Empty Chips

9 Plays · 1 RB, 1 TE, 3 WR

Empty Chips Nasty

10 Plays · 1 RB, 1 TE, 3 WR

Empty Chips Quads

9 Plays · 1 RB, 1 TE, 3 WR

Empty Chips Tight

11 Plays · 1 RB, 1 TE, 3 WR

Empty HB Wide

13 Plays · 1 RB, 1 TE, 3 WR

Empty Quads

9 Plays · 0 RB, 1 TE, 4 WR

Empty Sketch Stack

10 Plays · 1 RB, 1 TE, 3 WR

Empty Steeler

12 Plays · 1 RB, 1 TE, 3 WR

Empty Strong Slots

9 Plays · 1 RB, 1 TE, 3 WR

Empty Trey

21 Plays · 1 RB, 1 TE, 3 WR

Empty Trey Flex

12 Plays · Unknown

Empty Trey Stack

15 Plays · 1 RB, 1 TE, 3 WR

Empty Triple Stack

3 Plays · 1 RB, 1 TE, 3 WR

Empty Trips Speed

15 Plays · 1 RB, 1 TE, 3 WR

Empty Y Slot

15 Plays · 1 RB, 1 TE, 3 WR

Flanker Close

14 Plays · 1 RB, 0 TE, 4 WR

Flex Y Off

20 Plays · 1 RB, 1 TE, 3 WR

Flex Y Off Close

16 Plays · 1 RB, 1 TE, 3 WR

Flex Y Off Wk

27 Plays · 1 RB, 1 TE, 3 WR

Gadget Backfield

6 Plays · 3 RB, 1 TE, 1 WR

Gadget Package

6 Plays · 3 RB, 1 TE, 1 WR

Heavy Panther

9 Plays · 2 RB, 3 TE, 0 WR

Monster

3 Plays · 1 RB, 1 TE, 3 WR

Normal Flex Snug

17 Plays · 1 RB, 1 TE, 3 WR

Normal Flex Wing

12 Plays · 1 RB, 1 TE, 3 WR

Normal Off Close Wk

21 Plays · 1 RB, 1 TE, 3 WR

Normal Y Off

50 Plays · 1 RB, 1 TE, 3 WR

Normal Y Off Close

49 Plays · 1 RB, 1 TE, 3 WR

Normal Y Off Wk

34 Plays · 1 RB, 1 TE, 3 WR

Open Flex

10 Plays · 1 RB, 1 TE, 3 WR

Slot Left

9 Plays · 1 RB, 1 TE, 3 WR

Slot Right

22 Plays · 1 RB, 1 TE, 3 WR

Slot WR Backfield

7 Plays · Unknown

Split Close

30 Plays · 2 RB, 0 TE, 3 WR

Split Close Pro

15 Plays · 2 RB, 1 TE, 2 WR

Split Cowboy

17 Plays · 1 RB, 1 TE, 3 WR

Split Flanker Close

9 Plays · 2 RB, 0 TE, 3 WR

Split Offset

34 Plays · 2 RB, 0 TE, 3 WR

Split Pro Offset Wk

6 Plays · 2 RB, 1 TE, 2 WR

Split Slot Offset

41 Plays · 2 RB, 0 TE, 3 WR

Split Slot Open

33 Plays · 2 RB, 0 TE, 3 WR

Split Twins

6 Plays · 2 RB, 1 TE, 2 WR

Split Twins Offset

13 Plays · 2 RB, 1 TE, 2 WR

Split Twins Stack

6 Plays · 2 RB, 1 TE, 2 WR

Split Wing Nasty

6 Plays · 2 RB, 2 TE, 1 WR

Split WR Backfield

9 Plays · 1 RB, 1 TE, 3 WR

Split Y-Flex

15 Plays · 2 RB, 1 TE, 2 WR

Split Y Off

19 Plays · 2 RB, 1 TE, 2 WR

Split Y Off Close

10 Plays · 1 RB, 1 TE, 3 WR

Spread

69 Plays · 1 RB, 0 TE, 4 WR

Spread 4wr

1 Play · 1 RB, 1 TE, 3 WR

Spread Dbl Flex

40 Plays · 1 RB, 1 TE, 3 WR

Spread Dbl Flex Wk

22 Plays · 1 RB, 1 TE, 3 WR

Spread Flex

15 Plays · 1 RB, 1 TE, 3 WR

Spread Slots Close

22 Plays · 1 RB, 0 TE, 4 WR

Spread Y-Flex

54 Plays · 1 RB, 1 TE, 3 WR

Spread Y-Flex Wk

40 Plays · 1 RB, 1 TE, 3 WR

Spread Y-Slot

61 Plays · 1 RB, 1 TE, 3 WR

Spread Y-Slot Wk

49 Plays · 1 RB, 1 TE, 3 WR

Stack HB WK

9 Plays · 1 RB, 1 TE, 3 WR

Stack Y-Flex

15 Plays · 1 RB, 1 TE, 3 WR

Stack Y Off

14 Plays · 1 RB, 1 TE, 3 WR

Tackle Over

9 Plays · 1 RB, 1 TE, 3 WR

Tackle Over Trips

10 Plays · 1 RB, 1 TE, 3 WR

Tight

31 Plays · 1 RB, 1 TE, 3 WR

Tight Base Flex

9 Plays · 2 RB, 1 TE, 2 WR

Tight Doubles

18 Plays · 1 RB, 1 TE, 3 WR

Tight Flex

25 Plays · 1 RB, 1 TE, 3 WR

Tight Flex Wk

18 Plays · 1 RB, 1 TE, 3 WR

Tight Offset TE

18 Plays · 1 RB, 1 TE, 3 WR

Tight Open

52 Plays · 1 RB, 1 TE, 3 WR

Tight Slot Flip

9 Plays · 1 RB, 1 TE, 3 WR

Tight Slot Open

10 Plays · 1 RB, 1 TE, 3 WR

Tight Slots

36 Plays · 1 RB, 1 TE, 3 WR

Tight Slots HB Wk

19 Plays · 1 RB, 1 TE, 3 WR

Tight Y Off

42 Plays · 1 RB, 1 TE, 3 WR

Tight Y Off Wk

47 Plays · 1 RB, 1 TE, 3 WR

Trey

12 Plays · 1 RB, 1 TE, 3 WR

Trey 4WR

21 Plays · 1 RB, 0 TE, 4 WR

Trey Offset

24 Plays · 1 RB, 1 TE, 3 WR

Trey Open

68 Plays · 1 RB, 1 TE, 3 WR

Trey Open HB Str

22 Plays · 1 RB, 1 TE, 3 WR

Trey Open Offset

37 Plays · 1 RB, 1 TE, 3 WR

Trey Y-Flex

38 Plays · 1 RB, 1 TE, 3 WR

Trey Y-Flex Str

21 Plays · 1 RB, 1 TE, 3 WR

Trey Y Iso

15 Plays · 1 RB, 1 TE, 3 WR

Trio

30 Plays · 1 RB, 1 TE, 3 WR

Trio HB Wk

30 Plays · 1 RB, 1 TE, 3 WR

Trio Offset

18 Plays · 1 RB, 1 TE, 3 WR

Trio Offset Wk

12 Plays · 1 RB, 1 TE, 3 WR

Trio Rt Open

1 Play · 1 RB, 1 TE, 3 WR

Trio Y-Flex

30 Plays · 1 RB, 1 TE, 3 WR

Trips

39 Plays · 1 RB, 0 TE, 4 WR

Trips HB Wk

53 Plays · 1 RB, 0 TE, 4 WR

Trips Slots Close

27 Plays · 1 RB, 0 TE, 4 WR

Trips TE

59 Plays · 1 RB, 1 TE, 3 WR

Trips TE Flex

23 Plays · 1 RB, 1 TE, 3 WR

Trips TE Offset

22 Plays · 1 RB, 1 TE, 3 WR

Trips TE Offset Wk

14 Plays · 1 RB, 1 TE, 3 WR

Trips X Nasty

22 Plays · 1 RB, 1 TE, 3 WR

Trips X Nasty Offset WK

12 Plays · 1 RB, 1 TE, 3 WR

Trips X Nasty Off Wk

12 Plays · 1 RB, 1 TE, 3 WR

Trips Y-Flex

21 Plays · 1 RB, 1 TE, 3 WR

Trips Y Slot Str

6 Plays · 1 RB, 1 TE, 3 WR

U Off Stack

13 Plays · 1 RB, 2 TE, 2 WR

U Off Trips

22 Plays · 1 RB, 2 TE, 2 WR

U Off Trips Flex

15 Plays · 1 RB, 2 TE, 2 WR

U Off Trips Wk

17 Plays · 1 RB, 2 TE, 2 WR

Wide 5wr

24 Plays · Unknown

Wide Slot Left

16 Plays · Unknown

Wide Slot Right WK

15 Plays · 1 RB, 1 TE, 3 WR

Wide Trips

15 Plays · 1 RB, 0 TE, 4 WR

Wide Y Trips WK

16 Plays · Unknown

Wing

15 Plays · 1 RB, 2 TE, 2 WR

Wing Flex Offset

22 Plays · 1 RB, 2 TE, 2 WR

Wing Flex Offset Wk

24 Plays · 1 RB, 2 TE, 2 WR

Wing HB Wk Close

9 Plays · 1 RB, 2 TE, 2 WR

Wing Pair

16 Plays · 1 RB, 3 TE, 1 WR

Wing Slot Offset

68 Plays · 1 RB, 2 TE, 2 WR

Wing Slot Wk

47 Plays · 1 RB, 2 TE, 2 WR

Wing Stack

21 Plays · 1 RB, 2 TE, 2 WR

Wing Stack Wk

13 Plays · 1 RB, 2 TE, 2 WR

Wing Tight

9 Plays · 1 RB, 3 TE, 1 WR

Wing Tight Flip

12 Plays · 1 RB, 3 TE, 1 WR

Wing Tight Nasty

6 Plays · 1 RB, 3 TE, 1 WR

Wing Tight Z

10 Plays · 1 RB, 3 TE, 1 WR

Wing Trio

15 Plays · 1 RB, 1 TE, 3 WR

Wing Trips Wk Nasty

15 Plays · 1 RB, 1 TE, 3 WR

Y Off Trio Close

25 Plays · 1 RB, 1 TE, 3 WR

Y Off Trio Wk

55 Plays · 1 RB, 1 TE, 3 WR

Y Off Trips

54 Plays · 1 RB, 1 TE, 3 WR

Y Off Trips Close

31 Plays · 1 RB, 1 TE, 3 WR

Y Off Trips Nasty

15 Plays · 1 RB, 1 TE, 3 WR

Y Off Trips Pats

32 Plays · Unknown

Y Off Trips Stack

3 Plays · Unknown

Y Off Trips Wk

60 Plays · 1 RB, 1 TE, 3 WR

Y Trio Offset Wk

23 Plays · 1 RB, 1 TE, 3 WR

Y Trips 1 Slot

1 Play · 1 RB, 1 TE, 3 WR

Y Trips Offset

25 Plays · 1 RB, 1 TE, 3 WR

Y Trips Offset Wk

15 Plays · 1 RB, 1 TE, 3 WR

Y Trips Wk

92 Plays · 1 RB, 1 TE, 3 WR