Playbooks

At a Glance
In 13 playbooks
Overview
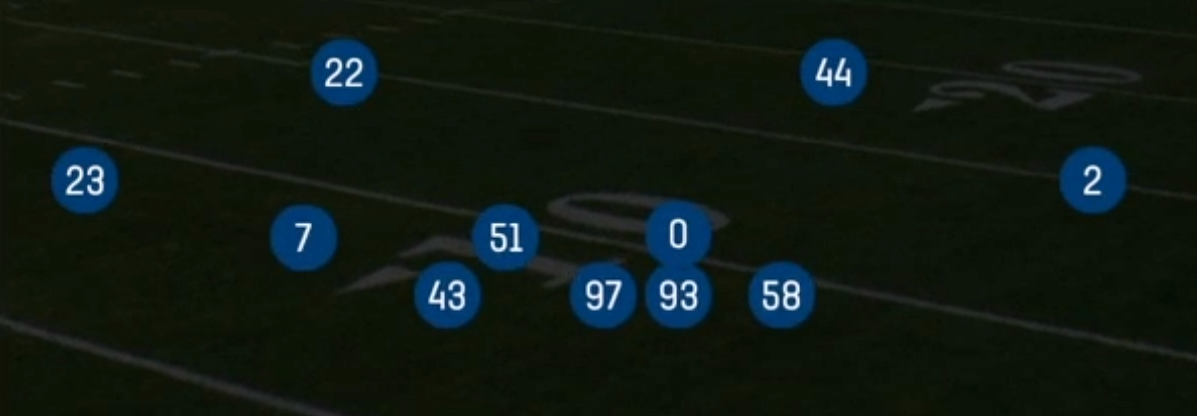
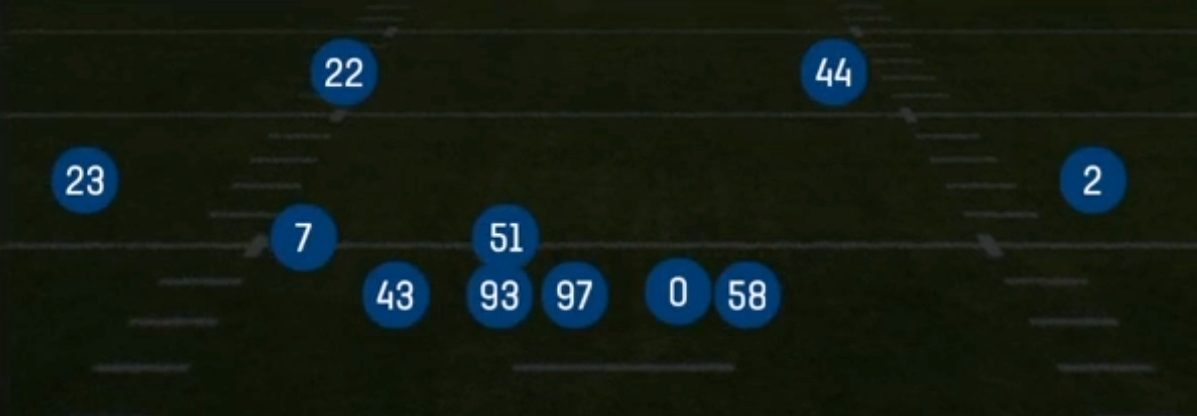
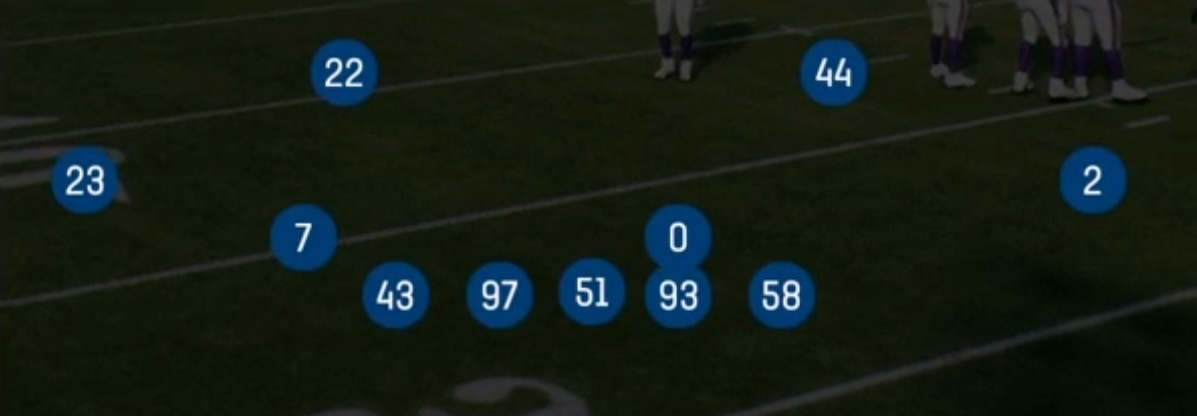
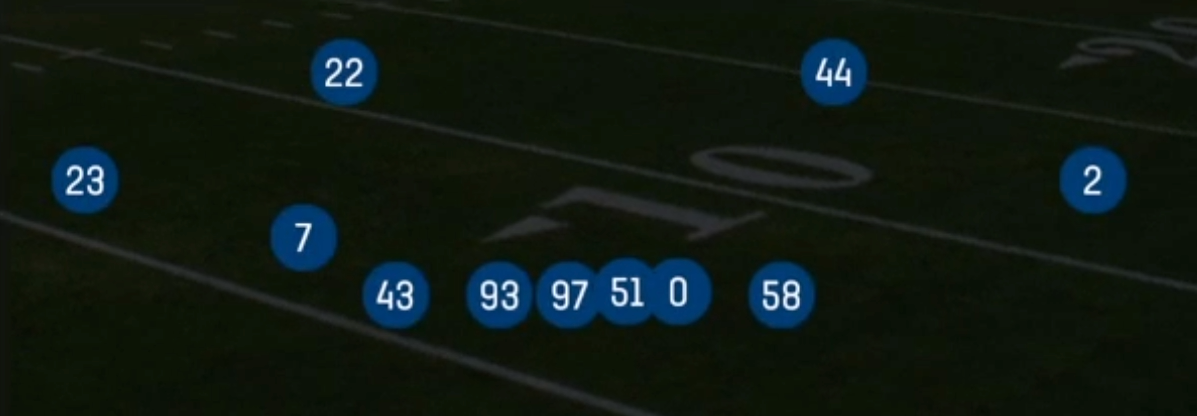
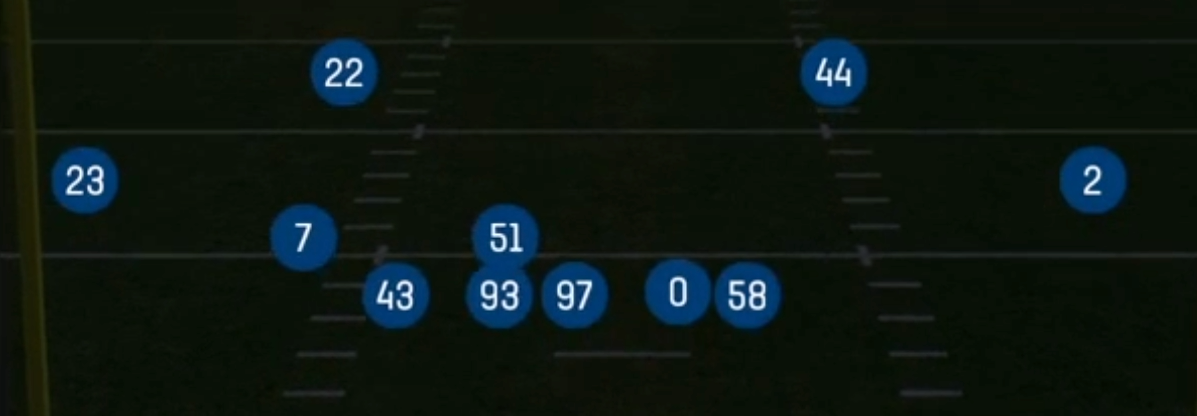
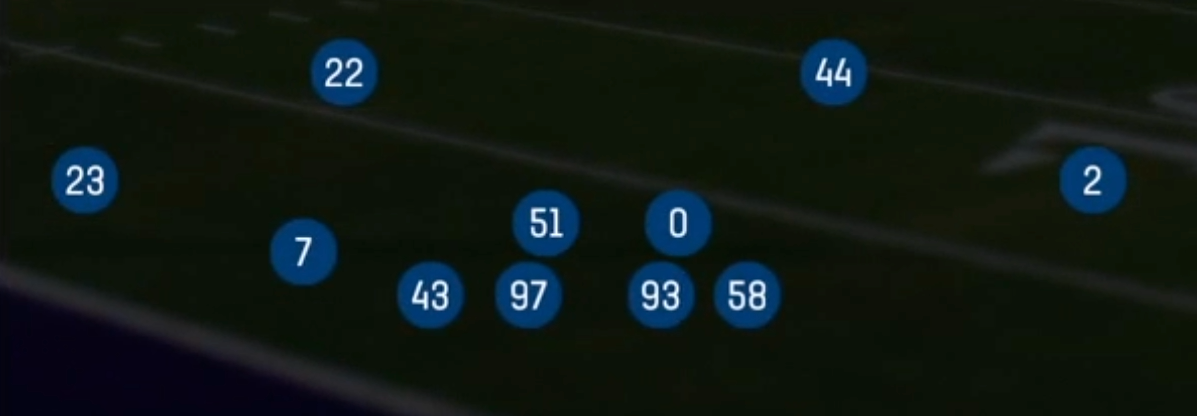
The Load Mug set is a pressure-look package within the Nickel formation. It keeps the Nickel 4-2-5 personnel on the field but walks the linebackers up into the A gaps before the snap. Standard Nickel sets stack the backers at normal depth. Load Mug instead puts heavy bodies inside and walks the SUBLB and base linebacker right over the center. The NT and RDT sit tight, and the RLE and RRE widen on the edges. That condensed front threatens six or seven rushers on every snap while the SLCB mirrors the slot and the safeties hold a two-high or rotated shell. The offense cannot tell pressure from drop until the ball is snapped.
The set's value comes from disguise. Nickel Blitz 0, LB Blitz 0, and Cover 1 LB Blitz all send the mugged backers through the A gaps. Cover 3 Match, Cover 6, Cover 3 Cloud, Cover 3 Sky, and Tampa 2 bail those same backers into hook and curl drops from an identical alignment. Offenses that slide protection toward the mug, keep the RB in to block, or check into quick game give up route volume and hand you free coverage defenders. LB De Twist 3 and Hot Blitz 3 add simulated pressure, and Nickel Blitz 1, 2, and 3 bring the SLCB off the slot to overload one side.
Against spread and 11 personnel offenses, Load Mug attacks the interior protection instead of the receivers. The mugged backers put the center and guards in conflict. Isolated slot receivers see either a SLCB pressing in Cover 2 Man or a rotating Cover 3 Match defender who carries the vertical seam. Against quick-game players who read pressure presnap and throw hot, the set forces them to guess. That is why it is a premier third down and red zone front.
Strengths
- The mugged A gap look creates a protection nightmare, because the center must declare a backer and the RB is often left alone against a free rusher on Nickel Blitz 0 and LB Blitz 0.
- Pressure and drop plays come from an identical presnap picture, so Cover 3 Match, Cover 6, and Tampa 2 bait quick hot routes like slants and drags into backers bailing into hook zones.
- Cover 3 Match and Cover 6 Willie handle four verticals and seam-heavy zone beaters well because the match rules carry the slot vertical while the flat and curl defenders stay square.
- Cover 1 LB Blitz and Cover 2 Man give you true man coverage behind interior pressure, which shortens the clock against man beaters like mesh, slant flat, and drive concepts.
- Nickel Blitz 1, 2, and 3 bring the SLCB off the edge to overload one side of the protection, which punishes offenses that slide protection toward the mugged linebackers.
Weaknesses
- Walking both linebackers up leaves the hook zones empty for a beat, so quick slants, sticks, and RB option routes can hit before the backers get depth on drop coverages.
- A 4-2-5 box with backers on the line is vulnerable to draws, inside zone, and counter against 12 or 21 personnel, especially when the backers are assigned to rush.
- RB screens and middle screens destroy the zero blitzes because the mugged backers run straight upfield past the back, leaving no one to fit the screen.
- Offenses that motion the slot or check into empty against the mug can create an unblocked hot throw away from the Nickel Blitz pressure side, leaving the SLCB late to recover.
- Skilled users read the mug presnap and hot route the RB to block, then throw into single-high man matchups on Cover 1 LB Blitz, attacking your weakest corner with a fade or corner route.
Usage Tips
Use Load Mug on 3rd and 4 to 8, when the offense must throw. Rotate Nickel Blitz 0 with Cover 3 Match so the quick-game player never gets a clean read.
User the mugged SUBLB or the middle backer on drop calls like Tampa 2 and Cover 6. Drift into the slant window instead of the deep middle to take away the first hot read.
If the offense keeps the RB in to block, switch from LB Blitz 0 to Cover 3 Cloud or Cover 3 Sky. You already have numbers in coverage and can take away the flats with rotated coverage.
Against heavy personnel or a run tendency, avoid the zero pressures and use LB De Twist 3 or Hot Blitz 3. Stunts keep the gaps sound and still stress the interior line.
Pair Cover 1 LB Blitz with a presnap press or shade adjustment on the best receiver. Show blitz on early downs, then drop the backers in the red zone, where compressed space makes hook zone drops extra effective.
Plays (15)
 Cover 1 LB BlitzCover 1, Blitz, LB Blitz +1
 Cover 2 ManCover 2 Man, Man To Man, Man Coverage
 Cover 3 CloudCover 3, Cover 3 Cloud, Zone Coverage
 Cover 3 MatchCover 3, Cover 3 Match, Zone Coverage
 Cover 3 SkyCover 3, Cover 3 Sky, Zone Coverage
 Cover 6Cover 6, Zone Coverage
 Cover 6 WillieCover 6, Zone Coverage
 Hot Blitz 3Cover 3, Blitz, Zone Coverage
 LB Blitz 0Cover 0, Blitz, LB Blitz +2
 LB De Twist 3Cover 3, Line Stunt, Zone Coverage
 Nickel Blitz 0Cover 0, Blitz, DB Blitz +2
 Nickel Blitz 1Cover 1, Blitz, DB Blitz +1
 Nickel Blitz 2Cover 2, Blitz, DB Blitz +1
 Nickel Blitz 3Cover 3, Blitz, DB Blitz +1
 Tampa 2Cover 2, Tampa 2, Zone Coverage