Playbooks

Quick Reference
In 18 playbooks
Breakdown
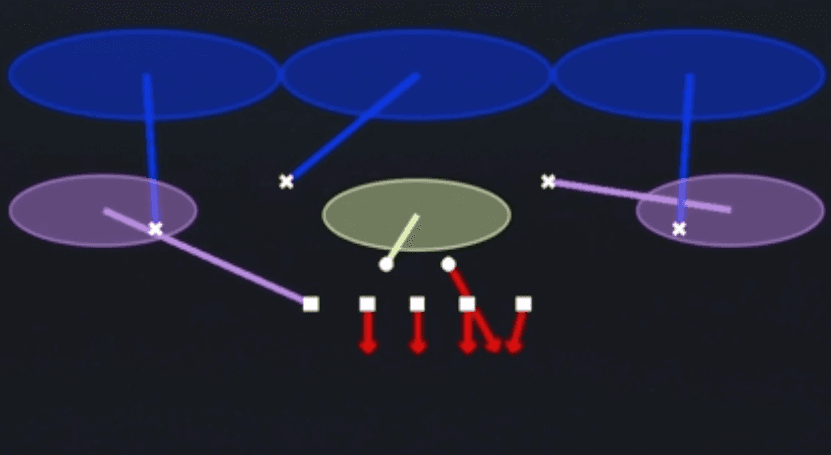
Saw Blitz 3 out of the 3-4 Tite Base 5-2 personnel brings a five man pressure package up front while dropping into a Cover 3 shell behind it. The diagram shows three deep zone defenders splitting the field into thirds, two underneath purple zones sitting at the flats or hook/curl areas, and a shallow green zone spying the middle of the field, with two crossing blitzer paths converging near the line of scrimmage to attack gaps. This is a zone blitz design, not a man beater, and the primary read is to identify which gap the blitz is coming from pre-snap, then trust the three deep defenders to cap anything vertical while the underneath zone and green spy account for check downs, drags, and hot routes.
Defensive Reads
Pre-snap, check safety depth and alignment: if both safeties are shaded to one side, the offense may be setting up a formation beater that overloads the Cover 3 deep third on that side. Watch cornerback positioning at the snap, since the deep thirds require them to stay disciplined and not bite on double moves or comeback routes designed to exploit zone leverage. Post-snap, key the green zone spy for any leaking running back or delayed release from the backfield, as this play is vulnerable to check down passes if the blitz does not get home fast enough. This play beats teams that rely on vertical shots and slow developing man beater concepts, but it can be exposed by quick game spacing concepts or screens that get the ball out before the five man rush arrives. Look for user-controlled receivers sitting down in the shallow crossing lanes between the underneath zones, as this is the classic soft spot Cover 3 zone blitzes give up against spacing or flood concepts.
Usage Tips
Use this call on early down and distance when you expect the offense to take a shot downfield, since the Cover 3 shell caps verticals while the extra rushers create pressure before protection can adjust.
Pre-snap, identify if the offense has a trips or bunch look to one side and consider sliding your zone drops or adjusting your blitz angle to match the strength of the formation.
Bait the quarterback by showing a simple pre-snap look, then let the blitzers work their converging paths through the interior gaps to collapse the pocket quickly.
Pair this with Saw Blitz 1 and Saw Blitz 2 in your play-calling sequence so opponents cannot key on the exact gap or rusher count, keeping the quarterback guessing on pressure source.
Against spread formations with quick game concepts, consider hot routing the green zone defender to widen his spy responsibility if you see stick or slant concepts attacking the middle immediately after the snap.
Other Plays in Tite
- Cov 3 Match BenchCover 3, Cover 3 Match, Zone Coverage
- Cov 3 Match FieldCover 3, Cover 3 Match, Zone Coverage
 Cover 1 HoleCover 1, Cover 1 Hole, Man Coverage
 Cover 3 MatchCover 3, Cover 3 Match, Zone Coverage
 Cover 3 SkyCover 3, Cover 3 Sky, Zone Coverage
 Cover 4 DropCover 4, Zone Coverage
 Cover 4 QuartersCover 4, Quarters, Zone Coverage
 Cover 6Cover 6, Zone Coverage
 Field Blitz 3Cover 3, Blitz, Zone Coverage
 Hot Blitz 3Cover 3, Blitz, Zone Coverage
 Saw Blitz 0Cover 0, Blitz, Man Coverage +1
 Saw Blitz 1Cover 1, Blitz, Man Coverage
 Saw Blitz 2Cover 2, Blitz, Zone Coverage
 SS 2 TrapCover 2, Trap Coverage, Zone Coverage
 Tampa 2Cover 2, Tampa 2, Zone Coverage
 Trio Sky ZoneZone, Zone Coverage