Playbooks

Bunch Trio Open

SpecialistsGadgetSLWR

Overview

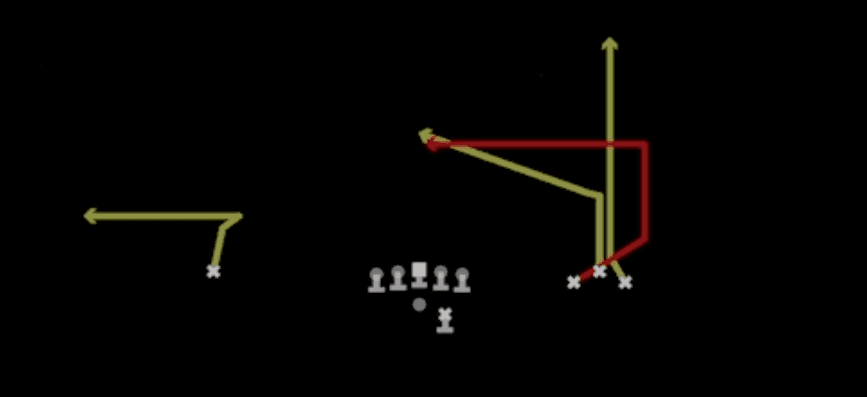
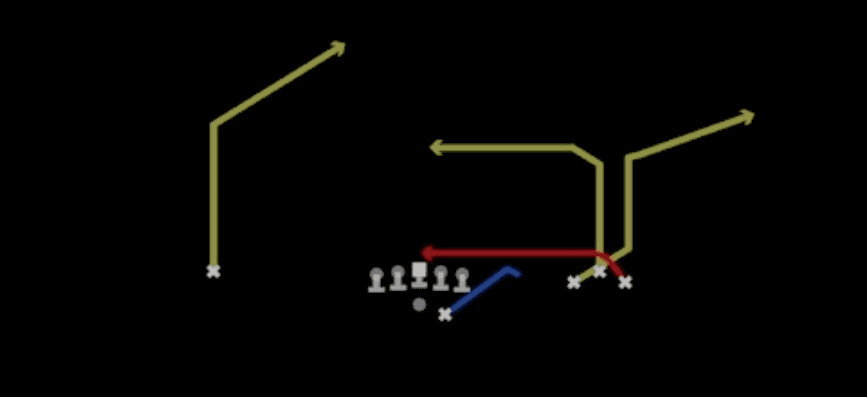
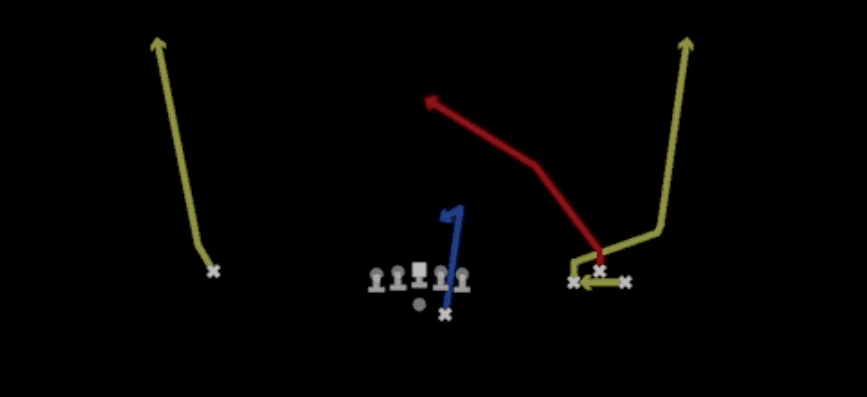
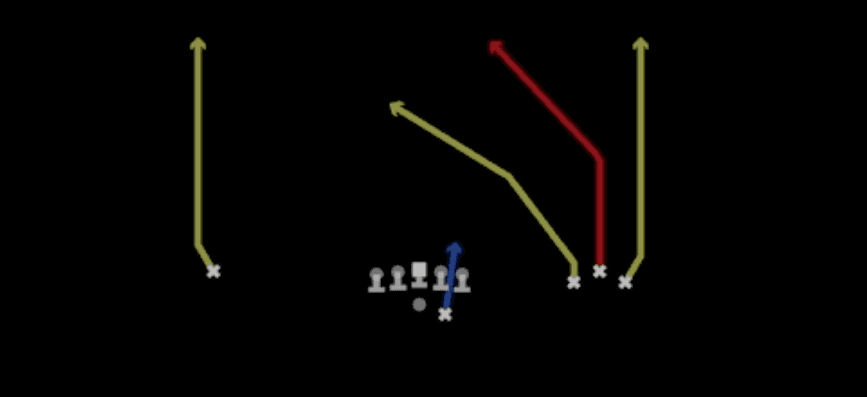
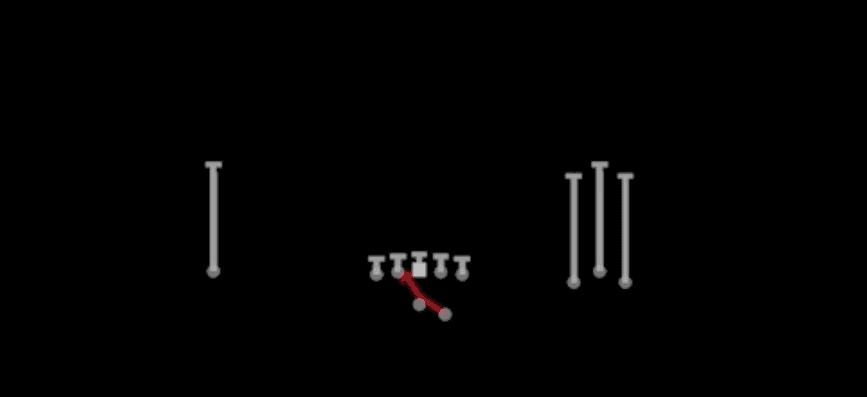
Bunch Trio Open takes the standard Shotgun trips look and compresses the three receiver side into a true bunch cluster while leaving the backside completely open, which is where the "Open" tag earns its name. You get 11 personnel (1 RB, 1 TE) with the tight end folded into the bunch alongside the slot and the outside receiver, and the running back offset in the backfield. The isolated backside receiver has the entire field width to himself, so pre-snap you are essentially reading two separate offenses at once: a rub concept factory on the bunch side and a one on one iso on the open side. Unlike wider trips sets in Shotgun, the tight bunch spacing forces defensive backs to declare their coverage responsibilities early because they cannot line up cleanly across from three stacked bodies.

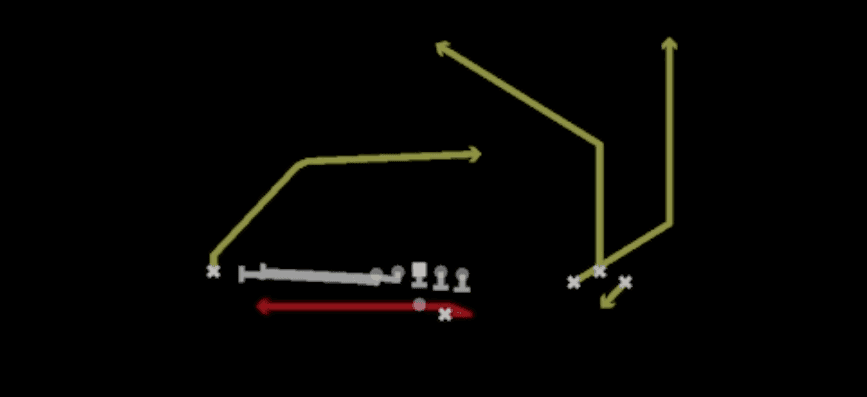
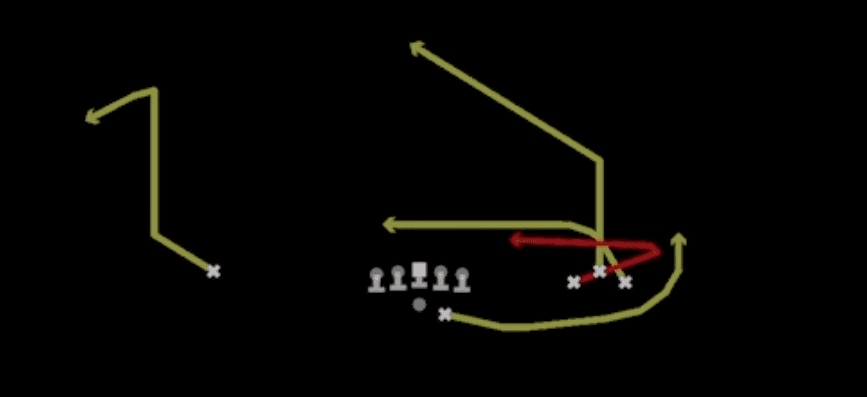
The bunch alignment is the reason this set punishes man coverage so hard. Any Cover 1 or Cover 0 look has to navigate traffic, and plays like Z Spot, Y Trail, and Dagger Swap X-Slant generate natural collisions without you needing to manually hot route anything. Defenders in Madden get caught on bunch releases constantly, which turns simple flat and slant routes into free separation. Against zone, the same cluster overloads whatever underneath defender is responsible for the flat, and Flood Swap gives you the classic three level stretch to the bunch side.

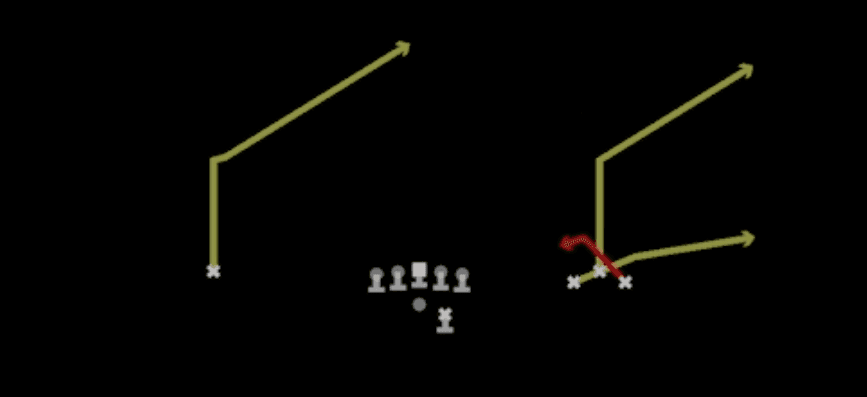
Where this set separates itself from the rest of the Shotgun tree is the gadget package layered on top. HB Cross Screen, PA Fake Screen Verts, Fake Screen Verticals, and RPO Alert WR Screen all sell the screen action before pushing routes vertically, which is a nightmare for users who like to jump underneath throws with a user-controlled defender. Add Inside Zone and PA Choice Vert Comebacks and you have a set that runs, screens, and throws deep out of the exact same alignment, so opponents get no personnel or formation tell before the snap.

Strengths

  • Bunch spacing creates automatic rub and traffic situations that destroy Cover 1, Cover 0, and any man press look without you needing a single hot route
  • The isolated backside receiver gives you a clean one on one every snap, so put your best route runner there and read his release for man or zone before deciding where to go with the ball
  • Flood Swap and Z Spot attack Cover 3 and Cover 4 with true three level flood and spot concepts to the overloaded side, forcing the flat defender into an impossible choice
  • The screen and fake screen family (HB Cross Screen, PA Fake Screen Verts, Fake Screen Verticals, RPO Alert WR Screen) baits user-controlled defenders into jumping underneath while verticals run behind them
  • Four Verticals out of a bunch alignment gets your seam runners past the linebacker level faster than wide splits because defenders have to fight through the cluster before they can carry anything

Weaknesses

  • The compressed bunch means less pass protection width and no motion man in the backfield beyond one back, so overload blitzes and nano pressure off the open side edge get home before deeper concepts develop
  • Cover 2 and any two high shell that brackets the isolated backside receiver takes away your primary iso read and forces you back into the congested bunch side where defenders are already stacked
  • Bunch releases in Madden occasionally stall your own receivers into each other, killing timing on quick concepts if the defense presses the cluster at the line
  • Heavy man press with a user defender jumping the first bunch release can blow up the entire rub concept and force a checkdown or a sack
  • Only Inside Zone as a true run option means the ground game is predictable and defenses can commit to blitzing on early downs without respecting the run

Usage Tips

Read the defender aligned over the isolated backside receiver first: if he is pressed and shaded inside with no help over the top, take the one on one and let your top receiver work

When you see man press across the board, go straight to Z Spot, Y Trail, or Dagger Swap X-Slant and let the bunch traffic do the work instead of hot routing anything

Against a single high shell with a lone flat defender, Flood Swap is your safest three level answer, and you can hot route the back to a flat or wheel to widen the read

Use RPO Alert WR Screen and the fake screen plays after you have shown the real screens a few times, because opponents who start jumping the flats leave the vertical shot wide open

Slide protection toward the open side or hot route the running back to block when you diagnose a blitz off the isolated edge, since that is the fastest path to your quarterback out of this alignment

Other Sets in Shotgun

4wr Pack Trips

18 Plays · 1 RB, 0 TE, 4 WR

4WR Trips Strong

18 Plays · 1 RB, 0 TE, 4 WR

5WR Flex Trey

16 Plays · 0 RB, 1 TE, 4 WR

5WR Tight

15 Plays · 0 RB, 0 TE, 5 WR

5WR Trio

31 Plays · 1 RB, 1 TE, 3 WR

5WR Trips

18 Plays · 0 RB, 0 TE, 5 WR

Ace

28 Plays · 1 RB, 2 TE, 2 WR

Ace Offset

17 Plays · 1 RB, 2 TE, 2 WR

Ace Slot

16 Plays · 1 RB, 2 TE, 2 WR

Ace Slot Offset

22 Plays · 1 RB, 2 TE, 2 WR

Box

18 Plays · 1 RB, 0 TE, 4 WR

Box HB Strong

6 Plays · 1 RB, 1 TE, 3 WR

Box Offset Wk

19 Plays · 1 RB, 1 TE, 3 WR

Box Y Off

12 Plays · 1 RB, 1 TE, 3 WR

Box Y Split

24 Plays · 1 RB, 1 TE, 3 WR

Bunch

54 Plays · 1 RB, 1 TE, 3 WR

Bunch HB Str

12 Plays · 1 RB, 1 TE, 3 WR

Bunch Offset

31 Plays · 1 RB, 1 TE, 3 WR

Bunch Offset Close

11 Plays · 1 RB, 1 TE, 3 WR

Bunch Open

9 Plays · 1 RB, 0 TE, 4 WR

Bunch Open Offset

19 Plays · 1 RB, 1 TE, 3 WR

Bunch Open TE

16 Plays · 1 RB, 1 TE, 3 WR

Bunch Quads

9 Plays · 1 RB, 1 TE, 3 WR

Bunch Quads Close

6 Plays · 1 RB, 1 TE, 3 WR

Bunch Quads Open

6 Plays · 1 RB, 1 TE, 3 WR

Bunch Spread

24 Plays · 1 RB, 1 TE, 3 WR

Bunch Spread Nasty

38 Plays · 1 RB, 1 TE, 3 WR

Bunch Str Nasty

33 Plays · 1 RB, 1 TE, 3 WR

Bunch Str Offset

46 Plays · 1 RB, 1 TE, 3 WR

Bunch TE

57 Plays · 1 RB, 1 TE, 3 WR

Bunch TE Str

13 Plays · 1 RB, 1 TE, 3 WR

Bunch TE Wk

18 Plays · 1 RB, 1 TE, 3 WR

Bunch Wide

29 Plays · 1 RB, 1 TE, 3 WR

Bunch Wide Nasty

23 Plays · 1 RB, 1 TE, 3 WR

Bunch X Nasty

61 Plays · 1 RB, 1 TE, 3 WR

Bunch Y-Flex

37 Plays · 1 RB, 1 TE, 3 WR

Bunch Y-Trips

15 Plays · 1 RB, 1 TE, 3 WR

Cluster

15 Plays · 1 RB, 1 TE, 3 WR

Cluster HB Str

18 Plays · 1 RB, 1 TE, 3 WR

Dbls Flex Y Off Close

24 Plays · 1 RB, 1 TE, 3 WR

Deebo Package

6 Plays · Unknown

Deuce

26 Plays · 1 RB, 2 TE, 2 WR

Deuce Close

53 Plays · 1 RB, 2 TE, 2 WR

Doubles

69 Plays · 1 RB, 1 TE, 3 WR

Doubles Flex

27 Plays · 1 RB, 1 TE, 3 WR

Doubles Flex WK Pats

13 Plays · Unknown

Doubles Flex Wk Swap

12 Plays · 1 RB, 1 TE, 3 WR

Doubles Flex Y Off Close

21 Plays · 1 RB, 1 TE, 3 WR

Doubles HB Wk

48 Plays · 1 RB, 1 TE, 3 WR

Doubles Hip

13 Plays · 1 RB, 1 TE, 3 WR

Doubles Off Close

10 Plays · 1 RB, 1 TE, 3 WR

Doubles Off Close Wk

22 Plays · 1 RB, 1 TE, 3 WR

Doubles Offset

44 Plays · 1 RB, 1 TE, 3 WR

Doubles Offset Wk

57 Plays · 1 RB, 1 TE, 3 WR

Doubles Stack Clamp

27 Plays · 1 RB, 1 TE, 3 WR

Double Stack

21 Plays · 1 RB, 1 TE, 3 WR

Doubles Y-Flex

29 Plays · 1 RB, 1 TE, 3 WR

Doubles Y-Flex Offset

15 Plays · 1 RB, 1 TE, 3 WR

Doubles Y Off

73 Plays · 1 RB, 1 TE, 3 WR

Doubles Y Off Nasty

21 Plays · 1 RB, 1 TE, 3 WR

Doubles Y Off WK

29 Plays · 1 RB, 1 TE, 3 WR

Doubles Z Close

14 Plays · 1 RB, 1 TE, 3 WR

Doubles Z Close Wk

20 Plays · 1 RB, 1 TE, 3 WR

Double Wing

9 Plays · 2 RB, 3 TE, 0 WR

Duo Offset

19 Plays · Unknown

Duo Slot Open

19 Plays · 2 RB, 0 TE, 3 WR

Duo Twins Flex

9 Plays · 2 RB, 1 TE, 2 WR

Empty Ace

15 Plays · 1 RB, 2 TE, 2 WR

Empty Base

35 Plays · 1 RB, 1 TE, 3 WR

Empty Base Flex

35 Plays · 1 RB, 1 TE, 3 WR

Empty Base Trio

21 Plays · 1 RB, 1 TE, 3 WR

Empty Bunch

9 Plays · 1 RB, 1 TE, 3 WR

Empty Bunch Open

17 Plays · 1 RB, 1 TE, 3 WR

Empty Bunch Tight

12 Plays · 1 RB, 1 TE, 3 WR

Empty Bunch Wide

16 Plays · 1 RB, 1 TE, 3 WR

Empty Bunch Y Flex

9 Plays · 1 RB, 1 TE, 3 WR

Empty Chips

9 Plays · 1 RB, 1 TE, 3 WR

Empty Chips Nasty

12 Plays · 1 RB, 1 TE, 3 WR

Empty Chips Quads

9 Plays · 1 RB, 1 TE, 3 WR

Empty Chips Tight

11 Plays · 1 RB, 1 TE, 3 WR

Empty HB Wide

13 Plays · 1 RB, 1 TE, 3 WR

Empty Quads

9 Plays · 0 RB, 1 TE, 4 WR

Empty Sketch Stack

10 Plays · 1 RB, 1 TE, 3 WR

Empty Steeler

12 Plays · 1 RB, 1 TE, 3 WR

Empty Strong Slots

9 Plays · 1 RB, 1 TE, 3 WR

Empty Trey

21 Plays · 1 RB, 1 TE, 3 WR

Empty Trey Flex

12 Plays · Unknown

Empty Trey Stack

15 Plays · 1 RB, 1 TE, 3 WR

Empty Triple Stack

3 Plays · 1 RB, 1 TE, 3 WR

Empty Trips Speed

15 Plays · 1 RB, 1 TE, 3 WR

Empty Y Slot

15 Plays · 1 RB, 1 TE, 3 WR

Flanker Close

17 Plays · 1 RB, 0 TE, 4 WR

Flanker Close WK

9 Plays · 1 RB, 1 TE, 3 WR

Flex Y Off

20 Plays · 1 RB, 1 TE, 3 WR

Flex Y Off Close

19 Plays · 1 RB, 1 TE, 3 WR

Flex Y Off Wk

30 Plays · 1 RB, 1 TE, 3 WR

Gadget Backfield

6 Plays · 3 RB, 1 TE, 1 WR

Gadget Package

6 Plays · 3 RB, 1 TE, 1 WR

Go Go Twins Flex

9 Plays · 2 RB, 1 TE, 2 WR

Heavy Panther

9 Plays · 2 RB, 3 TE, 0 WR

Monster

3 Plays · 1 RB, 1 TE, 3 WR

Normal Flex Snug

17 Plays · 1 RB, 1 TE, 3 WR

Normal Flex Wing

12 Plays · 1 RB, 1 TE, 3 WR

Normal Off Close Wk

24 Plays · 1 RB, 1 TE, 3 WR

Normal Wing Pats Close

7 Plays · Unknown

Normal Y Off

64 Plays · 1 RB, 1 TE, 3 WR

Normal Y Off Close

62 Plays · 1 RB, 1 TE, 3 WR

Normal Y Off Wk

40 Plays · 1 RB, 1 TE, 3 WR

Open Flex

10 Plays · 1 RB, 1 TE, 3 WR

Slot Left

9 Plays · 1 RB, 1 TE, 3 WR

Slot Right

23 Plays · 1 RB, 1 TE, 3 WR

Slot WR Backfield

7 Plays · Unknown

Split Close

30 Plays · 2 RB, 0 TE, 3 WR

Split Close Pro

15 Plays · 2 RB, 1 TE, 2 WR

Split Cowboy

17 Plays · 1 RB, 1 TE, 3 WR

Split Flanker Close

9 Plays · 2 RB, 0 TE, 3 WR

Split Offset

34 Plays · 2 RB, 0 TE, 3 WR

Split Pro Near

18 Plays · 2 RB, 1 TE, 2 WR

Split Pro Offset Wk

6 Plays · 2 RB, 1 TE, 2 WR

Split Slot Offset

47 Plays · 2 RB, 0 TE, 3 WR

Split Slot Open

50 Plays · 2 RB, 0 TE, 3 WR

Split Twins

6 Plays · 2 RB, 1 TE, 2 WR

Split Twins Offset

13 Plays · 2 RB, 1 TE, 2 WR

Split Twins Offset Close

15 Plays · 2 RB, 1 TE, 2 WR

Split Twins Stack

6 Plays · 2 RB, 1 TE, 2 WR

Split U Off Close

9 Plays · 2 RB, 2 TE, 1 WR

Split Wing Nasty

6 Plays · 2 RB, 2 TE, 1 WR

Split WR Backfield

9 Plays · 1 RB, 1 TE, 3 WR

Split Y-Flex

33 Plays · 2 RB, 1 TE, 2 WR

Split Y Off

23 Plays · 2 RB, 1 TE, 2 WR

Split Y Off Close

10 Plays · 1 RB, 1 TE, 3 WR

Spread

85 Plays · 1 RB, 0 TE, 4 WR

Spread 4wr

1 Play · 1 RB, 1 TE, 3 WR

Spread Dbl Flex

43 Plays · 1 RB, 1 TE, 3 WR

Spread Dbl Flex Wk

22 Plays · 1 RB, 1 TE, 3 WR

Spread Flex

29 Plays · 1 RB, 1 TE, 3 WR

Spread Slots Close

22 Plays · 1 RB, 0 TE, 4 WR

Spread Y-Flex

69 Plays · 1 RB, 1 TE, 3 WR

Spread Y-Flex Wk

50 Plays · 1 RB, 1 TE, 3 WR

Spread Y-Slot

93 Plays · 1 RB, 1 TE, 3 WR

Spread Y-Slot Wk

56 Plays · 1 RB, 1 TE, 3 WR

Stack HB WK

15 Plays · 1 RB, 1 TE, 3 WR

Stack Y-Flex

16 Plays · 1 RB, 1 TE, 3 WR

Stack Y Off

17 Plays · 1 RB, 1 TE, 3 WR

Tackle Over

9 Plays · 1 RB, 1 TE, 3 WR

Tackle Over Trips

10 Plays · 1 RB, 1 TE, 3 WR

Tight

34 Plays · 1 RB, 1 TE, 3 WR

Tight Base Flex

9 Plays · 2 RB, 1 TE, 2 WR

Tight Doubles

19 Plays · 1 RB, 1 TE, 3 WR

Tight Flex

25 Plays · 1 RB, 1 TE, 3 WR

Tight Flex Offset

15 Plays · 1 RB, 1 TE, 3 WR

Tight Flex Wk

24 Plays · 1 RB, 1 TE, 3 WR

Tight Offset TE

18 Plays · 1 RB, 1 TE, 3 WR

Tight Open

55 Plays · 1 RB, 1 TE, 3 WR

Tight Slot Flip

9 Plays · 1 RB, 1 TE, 3 WR

Tight Slot Open

10 Plays · 1 RB, 1 TE, 3 WR

Tight Slots

40 Plays · 1 RB, 1 TE, 3 WR

Tight Slots HB Wk

19 Plays · 1 RB, 1 TE, 3 WR

Tight Y Off

43 Plays · 1 RB, 1 TE, 3 WR

Tight Y Off Wk

54 Plays · 1 RB, 1 TE, 3 WR

Trey

12 Plays · 1 RB, 1 TE, 3 WR

Trey 4WR

21 Plays · 1 RB, 0 TE, 4 WR

Trey Offset

24 Plays · 1 RB, 1 TE, 3 WR

Trey Open

85 Plays · 1 RB, 1 TE, 3 WR

Trey Open HB Str

48 Plays · 1 RB, 1 TE, 3 WR

Trey Open Offset

42 Plays · 1 RB, 1 TE, 3 WR

Trey Y-Flex

47 Plays · 1 RB, 1 TE, 3 WR

Trey Y-Flex Str

22 Plays · 1 RB, 1 TE, 3 WR

Trey Y Iso

15 Plays · 1 RB, 1 TE, 3 WR

Trio

30 Plays · 1 RB, 1 TE, 3 WR

Trio 4wr Str

15 Plays · 1 RB, 0 TE, 4 WR

Trio HB Wk

30 Plays · 1 RB, 1 TE, 3 WR

Trio Offset

18 Plays · 1 RB, 1 TE, 3 WR

Trio Offset Wk

17 Plays · 1 RB, 1 TE, 3 WR

Trio Rt Open

1 Play · 1 RB, 1 TE, 3 WR

Trio Y-Flex

32 Plays · 1 RB, 1 TE, 3 WR

Trips

49 Plays · 1 RB, 0 TE, 4 WR

Trips HB Wk

61 Plays · 1 RB, 0 TE, 4 WR

Trips Slots Close

27 Plays · 1 RB, 0 TE, 4 WR

Trips TE

65 Plays · 1 RB, 1 TE, 3 WR

Trips TE Flex

25 Plays · 1 RB, 1 TE, 3 WR

Trips TE Flex Close WK

30 Plays · 1 RB, 1 TE, 3 WR

Trips TE Offset

24 Plays · 1 RB, 1 TE, 3 WR

Trips TE Offset Wk

25 Plays · 1 RB, 1 TE, 3 WR

Trips X Nasty

23 Plays · 1 RB, 1 TE, 3 WR

Trips X Nasty Offset WK

12 Plays · 1 RB, 1 TE, 3 WR

Trips X Nasty Off Wk

12 Plays · 1 RB, 1 TE, 3 WR

Trips Y-Flex

22 Plays · 1 RB, 1 TE, 3 WR

Trips Y Iso

12 Plays · 1 RB, 1 TE, 3 WR

Trips Y Slot Str

6 Plays · 1 RB, 1 TE, 3 WR

U Off Stack

13 Plays · 1 RB, 2 TE, 2 WR

U Off Trips

30 Plays · 1 RB, 2 TE, 2 WR

U Off Trips Flex

15 Plays · 1 RB, 2 TE, 2 WR

U Off Trips Wk

23 Plays · 1 RB, 2 TE, 2 WR

Wide 5wr

24 Plays · Unknown

Wide Doubles Y Off WK

10 Plays · 1 RB, 1 TE, 3 WR

Wide Normal Y Off

6 Plays · 1 RB, 1 TE, 3 WR

Wide Slot Left

16 Plays · Unknown

Wide Slot Right WK

16 Plays · 1 RB, 1 TE, 3 WR

Wide Trips

15 Plays · 1 RB, 0 TE, 4 WR

Wide Trips HB WK

16 Plays · 1 RB, 0 TE, 4 WR

Wide Y Off Trips

11 Plays · 1 RB, 1 TE, 3 WR

Wide Y Trips WK

16 Plays · Unknown

Wing

15 Plays · 1 RB, 2 TE, 2 WR

Wing Close Offset

10 Plays · Unknown

Wing Flex Offset

27 Plays · 1 RB, 2 TE, 2 WR

Wing Flex Offset Wk

24 Plays · 1 RB, 2 TE, 2 WR

Wing HB Wk Close

9 Plays · 1 RB, 2 TE, 2 WR

Wing Pair

16 Plays · 1 RB, 3 TE, 1 WR

Wing Slot Offset

75 Plays · 1 RB, 2 TE, 2 WR

Wing Slot Offset WK

21 Plays · 1 RB, 2 TE, 2 WR

Wing Slot Wk

50 Plays · 1 RB, 2 TE, 2 WR

Wing Stack

21 Plays · 1 RB, 2 TE, 2 WR

Wing Stack Wk

26 Plays · 1 RB, 2 TE, 2 WR

Wing Tight

16 Plays · 1 RB, 3 TE, 1 WR

Wing Tight Flip

12 Plays · 1 RB, 3 TE, 1 WR

Wing Tight Nasty

6 Plays · 1 RB, 3 TE, 1 WR

Wing Tight Z

10 Plays · 1 RB, 3 TE, 1 WR

Wing Trio

18 Plays · 1 RB, 1 TE, 3 WR

Wing Trips WK

30 Plays · 1 RB, 1 TE, 3 WR

Wing Trips Wk Nasty

16 Plays · 1 RB, 1 TE, 3 WR

Wing Trips WK Nasty Mug

20 Plays · Unknown

Y Off Trio Close

35 Plays · 1 RB, 1 TE, 3 WR

Y Off Trio Close WK

21 Plays · 1 RB, 1 TE, 3 WR

Y Off Trio Wk

55 Plays · 1 RB, 1 TE, 3 WR

Y Off Trips

64 Plays · 1 RB, 1 TE, 3 WR

Y Off Trips Close

31 Plays · 1 RB, 1 TE, 3 WR

Y Off Trips Nasty

15 Plays · 1 RB, 1 TE, 3 WR

Y Off Trips Pats

32 Plays · Unknown

Y Off Trips Stack

3 Plays · Unknown

Y Off Trips Wk

68 Plays · 1 RB, 1 TE, 3 WR

Y Trio Offset Wk

23 Plays · 1 RB, 1 TE, 3 WR

Y Trips

4 Plays · 1 RB, 1 TE, 3 WR

Y Trips 1 Slot

1 Play · 1 RB, 1 TE, 3 WR

Y Trips Offset

25 Plays · 1 RB, 1 TE, 3 WR

Y Trips Offset Wk

15 Plays · 1 RB, 1 TE, 3 WR

Y Trips Wk

100 Plays · 1 RB, 1 TE, 3 WR