Playbooks
Over Load

At a Glance
Overview
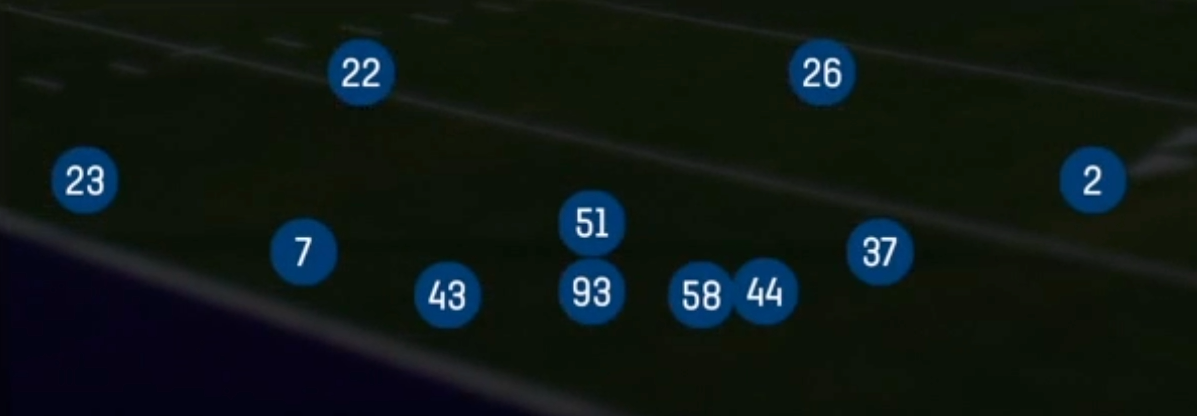
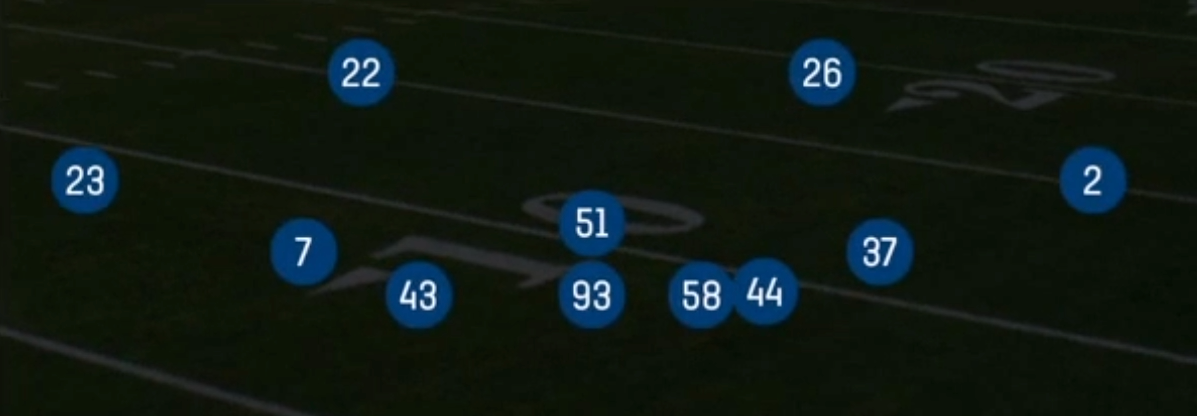
Over Load is a pressure-oriented set within the Quarter formation. It uses the Big Quarter 1-3-7 personnel package: one down lineman, three linebackers, and seven defensive backs. Standard Quarter looks are built for prevent and long-yardage coverage. Over Load stacks linebackers and nickel defenders to one side of the formation, so the offense sees an overloaded edge before the snap. That forces the quarterback and his protection to account for more potential rushers on one side than they can block, while the seven DB shell keeps enough speed on the field to match four and five wide sets.
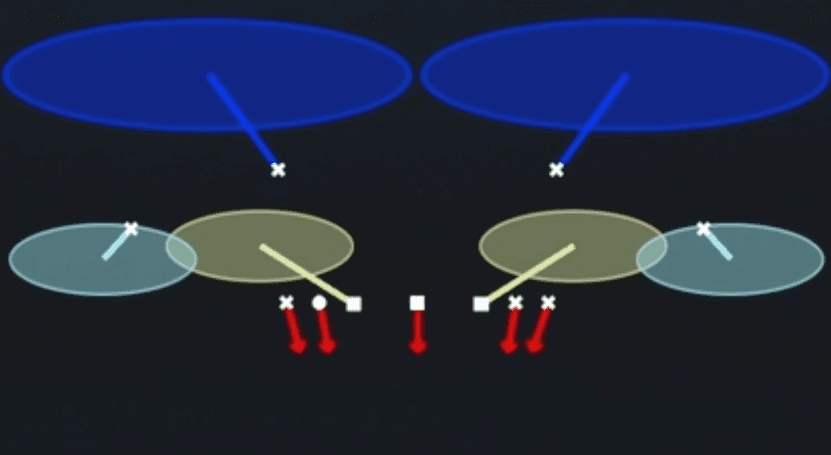
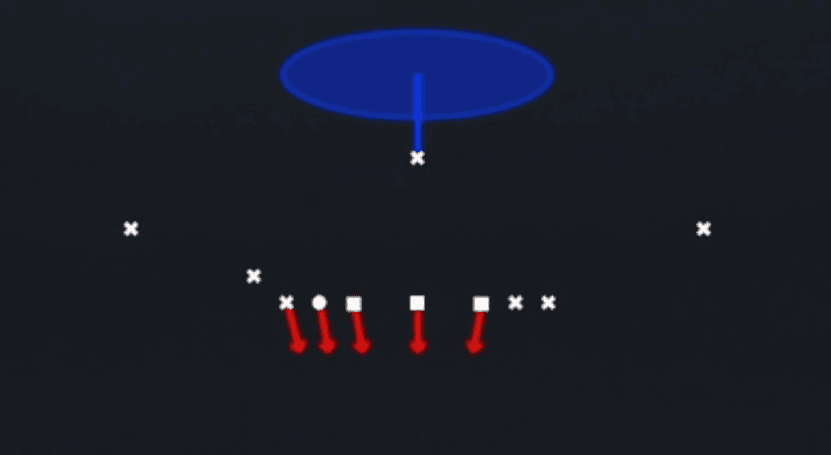
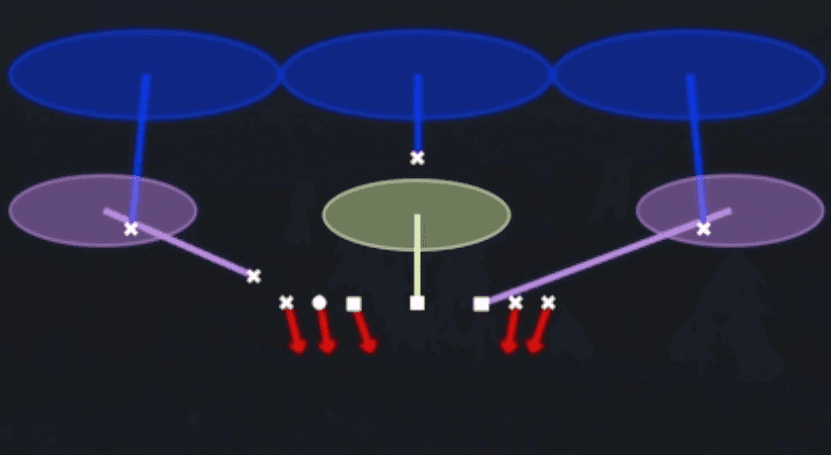
The menu splits evenly between disguised pressure and bail coverage from the same alignment. Cover 0 Blitz and DB Blitz 2 send the overload with defensive backs coming off the edge. Heavy 1 Rat and 3 Rat Zone keep a hole defender in the middle to rob crossers and drags. Heavy 2 Trap and Heavy 3 Zone let you show pressure and then drop into a sound shell that baits hot routes and sight adjustments. Every play starts from the same look, so the offense cannot read coverage from pre-snap alignment. It has to guess, and a wrong guess usually means a sack, a jumped quick throw, or a forced checkdown.
The matchup advantage comes from the personnel. With seven DBs on the field, the offense has no weak link to target in man coverage. Slot receivers and flexed tight ends draw defensive backs instead of linebackers. The overload side also funnels hot routes and quick slants into areas where a trap corner or rat defender is waiting, which punishes quarterbacks who throw off pre-snap reads instead of post-snap leverage.
Strengths
- Identical pre-snap alignment across Cover 0 Blitz, DB Blitz 2, Heavy 2 Trap, and Heavy 3 Zone makes it nearly impossible for the offense to diagnose pressure versus coverage before the snap
- Seven defensive backs eliminate linebacker-on-slot mismatches, so mesh, drive, and shallow cross man beaters lose their usual free target
- Heavy 1 Rat and 3 Rat Zone put a rat defender in the hole to jump drags, slants, and crossers, which shuts down the quick game offenses use to beat the overload
- Heavy 2 Trap punishes quick outs and flats thrown hot to the overload side, since the trap corner sits on the short route and breaks on the ball
- The overloaded edge creates a numbers advantage against six man protection, often producing a free rusher that forces early throws or sacks before deep route combos develop
Weaknesses
- Only one down lineman and a light front leave the defense exposed to inside zone, power, and counter runs, especially from heavy or 12 personnel sets
- Cover 0 Blitz has no deep safety help, so a quick fade, slot fade, or back shoulder throw against a slow corner can go for a touchdown if the pressure does not get home
- Offenses that slide protection toward the overload or keep a running back in to chip can neutralize the extra rusher and create one on one shots on the backside
- Quick screens, bubble RPOs, and running back swings to the weak side attack the vacated side of the overload before pressure arrives
- Smart quarterbacks who read post-snap leverage instead of hot routing off the pre-snap look will find soft spots in Heavy 3 Zone seams and the Heavy 2 Trap hole between the corner and safety
Usage Tips
Deploy Over Load on 3rd and medium to 3rd and long against spread and empty sets, where the light front is not a liability and the offense has to throw
Mix Cover 0 Blitz and DB Blitz 2 with Heavy 2 Trap from the same look to bait opponents who hot route slants or outs to beat the overload side
User the rat or hole defender in Heavy 1 Rat and 3 Rat Zone and sit on the middle to take away drags and mesh crossers, which are the first reads versus pressure
If the offense shows heavy personnel or a tight bunch with an extra blocker, audible out of Over Load into a formation with more down linemen to avoid getting gashed on the ground
Use pre-snap coverage adjustments like press on the overload side in Cover 0 to disrupt quick timing, and shade safeties away from the overload in Heavy 3 Zone to protect the backside seams